
This simple Opencart OCMod file will remove the index.php?route= in Opencart and shorten the URL of OpenCart for contact us page, common home, checkout, cart, voucher, account, log in, manufacturer, affiliate login, password forget URL, and others.
Once you download the above, you will get seo-url.ocmod_.zip extract it and rename it to seo-url.ocmod.zip, then go to admin >> Extensions >> Installer then upload the seo-url.ocmod.zip. Then download the following SEO-URL.sql
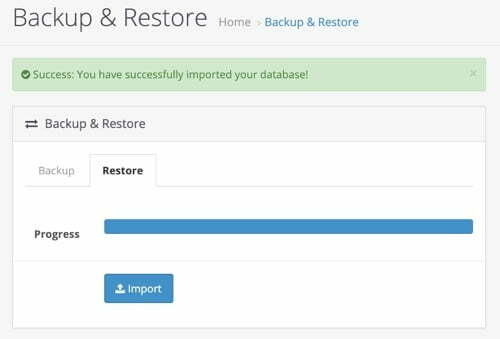
Once you download the above you will get seo-url-add.sql_.zip, extract it, you will get seo-url-add.sql. Then go to admin >> System >> Maintenance >> Backup & Restore, and click the Restore tab and click Import, and select seo-url-add.sql.
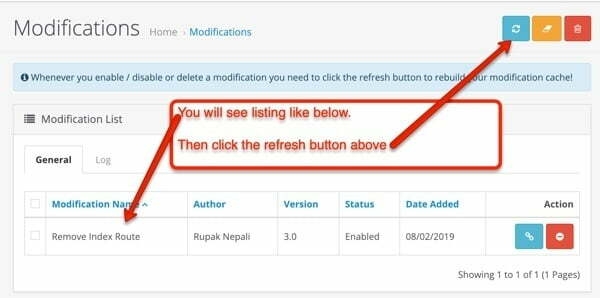
Once this is successful then go to admin >> Extensions >> Modifications >> then click refresh buttone
Then you are all set.
If you are still seeing issues then check if you complete all of the below:
- Don’t forget to refresh your modifications.
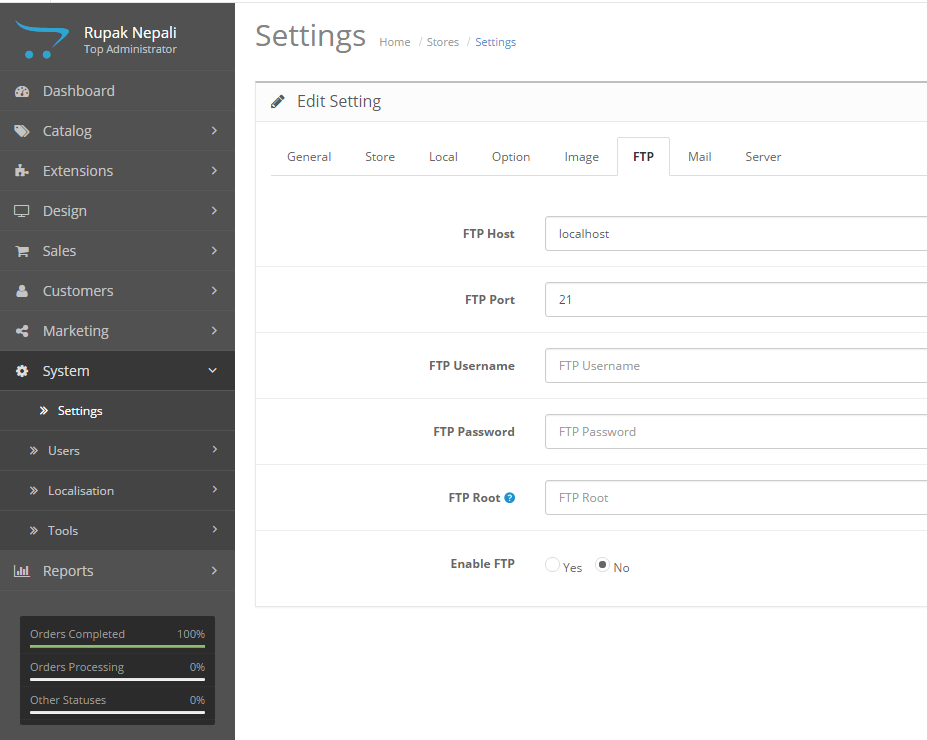
- Your SEO URL need to be active
- If you are running your store in sub-folder then don’t forget to add it in .htaccess.
Read more: 25 SEO best practices for Opencart 3 with 3 free SEO Opencart 3 module
For those who are developer:
The developer can do the following to make more changes as needed. Open catalog/controller/startup/seo_url.php and in the public function rewrite($link) method add below code after parse_str($url_info[‘query’], $data);
if ($data['route'] == 'common/home'){
$url .= '/';
}
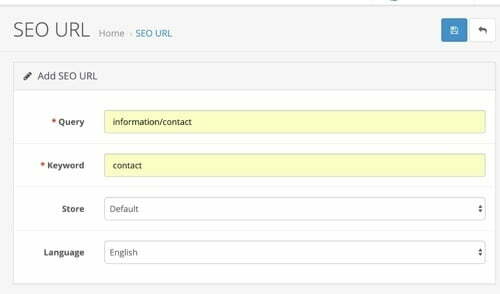
if ($data['route'] == 'information/contact'){
$url .= '/contact';
}
if ($data['route'] == 'account/return/add'){
$url .= '/returnadd';
}
if ($data['route'] == 'information/sitemap'){
$url .= '/sitemap';
}
if ($data['route'] == 'product/manufacturer'){
$url .= '/manufacturer';
}
if ($data['route'] == 'account/voucher'){
$url .= '/voucher';
}
if ($data['route'] == 'affiliate/login'){
$url .= '/affiliatelogin';
}
if ($data['route'] == 'product/special'){
$url .= '/special';
}
if ($data['route'] == 'account/login'){
$url .= '/login';
}
if ($data['route'] == 'checkout/cart'){
$url .= '/cart';
}Add as many URLs as you want in here and it’s rewrite URL. Then go to admin >> Design >> SEO URL and add them each except for the home page. Like for contact us page
So you need to insert for all, then you will see the changes or you can directly import the following
Or run the following SQL in your database
INSERT INTO `oc_seo_url` (`seo_url_id`, `store_id`, `language_id`, `query`, `keyword`) VALUES (NULL, '0', '1', 'checkout/cart', 'cart');
INSERT INTO `oc_seo_url` (`seo_url_id`, `store_id`, `language_id`, `query`, `keyword`) VALUES (NULL, '0', '1', 'account/login', 'login');
INSERT INTO `oc_seo_url` (`seo_url_id`, `store_id`, `language_id`, `query`, `keyword`) VALUES (NULL, '0', '1', 'affiliate/login', 'affiliatelogin');
INSERT INTO `oc_seo_url` (`seo_url_id`, `store_id`, `language_id`, `query`, `keyword`) VALUES (NULL, '0', '1', 'account/voucher', 'voucher');
INSERT INTO `oc_seo_url` (`seo_url_id`, `store_id`, `language_id`, `query`, `keyword`) VALUES (NULL, '0', '1', 'product/manufacturer', 'manufacturer');
INSERT INTO `oc_seo_url` (`seo_url_id`, `store_id`, `language_id`, `query`, `keyword`) VALUES (NULL, '0', '1', 'information/sitemap', 'sitemap');
INSERT INTO `oc_seo_url` (`seo_url_id`, `store_id`, `language_id`, `query`, `keyword`) VALUES (NULL, '0', '1', 'account/return/add', 'returnadd');
INSERT INTO `oc_seo_url` (`seo_url_id`, `store_id`, `language_id`, `query`, `keyword`) VALUES (NULL, '0', '1', 'information/contact', 'contact');
INSERT INTO `oc_seo_url` (`seo_url_id`, `store_id`, `language_id`, `query`, `keyword`) VALUES (NULL, '0', '1', 'checkout/checkout', 'checkout');
INSERT INTO `oc_seo_url` (`seo_url_id`, `store_id`, `language_id`, `query`, `keyword`) VALUES (NULL, '0', '1', 'product/special', 'special');
You can add other URLs as per your need. You can keep on customizing and let us know tips and tricks to improve it.
In this way, you can improve your URL and be SEO-friendly in Opencart. Let us know if need any support. Please subscribe to our YouTube Channel for Opencart video tutorials and get lots of other Opencart free modules. You can also find us on Twitter and Facebook.


