Top 10 Marketing Automation Tools for Ecommerce and How to Integrate Them

Discover the 10 best marketing automation platforms for ecommerce and learn practical integration patterns for OpenCart, Shopify, WooCommerce, and custom stacks.

Why Marketing Automation Matters for Ecommerce

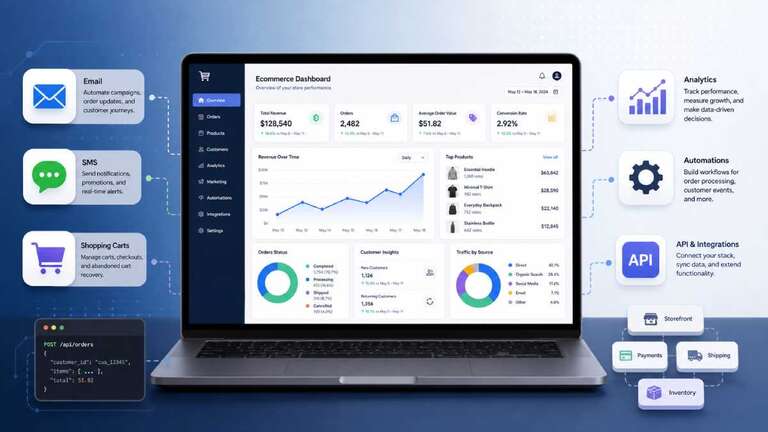
Manual campaigns don’t scale when you’re dealing with thousands of SKUs, fragmented customer journeys, and multi-channel traffic. Marketing automation platforms ingest behavioral, transactional, and customer data, then trigger personalized messaging across email, SMS, push, and ads to drive repeat purchases and lifetime value.

For ecommerce teams, the sweet spot is tools that understand carts, orders, and browsing events natively, integrate cleanly with your store and CRM, and expose APIs/webhooks so you can wire them into your custom stack (OpenCart, headless frontends, custom checkout flows, etc.).

How to Think About Integration (Architecture First)

Before you pick a tool, map where customer data lives and how events flow:

  • Data sources: ecommerce platform (OpenCart/Shopify/Woo), payment gateways, analytics, CDP, and support tools.
  • Events: viewed product, added to cart, started checkout, placed order, refunded order, email opened/clicked, SMS delivered, subscription cancelled.
  • Destinations: marketing automation platform, CRM, reporting warehouse, and any AI/agentic workflows that react to events.

Most platforms you’ll see support three common integration patterns below:

  1. Native ecommerce integrations – app/plugin that syncs customers, orders, and events automatically (Shopify, WooCommerce, BigCommerce, etc.).
  2. Tracking script + REST API – client-side tracking plus server-side calls from your store or backend (ideal for OpenCart and custom builds).
  3. Middleware (Zapier, Gumloop, etc.) – connectors and no-code flows to bridge unsupported systems and orchestrate automations.

Use native integrations where possible, then augment with API/webhooks for custom logic and data completeness.

1. Klaviyo – Ecommerce-Native Email & SMS Automation

Klaviyo is purpose-built for ecommerce and in-commerce brands, unifying customer, product, and order data to drive highly personalized email and SMS campaigns. It centralizes event streams (browsing, cart, orders, engagement) into rich profiles and segments, then powers automations like welcome flows, abandoned cart recovery, browse abandonment, post-purchase sequences, and win-back journeys.

Klaviyo offers native integrations with platforms like Shopify and WooCommerce, plus connectors for payment providers, CRMs, analytics tools, and AI assistants (ChatGPT, Claude, Klaviyo MCP) to build agentic workflows. With its tracking script, REST API, and webhooks, developers can push events from custom ecommerce stacks (including OpenCart) and stitch together full-funnel automations and reporting on revenue per message.

Integration Pattern

  • Install the Klaviyo tracking script on storefront pages to capture page views, signups, and basic engagement.
  • From your ecommerce backend (e.g., OpenCart), call Klaviyo’s REST API on key events—customer creation, order placement, refund, subscription changes—to keep profiles and revenue data in sync.
  • Use server-side triggers (events/hooks) to fire flows like order confirmation, replenishment reminders, and loyalty offers, then feed performance metrics back into your observability stack.

2. Omnisend – Omnichannel Ecommerce Messaging (Email, SMS, Push)

Omnisend is an all-in-one ecommerce marketing automation platform built specifically for online retailers, combining email marketing, SMS, web push notifications, and segmentation in a single UI. The platform focuses on lifecycle campaigns—welcome series, cart recovery, product recommendations—and claims strong ROI for ecommerce brands when both email and SMS are used in tandem.

There are deep native integrations for Shopify and other SaaS ecommerce platforms, along with apps and plugins for WooCommerce and other carts. For more customized environments, Omnisend exposes APIs and can be connected through middleware like WP Fusion, which bridges WordPress/WooCommerce sites with Omnisend in real time.

Integration Pattern

  • Use the Shopify/WooCommerce app or other native integration where available to sync products, customers, and orders with minimal setup.
  • In custom stacks (OpenCart, bespoke checkout), send transactional and behavioral events to Omnisend via their API, mapping fields like cart contents, order totals, discount codes, and tags.
  • For CMS-heavy sites (WordPress frontends, content hubs), consider using WP Fusion or similar middleware to stream user activity (signups, downloads, logins) into Omnisend segments and workflows.

3. ActiveCampaign – Versatile Automation + CRM

ActiveCampaign has evolved from email marketing software into a full sales and marketing automation platform with an integrated CRM. It supports complex workflows that mix email, SMS, and social actions, plus lead scoring, pipelines, and dynamic content, making it suitable for ecommerce brands that also run B2B or subscription-like sales motions.

For ecommerce, ActiveCampaign can be connected to stores and landing page tools to automate lifecycle campaigns and upsells, while its CRM add-on links marketing automation flows directly into sales processes. It integrates with many third-party platforms, and its API/webhook model allows deep customization and event-driven journeys.

Integration Pattern

  • Use available store connectors (Shopify, WooCommerce, etc.) or integrate forms/popups to capture leads and subscribers.
  • Stream ecommerce events (orders, cart updates, subscription changes) into ActiveCampaign using webhooks or direct API calls from your backend, tagging customers by lifecycle stage or product interest.
  • Link automation workflows to CRM pipelines, so key events (high-value orders, churn signals, VIP activity) create or update deals and tasks automatically for sales or support follow-up.

4. HubSpot Marketing Hub – Inbound + Automation for Growing Brands

HubSpot Marketing Hub combines marketing automation with a free CRM, providing a user-friendly visual workflow builder and strong inbound/content marketing features. Its modular design lets you connect the Marketing Hub directly to other “hubs” (Sales, Service), creating a single place to orchestrate campaigns and track the full customer journey.

HubSpot supports extensive ecommerce and SaaS integrations, with over 1,200 third-party app connectors that include stores, advertising platforms, and data tools. You can automate lead capture via forms and popups, then design multi-step workflows that send emails, update properties, and trigger CRM actions based on ecommerce behavior or segment rules.

Integration Pattern

  • Connect your ecommerce platform using a native app or connector where available, or sync data from your store/ERP via HubSpot’s APIs and contact/property model.
  • Instrument your site with HubSpot forms and tracking code to capture marketing leads and behavior, then enrich these contacts with transactional events from your store.
  • Drive automation from CRM properties—e.g., last order date, total revenue, product categories—so workflows can send targeted reactivation emails, cross-sell offers, and feedback requests automatically.

5. Mailchimp – Email-Centric Automation with Journeys

Mailchimp is still one of the most recognized email platforms, but it has evolved beyond newsletters into a broader marketing automation tool with customer journeys, retargeting ads, and simple predictive insights. For early-stage ecommerce brands, its low barrier to entry and large template library make it easy to ship campaigns fast while experimenting with automation.

Mailchimp integrates with major ecommerce platforms and supports automations like abandoned cart emails, product recommendations, and post-purchase follow-ups when store data is connected. As you scale, you can use its journeys builder to chain events, conditions, and multichannel actions (email, ads, postcards) based on customer behavior.

Integration Pattern

  • Enable the ecommerce integration for your platform (where supported) to sync products, customers, and orders into Mailchimp’s “Audience” and “Store” objects.
  • Configure automation journeys for core flows—welcome series, cart recovery, replenishment—using triggers like “added to cart but not ordered” or “ordered X days ago.”
  • If you run OpenCart or a custom stack, use Mailchimp’s ecommerce API or batch upload process to push order/customer data on a schedule, then rely on behavioral data from the tracking script for engagement triggers.

6. Drip – CRM-Style Automation for Ecommerce Stores

Drip blends ecommerce focus with CRM-style automation, helping stores create targeted flows based on product interaction, site behavior, and purchase history. It’s designed to track the customer lifecycle for online shops and offer clear tools for building loyalty and repeat purchases.

Drip integrates with popular ecommerce platforms and supports events like viewed product, cart updates, and order completed, which you can use to trigger personalized emails and workflows. Its segmentation and tagging model is friendly for developers who want to send structured events from custom code and then build campaigns on top of those events.

Integration Pattern

  • Use native connectors for your ecommerce platform where possible to get automatic event and order syncing into Drip.
  • For custom builds, instrument your store to send structured JSON events (product IDs, categories, cart contents, order totals, coupon codes) into Drip via its APIs.
  • Build automation workflows that listen to these events—e.g., “viewed high-value product but didn’t purchase,” “placed second order,” “approaching subscription renewal”—and fire appropriate lifecycle messaging.

7. GetResponse – End-to-End Funnels for Ecommerce SMEs

GetResponse is a marketing automation platform with CRM features, landing pages, email/SMS marketing, and funnel builders, with a specific tier for ecommerce. It’s positioned as a strong option for small and midsize ecommerce businesses that want one suite to run campaigns end-to-end: capture, nurture, convert, and retain.

At the ecommerce tier, you can connect your web store, automate email and SMS campaigns, integrate Facebook ads, and even build websites and webinars within the same system. This makes GetResponse attractive when you need automation plus basic site and funnel capabilities without assembling a huge toolchain.

Integration Pattern

  • Connect your store using the ecommerce tier’s built-in integration, which syncs products and orders into GetResponse for use in campaigns and automations.
  • Use automation workflows to combine email/SMS, ad audiences, and funnel steps (e.g., landing page visit → email sequence → retargeting ads → checkout) based on store events.
  • Where native integrations are missing, push transaction data through GetResponse’s API, and let the built-in CRM features track customer value and engagement for segmentation.

8. Brevo (formerly Sendinblue) – Pragmatic Multi-Channel Automation

Brevo bundles email, SMS, simple CRM, and transactional messaging with approachable marketing automation workflows. It’s known for cost-effective plans and straightforward interfaces, which suit growing lists and teams that want multi-channel messaging without a heavyweight martech stack.

Brevo’s automation features allow you to build workflows driven by email engagement, page visits, and customer attributes, plus send transactional messages (order confirmations, password resets) from the same platform. By combining automation and transactional messaging, ecommerce businesses can consolidate tooling and simplify configuration.

Integration Pattern

  • Use ecommerce plugins or API to connect your store to Brevo, syncing contacts and order data into its CRM-like contact store.
  • Route transactional emails/SMS (order confirmations, shipping updates) through Brevo to keep messaging and deliverability centralized.
  • Build automation scenarios that react to both transactional and marketing events (e.g., “after first order + high engagement → send loyalty invite,” “long inactivity + high LTV → win-back sequence”).

9. SALESmanago – Full-Featured Omnichannel + AI Sidekick

SALESmanago (stylized SALESmanago) is a full-featured marketing automation platform that mixes personalization, omnichannel messaging, and AI-driven recommendations. It’s built to unify marketing, sales, and service data into a single ecosystem, with a proprietary Growth Framework and embedded “AI Sidekick” to help marketers generate content, segments, and workflows quickly.

The platform focuses on advanced web personalization, unified customer profiles, and revenue-focused omnichannel campaigns (email, SMS, web overlays, and more). It’s best suited for teams that want a single partner platform to guide scaling, especially in mid-market or enterprise ecommerce.

Integration Pattern

  • Integrate your ecommerce platform and CRM into SALESmanago to create unified profiles that blend browsing, purchase, and support interactions.
  • Deploy web personalization scripts on your storefront to dynamically change content, offers, and popups based on profile data and AI Sidekick suggestions.
  • Use omnichannel workflows (email, SMS, web, ads) triggered by ecommerce events, with AI-assisted segmentation and content generation for rapid experimentation.

10. Customer.io – Behavior-Driven Journeys from Real User Actions

Customer.io is an email and automation platform built to trigger messages based on real user behavior in your app, making it ideal for product-led and SaaS-style businesses—including ecommerce apps and marketplaces. It helps you create personalized customer journeys across channels, with flows that react to specific in-app events rather than just list-based campaigns.

While not exclusively ecommerce, its event-driven model is powerful when you treat your store or app as a product and want granular logic (e.g., specific feature usage, subscription changes, add-on purchases). You can send emails, SMS, and other actions when people interact with your product in defined ways, using segment rules and workflows.

Integration Pattern

  • Instrument your app or store to send event data (signed up, activated feature, started checkout, completed purchase, churned, etc.) into Customer.io via its APIs.
  • Design journeys that trigger based on combinations of events and attributes, such as “signed up but no first purchase,” “high usage of feature X,” or “subscription downgraded,” and send targeted lifecycle messaging.
  • Use integrations with analytics and data tools (Segment, Zapier, project management tools) to keep behavioral data consistent across your stack and coordinate actions beyond messaging.

Tool Overview for Ecommerce Teams

ToolBest ForChannels (Core)Ecommerce-Focused Integration Highlights
KlaviyoB2C ecommerce brands needing deep revenue trackingEmail, SMS, RCS, WhatsApp, push350+ ecommerce integrations; rich APIs for custom stacks
OmnisendOnline retailers wanting omnichannel campaignsEmail, SMS, web pushShopify/Woo apps; ecommerce events, cart recovery built-in
ActiveCampaignMixed ecommerce/B2B with sales pipelinesEmail, SMS, socialStore connectors + CRM; event/webhook-driven flows
HubSpotGrowing brands needing marketing + CRMEmail, ads, website content1,200+ integrations; marketing hub linked to sales/service hubs
MailchimpEarly-stage brands focused on email-first journeysEmail, ads, postcardsEcommerce integrations for carts/orders; journey builder
DripEcommerce stores wanting CRM-style automationEmail primarilyProduct & behavior-based flows focused on online stores
GetResponseSMEs needing funnel builder + ecommerce automationEmail, SMS, landing pages, webinarsEcommerce tier with store integration and CRM features
BrevoCost-conscious teams needing multi-channel + transactionalEmail, SMS, transactional messagingStore integrations via plugins/API; unified messaging
SALESmanagoMid-market/enterprise with personalization at scaleEmail, SMS, web, AI SidekickUnified customer profile; omnichannel personalization
Customer.ioProduct-led / app-based commerce with event-driven flowsEmail, SMS (via integrations)Event-based journeys from real user behavior in app/store

Practical Integration Tips for OpenCart and Custom Ecommerce Stacks

For OpenCart and other non-“first-class citizen” platforms, assume you’ll be using a mix of native plugins (where available), tracking scripts, and APIs:

  • Leverage events/hooks: Use OpenCart’s event system (e.g., on order creation, status change, customer registration) to call the marketing tool’s API with structured payloads (customer, order, cart, coupons, tags).
  • Normalize identifiers: Keep a consistent customer ID/email across your store, marketing platform, CRM, and any AI/agentic flows so you can stitch profiles reliably.
  • Model events explicitly: Even if the tool supports generic “custom events,” define a clear schema for ecommerce actions (e.g., cart_abandoned, order_placed, subscription_renewed) and reuse it across integrations.
  • Use middleware where it reduces friction: Tools like Zapier and Gumloop can help connect your store, CRM, and marketing platform while experimenting with new flows or AI agents—without fully committing custom code upfront.

Finally, treat marketing automation as part of your observability and security posture: log all outbound events, monitor API failures, enforce rate limits, and ensure customer data flowing into these platforms respects your PCI-DSS, privacy, and CSP constraints.

Blocking Basic XSS Attacks at the Edge with Cloudflare Workers

Cross-Site Scripting (XSS) remains one of the most common web application vulnerabilities. Attackers often attempt to inject malicious JavaScript into URLs, forms, search boxes, or other user-supplied inputs. If these payloads are not properly handled by the application, they can lead to session theft, credential compromise, defacement, or other security issues.

While the best defense is always proper input validation and output encoding within your application, Cloudflare Workers provide an additional layer of protection by allowing you to inspect and block suspicious requests before they reach your origin server.

In this article, we’ll explore a simple Cloudflare Worker that detects common XSS patterns in URLs and blocks malicious requests at the edge.

Why Block XSS Requests at the Edge?

When an attacker sends a request such as:

https://example.com/search?q=<script>alert(1)</script>

or

https://example.com/page?name=javascript:alert(1)

your web server still has to process the request unless a security layer intercepts it first.

By using Cloudflare Workers, you can:

  • Stop malicious requests before they reach your application.
  • Reduce unnecessary server load.
  • Add an extra layer of protection without modifying application code.
  • Quickly deploy security rules across multiple websites.
  • Customize detection logic based on your environment.

Deploying the Worker

Log in to your Cloudflare dashboard.

Navigate to Build >> Compute >> Workers & Pages.

Cloudflare build worker

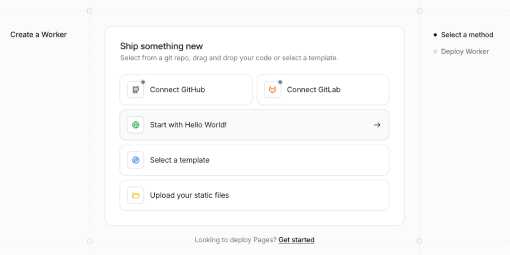
Create a new Worker by clicking “Create Application”. Then select “Start with Hello World”.

Cloudflare worker hello world

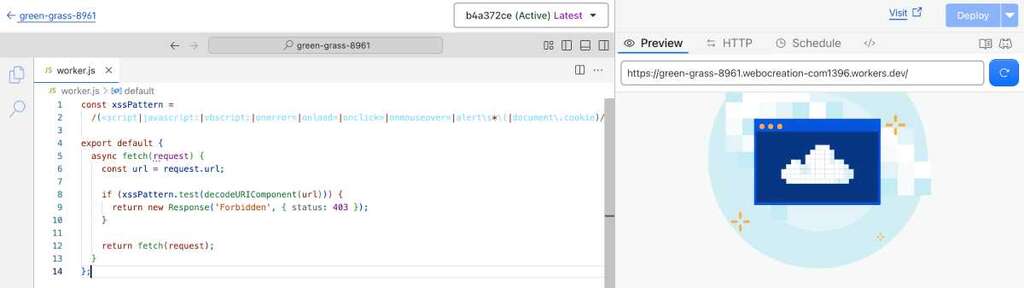
Replace the default code with the XSS detection Worker.

const xssPattern =
  /(<script|javascript:|vbscript:|onerror=|onload=|onclick=|onmouseover=|alert\s*\(|document\.cookie)/i;

export default {
  async fetch(request) {
    const url = request.url;

    if (xssPattern.test(decodeURIComponent(url))) {
      return new Response('Forbidden', { status: 403 });
    }

    return fetch(request);
  }
};
Cloudflare worker XSS code

Click “Deploy” to publish the Worker.

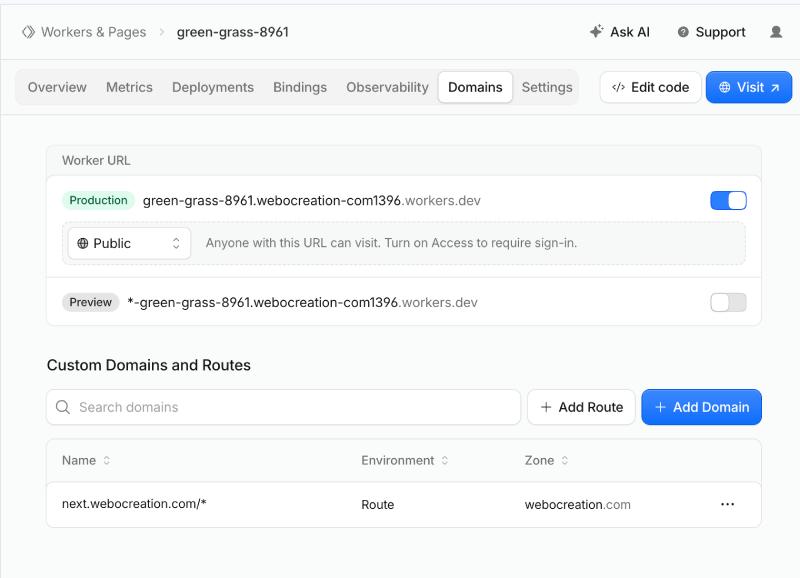
After that, go to the worker application and select the Domain tab and assign a route.

Cloudflare worker domain settings

In the above, we add the domain next.webocreation.com/*

    Once deployed, suspicious requests will receive a 403 Forbidden response before they ever reach your origin server. For example, if you visit a URL like https://next.webocreation.com/?ts=<script then you see 403, like in the image below:

    Cloudflare worker XSS forbidden

    Testing the Worker

    Try visiting a URL containing a test payload:

    https://example.com/?q=<script>alert(1)</script>

    The Worker should return:

    Forbidden

    with an HTTP status code of 403.

    Normal visitors accessing legitimate URLs will continue to be served normally.

    Understanding the Detection Pattern

    Let’s break down the regular expression:

    <script

    Detects attempts to inject HTML script tags:

    <script>alert('XSS')</script>

    javascript:

    Detects JavaScript URI schemes often used in malicious links:

    <a href="javascript:alert(1)">

    vbscript:

    An older scripting scheme sometimes used in legacy browser attacks:

    vbscript:msgbox("XSS")

    onerror=

    Commonly used within image tags to execute JavaScript:

    <img src="x" onerror="alert(1)">

    onload=

    Frequently used to trigger code execution when an element loads:

    <body onload="alert(1)">

    onclick=

    Used to execute JavaScript when a user clicks an element:

    <button onclick="alert(1)">

    onmouseover=

    Executes code when a visitor hovers over an element:

    <div onmouseover="alert(1)">

    alert(

    Although not inherently malicious, attackers often use it while testing XSS vulnerabilities:

    alert(1)

    document.cookie

    Often appears in attempts to steal user session information:

    document.cookie

    Why Use decodeURIComponent()?

    Attackers frequently URL-encode malicious payloads to evade simple filters.

    For example:

    https://example.com/?q=%3Cscript%3Ealert(1)%3C/script%3E

    Without decoding, the Worker might not recognize the payload.

    The following line ensures encoded attacks are inspected correctly:

    decodeURIComponent(url)

    Limitations of Regex-Based XSS Detection

    While this approach is useful for blocking many low-effort attacks, it is not a complete XSS protection solution.

    Attackers may use:

    • HTML entity encoding
    • Double URL encoding
    • Unicode obfuscation
    • Alternate event handlers
    • JavaScript function variations
    • Browser-specific payloads

    Examples include:

    <img src=x oNeRrOr=alert(1)>

    or

    <svg onload=confirm(1)>

    Because attackers constantly develop new bypass techniques, regex-based filtering should be viewed as an additional security layer rather than a complete defense.

    Recommended Security Layers

    For stronger protection, combine Cloudflare Workers with:

    • Cloudflare WAF managed rules
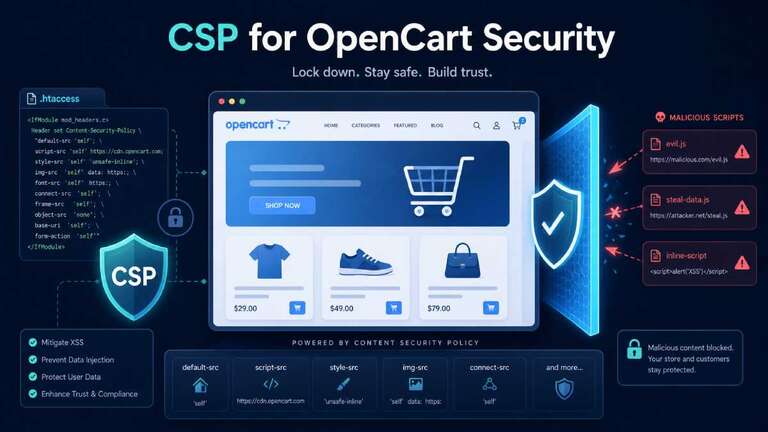
    • Content Security Policy (CSP)
    • Proper output escaping
    • Input validation
    • Secure cookies
    • HTTP security headers
    • Regular vulnerability scanning
    • Secure coding practices

    A layered security approach provides significantly better protection than relying on a single filter.

    Conclusion

    Cloudflare Workers provide an easy and effective way to block many common XSS attempts before they reach your web application. By inspecting incoming requests at the edge, you can reduce malicious traffic, protect backend resources, and add an extra layer of security with minimal effort.

    While regex-based detection should never replace proper application security controls, it can serve as a valuable first line of defense against common attack patterns targeting ecommerce stores, content management systems, and custom web applications.

    Cloudflare Workers for Websites: 10 Powerful Edge Computing Use Cases to Boost Speed, Security, and SEO

    Cloudflare Workers let you run serverless JavaScript on Cloudflare’s edge network, close to your users, without managing servers or regions. For ecommerce and modern web apps, they’re perfect for “middleware” logic: security, routing, caching, small APIs, and scheduled jobs that need to be fast, cheap, and globally distributed.

    This post explains what Cloudflare Workers are, when to use them, and walks through 10 practical use cases with implementation steps you can adapt for your own site.

    What are Cloudflare Workers and when should you use them?

    A Cloudflare Worker is a small script that runs at Cloudflare’s edge in response to HTTP requests, cron triggers, or other events. You write them in JavaScript/TypeScript; Cloudflare deploys them across its global network.

    Workers are especially useful when you want to:

    • Modify or inspect requests and responses before they reach your origin
    • Offload small pieces of logic from your application servers to reduce latency and load
    • Build lightweight APIs or scheduled tasks without maintaining backend infrastructure

    They are not meant to replace a full application server for everything, but to handle the glue and middleware that sits between users and your origin.

    Getting started with Cloudflare Workers

    Regardless of which use cases you implement first, the basic flow looks like this:

    1. Set up Cloudflare and Wrangler
      • Add your domain to Cloudflare and point DNS to use Cloudflare’s proxy.
      • Install the wrangler CLI and log in.
    2. Initialize a Worker project
      • Run wrangler init to scaffold a new Worker, choose a template if desired.
      • Write your Worker logic in index.js or src/index.ts.
    3. Configure bindings and routes
      • Add any KV/R2/D1 bindings or secrets in wrangler.toml as needed.
      • Set up routes (for example, route = "example.com/*") and, if needed, Cron Triggers in the Cloudflare dashboard.
    4. Develop and test
      • Use wrangler dev to run the Worker locally or in a preview environment, inspecting logs and behavior.
    5. Deploy and monitor
      • Deploy with wrangler deploy.
      • Use Cloudflare’s dashboard and logs to monitor errors, performance, and usage.

    1. Add security headers for every response

    Use case: Enforce security headers (HSTS, CSP, X‑Frame‑Options, etc.) consistently, no matter which backend framework or CMS you run.

    Why: Many stacks ship with weak or inconsistent security headers. Doing it at the edge ensures every response is hardened.

    How to implement:

    1. Create a new Worker via the Cloudflare dashboard or with wrangler init.
    2. In your Worker, intercept the request, call fetch(request) to get the origin response, then clone and modify the headers (add Strict-Transport-Security, Content-Security-Policy, X-Frame-Options, X-Content-Type-Options, etc.).
    3. Return the modified response, deploy the Worker, and bind it to your zone so all traffic passes through it.

    This gives you a central place to manage security headers, even if you’re running multiple apps or platforms behind Cloudflare.

    2. Bulk redirects and URL rewriting

    Use case: Handle large numbers of redirects (old URLs to new ones, HTTP to HTTPS variants, language paths) without touching origin code.

    Why: Great for SEO migrations, consolidating old paths, or cleaning up legacy URL structures.

    How to implement:

    1. Define a mapping of old → new URLs (as a JavaScript object or via Workers KV for large sets).
    2. In the Worker, parse request.url and check if there’s a match in the mapping.
    3. If matched, return a Response.redirect(newUrl, 301) or 302; otherwise, call fetch(request) to hit your origin.

    You can adjust logic to handle patterns (for example, regex replacements) rather than only exact matches.

    3. Edge caching and custom cache keys

    Use case: Fine‑tune caching beyond what your origin or default CDN behavior can do, including custom cache keys and TTLs.

    Why: Default caching can be too aggressive or too conservative, and many ecommerce pages benefit from intelligent, per‑segment caching.

    How to implement:

    1. Use the Cache API (caches.default.match and caches.default.put) inside your Worker.
    2. Build a custom cache key that includes only the parts of the request you care about (URL path, some query params, maybe language header).
    3. If the cache has a response, serve it; otherwise, fetch from origin, set appropriate Cache-Control headers and TTL, and store the response in the cache.

    This can significantly reduce origin load for category pages, blogs, and other semi‑static content.

    4. Lightweight authentication in front of an origin

    Use case: Protect internal tools or small APIs with basic auth or API keys at the edge, without implementing full auth in your app.

    Why: Handy for admin dashboards, staging sites, or small services where you just want a simple gate.

    How to implement:

    1. In your Worker, read the Authorization header or a custom header carrying an API key.
    2. Validate credentials against values stored in environment variables (Worker secrets).
    3. If invalid, return a 401 or 403 with a WWW‑Authenticate header; if valid, call fetch(request) to forward traffic to the origin.

    This pattern gives you quick protection without changing legacy code.

    5. CORS proxy for third‑party APIs

    Use case: Call a third‑party API from the browser that doesn’t set adequate CORS headers, by proxying through a Worker.

    Why: Avoid CORS errors without hosting your own proxy server.

    How to implement:

    1. In the Worker, construct a new request to the third‑party API using fetch().
    2. Clone the response, then append CORS headers such as Access-Control-Allow-Origin, Access-Control-Allow-Methods, and Access-Control-Allow-Headers.
    3. Return the modified response to the browser.

    This effectively wraps the external API in an edge‑hosted CORS‑friendly layer.

    6. Geolocation‑based redirects or content

    Use case: Tailor behavior based on user location, such as redirecting to region‑specific paths or adjusting content/currency.

    Why: Cloudflare adds geolocation data to requests, so you don’t need to maintain your own IP database.

    How to implement:

    1. Access the request.cf object in the Worker, which includes country, city, and other geodata.
    2. Based on country, either:
      • Return a redirect to /us/, /eu/, etc., or
      • Add custom headers (like X-User-Country) so your origin can adapt content.
    3. Optionally, set cookies so users aren’t constantly redirected.

    This can improve UX and compliance for international audiences.

    7. A/B testing and experiments at the edge

    Use case: Serve different versions of a page or API response to different users for experiments, using a simple flag or cookie.

    Why: Runs experiments without deep changes in your app routing or templates.

    How to implement:

    1. In the Worker, check for an experiment cookie; if none is set, randomly assign a variant (A or B) and set a cookie.
    2. Based on the variant, route the request to different origins, paths, or backends—for example, /landing-a vs /landing-b.
    3. Ensure subsequent requests from the same user use the same variant by reading the cookie.

    You can also inject small changes (feature flags) into responses at the edge instead of routing to different paths.

    8. Cron‑like scheduled jobs

    Use case: Run recurring jobs such as refreshing caches, calling webhooks, or syncing data, using Cloudflare Cron Triggers.

    Why: Replace OS‑level cron jobs or scheduled tasks on a server with a managed edge solution.

    How to implement:

    1. Define a Cron Trigger in the Cloudflare dashboard (for example, every 15 minutes, hourly, or daily).
    2. Associate a Worker with that trigger; the Worker’s event handler will execute on schedule.
    3. Inside the Worker, add your job logic: call internal APIs, clear caches, write to KV/R2/D1, or send notifications.

    No server or VM needed; Cloudflare handles scheduling and execution.

    9. Edge‑native JSON APIs and microservices

    Use case: Build small APIs (for example, currency conversion, shipping estimates, feature flags) directly as Workers.

    Why: Serve backend logic from the edge for low latency worldwide, without spinning up full microservices.

    How to implement:

    1. Create a Worker that listens for requests on /api/... paths.
    2. Parse the path and query parameters, perform logic or call external services/Workers KV/D1, and respond with JSON (new Response(JSON.stringify(data), { headers: { 'Content-Type': 'application/json' } })).
    3. Route /api/* in your Cloudflare zone to this Worker.

    You can use Workers KV (key‑value store), R2 (object storage), or D1 (SQL DB) for storage behind these APIs.

    10. Data loss prevention and logging at the edge

    Use case: Inspect responses leaving your origin for patterns that look like sensitive data (credit card numbers, secrets) and log or block them.

    Why: Adds a final safety net before potentially sensitive content reaches users.

    How to implement:

    1. In the Worker, call fetch(request) to get the origin response.
    2. Read the response body (for smaller responses) or stream it while checking for patterns (for example, card‑number regexes, secret tokens).
    3. If a match is found, log to an external service via webhook or Workers logging, and optionally redact or replace sensitive parts before returning the response.

    This can help catch accidental exposure bugs or misconfigurations in templates and APIs.

    If your main stack is PHP (OpenCart, Magento, WooCommerce), Cloudflare Workers can act as a powerful security and performance layer in front of your existing code—no need to rewrite your app. You can start small (security headers, redirects) and gradually move more middleware logic to the edge.

    Best Payment Gateways for eCommerce & Dropshipping in 2026

    In the booming world of e-commerce, offering seamless and secure payment options is critical to maximizing conversion rates and customer trust. According to a report by Statista, global digital payment transaction values are expected to exceed $14 trillion by 2026. Choosing the right payment gateway can be the difference between abandoned carts and skyrocketing sales. In this research-backed guide, we’ll break down the best payment gateways for online stores in 2026, comparing fees, features, and ideal use cases.

    Dropshipping is the eCommerce industry’s buzzword these days. So, website builders for eCommerce are more and more popular every day. Cashless economies are gaining popularity. Many nations accept simple payment options. As a result, most Internet marketers are gearing up for a fresh start in dropshipping.

    eCommerce and Dropshipping Payment Gateways: What Are They?

    All of the store’s transactions are handled by an eCommerce payment gateway. The gateway simplifies and streamlines online payment processing. A payment gateway is more than just a transaction processor — it impacts user experience, security, and international accessibility. According to Baymard Institute, 18% of shoppers abandon their carts due to a “checkout process that’s too complicated,” highlighting the need for a smooth payment experience.

    All you need to do is input your credit card information on the payment gateway tab and complete the transaction. After subtracting specific fees, the payment gateway will process the payment from your credit or debit card and transmit it to the dropshipper’s bank account. After that, the dropshipper can deposit the funds into their bank account.

    Tips For Choosing The Right Payment Gateway

    Here are some tips to make the right choice:

    • Choose a well-known payment gateway in the nation where your items will be sold.
    • Check to see if the online banking gateway has a reasonable transaction charge.
    • Check to see if it works with dropshipping stores. Most eCommerce gateways do not prefer Dropshippers because of increased return rates.
    • Whether you want to grow into the worldwide market, see if you can use that gateway.
    • Examine whether it provides clients with a pleasant purchasing experience.

    Best Gateways In 2026

    This is a list of the most popular payment channels among dropshippers.

    PayPal

    PayPal is by far the most popular payment method for online merchants. It is a payment gateway that is approved in over 190 countries. It accepts Mastercard, Visa, Citibank, and other major credit cards. A PayPal account is required to begin dropshipping. However, not all countries endorse it.

    Fees:

    • 3.49% + $0.49 per transaction (U.S.)
    • Cross-border fees vary by country

    Pros:

    • Global brand recognition
    • Easy setup with most e-commerce platforms
    • Buyer and seller protection

    Cons:

    • Higher fees than some competitors
    • Account freezes can occur

    Stripe

    Stripe is a payment gateway founded in the United States and available in over 26 countries. All debit and credit cards are accepted. It is, however, primarily used in Ireland, Australia, and the United Kingdom. It also has WooCommerce integration. It’s much better if you offer it on Facebook Marketplace.

    Fees:

    • 2.9% + $0.30 per transaction (domestic)
    • Additional 1% for international cards

    Pros:

    • Supports 135+ currencies
    • Subscription billing capabilities
    • Advanced fraud detection tools

    Cons:

    Developer-heavy setup for advanced customization

    2Checkout (Now Verifone)

    This other payment system that is available in over 80 countries is 2Checkout. It accepts all major credit cards, including Mastercard, Visa, and Diners Club. It is used in conjunction with other payment gateways in several third-world nations. Below is a list of the most popular payment gateway combinations. 2Checkout offers a flexible global payment solution with strong international support, ideal for SaaS businesses and digital goods.

    Fees:

    • 3.5% + $0.35 per successful sale
    • Additional cross-border and currency conversion fees

    Pros:

    • Supports over 200 countries
    • Multiple payment methods including PayPal, Visa, and Mastercard
    • Easy integration for subscriptions

    Cons:

    Some restrictions on certain industries

    Higher fees compared to Stripe and PayPal

    Authorize.net

    Authorize.net is offered in over 30 countries right now. It is one of the most established and well-known online payment gateways. Multiple extensions are included for simple interaction with WooCommerce shops. For eCommerce and dropshipping shops, Authorize.net offers the lowest transaction cost at 2.90.

    Fees:

    • $25 monthly gateway fee
    • 2.9% + $0.30 per transaction (if using their merchant account)

    Pros:

    • Supports recurring billing
    • Strong security features (Advanced Fraud Detection Suite)

    Cons:

    • Monthly fees may deter small businesses
    • Interface is less modern than competitors

    Skrill

    Skrill is a payment gateway with over 42 countries of availability. It charges a 1.8 percent transfer fee at checkout. It also has an official WooCommerce-based dropshipping store integration plugin.

    Fees:

    • 1.9% per transaction + fixed fee (varies by currency)
    • 3.99% currency conversion fee

    Pros:

    • Good for cross-border payments
    • Fast account setup
    • Supports cryptocurrency transactions

    Cons:

    • Withdrawal fees
    • Customer support could be improved

    Wepay

    WePay is a digital payment alternative for dropshippers that want to integrate a secure and quick payment gateway into their website. WePay is a customizable payment system, although just a few payment alternatives are accessible.

    Fees:

    • 2.9% + $0.30 per transaction

    Pros:

    • Deep banking integration with Chase
    • Good for SaaS platforms
    • Offers White-label solutions

    Cons:

    • Less well-known compared to Stripe or PayPal
    • Limited international availability

    Google Pay

    For eCommerce business operators in the Western area, Google Pay seems to be another excellent choice. Most people in the United States and Europe store their money in Google Wallet. They can effortlessly pay using Google Checkout because they purchase online.

    This alternative is not only faster than some other dropshipping platforms, but it is also more dependable. Because the payment holder also serves as a bank account, Google Checkout deducts the lowest amount.

    Fees:

    • Free for merchants (only processing fees charged by payment processor)

    Pros:

    • Fast, easy checkout experience
    • High security with encryption and tokenization
    • Integrates with many e-commerce platforms

    Cons:

    • Requires user to have a Google account
    • Dependent on device compatibility

    Apple Pay

    If you are looking for the most popular contactless payment system available, you might as well give Apple Pay a chance. You can utilize it for the dropshipping store, allowing customers to effortlessly pay with Apple Pay by just pressing a button. Mastercard, Visa, American Express, and many more are all accepted through the contactless payment gateway.

    Fees:

    • Free for merchants (only processing fees charged by the payment processor)

    Pros:

    • Extremely secure via biometric authentication
    • Reduces checkout friction for iOS users
    • Supports both online and in-store payments

    Cons:

    • Only available on Apple devices
    • Requires additional setup for web checkout

    Payment Gateway Fee Comparison Chart

    Payment GatewayDomestic Transaction FeeInternational FeeMonthly Fee
    Stripe2.9% + $0.30+1%None
    PayPal3.49% + $0.49VariesNone
    Square2.9% + $0.30N/ANone
    Authorize.Net2.9% + $0.30 + $25/monthVaries$25
    Adyen~2.9% + $0.12VariesNone
    Shopify Payments2.4% – 2.9% + $0.30VariesDepends on plan
    Amazon Pay2.9% + $0.30VariesNone
    2Checkout3.5% + $0.35Additional feesNone
    Skrill1.9% + fixed fee3.99% FX feeNone
    WePay2.9% + $0.30LimitedNone
    Google PayVia processor feesVia processorNone
    Apple PayVia processor feesVia processorNone

    The Bottom Line

    When selecting a payment gateway for your online store, consider:

    • Transaction fees and hidden costs
    • International support
    • Device compatibility (Apple Pay, Google Pay)
    • Ease of integration
    • Customer trust factors
    • Features like fraud protection, white-labeling, and subscription management

    No one-size-fits-all solution exists. Startups may prefer Stripe or PayPal for fast setup. Global brands may lean toward Adyen or 2Checkout. Platforms focused on mobile users should seriously consider Google Pay and Apple Pay integration.

    Invest time in picking the right gateway now, and you’ll reap the rewards in lower cart abandonment rates, higher conversion rates, and increased revenue throughout 2025.

    A payment gateway is a necessary component of every online store. Finding the correct one, on the other hand, is a challenge. So, experiment with several payment gateways and pick the one that works best. To reduce the danger of losing relevant consumers to your eCommerce business, use successful eCommerce payment gateways like PayPal and 2Checkout if you’re just getting started.

    Automated Vulnerability Scanning for Ecommerce Apps: Tools, Frequency, and Handling False Positives

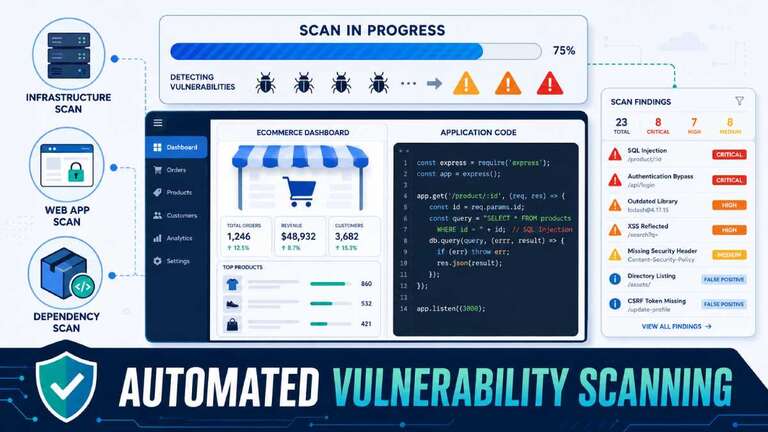
    Automated vulnerability scanning is one of the easiest ways for ecommerce developers to catch security bugs early—if you choose good tools, scan often enough, and don’t drown in false positives. This post walks through what automated scanning does for your store, which tools and approaches make sense, how frequently to run scans, and how to handle noisy results without burning your team out.

    Why automated vulnerability scanning matters for ecommerce

    Ecommerce apps are a perfect target: they hold customer data, payment flows, and admin panels, and they often grow quickly with plugins, themes, and custom code. Every new dependency or feature can introduce vulnerabilities—SQL injection, XSS, insecure libraries, misconfigured servers—that attackers can exploit long before a manual security review happens.

    Automated vulnerability scanners:

    • Continuously check your app, infrastructure, or container images for known weaknesses and misconfigurations.
    • Give you a prioritized list of issues to fix, often with CVE IDs, severities, and remediation hints.
    • Integrate into CI/CD pipelines so new code and dependencies get scanned before hitting production.

    For an ecommerce developer, this moves security from “once‑a‑year audit” to routine hygiene—part of the build, deploy, and maintenance cycle.

    The main types of vulnerability scanning you’ll use

    Different scanners look at different layers of your stack. For ecommerce, you usually want a mix, not just one tool.

    1. Infrastructure and network scanning

    Tools like Nessus, OpenVAS, and similar scanners look at servers, ports, and services to find:

    • Outdated software (web servers, databases, OS packages)
    • Misconfigurations (weak SSH, open management ports, missing patches)

    These scans help ensure the boxes your ecommerce app runs on don’t expose easy openings.

    2. Web application scanning (your store itself)

    Web vulnerability scanners (for example, Acunetix, Invicti, and similar DAST tools) actively crawl and interact with your web app:

    • They look for OWASP Top 10 issues like SQL injection, XSS, insecure cookies, and auth/session flaws.
    • Many support authenticated scanning, so they can test logged‑in areas like admin and checkout flows.

    Some vendors use “proof‑based” scanning—automatically verifying findings to reduce false positives, especially important when scanning complex ecommerce flows.

    3. Dependency and container scanning

    Your store depends on frameworks, libraries, and sometimes container images.

    • Dependency scanners (for example, tools like Dependabot or similar) look at your package manifests to find libraries with known CVEs.
    • Container scanners analyze images for vulnerable packages and misconfigurations.

    Given how much ecommerce is built on PHP, JS, and CMS plugins, library/package scanning is a big part of keeping your app safe.

    Choosing tools and where to integrate them

    When picking scanners as a developer, look at:

    • Coverage: Can it scan your web app, APIs, and containers, or only one layer?
    • Accuracy and false positive rates: Does the tool verify findings or flood you with noise?
    • Integration: Does it fit into your CI/CD, ticketing, and workflow easily?
    • Usability: Can devs actually read and act on reports, or is it only for specialists?

    For a typical ecommerce stack:

    • Use an infrastructure scanner (Nessus/OpenVAS) for servers and networks.
    • Use a web app scanner/DAST tool for the store and admin panels.
    • Use dependency scanning (e.g., GitHub‑style tools, language‑specific scanners) for libraries and plugin ecosystems.

    Then, hook at least some of these into:

    • Your CI/CD pipeline (scan new code/builds).
    • A regular scheduled job (scan production and staging environments).

    How often should you scan? Frequency for ecommerce apps

    There’s no single magic frequency, but ecommerce guidance tends to converge around routine scans plus deeper periodic assessments.

    A practical schedule:

    • On every major change:
      • Run dependency and web app scans whenever you deploy big feature changes, new plugins/extensions, or framework upgrades.
    • Weekly or biweekly for production web apps:
      • Automated DAST scans against staging and production to catch newly introduced issues and new exposures.
    • Monthly for infrastructure:
      • Network and server scans to find missing patches or misconfigurations.
    • At least annually for deep audits:
      • Full security audits and penetration tests, often recommended at least once a year or after major updates.

    The key idea: scanning should be regular and often, but you don’t need to scan heavy targets (e.g., full DAST with authentication) on every small CSS change. Tie scan frequency to risk and change—more scans when you’re changing code and dependencies more often.

    Dealing with false positives (without ignoring real issues)

    Every scanner produces some false positives—findings that look like vulnerabilities but aren’t actually exploitable or relevant. If you don’t manage them, you get alert fatigue, and developers start ignoring reports.

    Common causes of false positives include:

    • Cross‑ecosystem confusion: mapping a vulnerability from one package ecosystem onto a similarly named package in another.
    • Limited information/unauthenticated scans: scanner cannot see enough of the system, so it flags “possible” issues based only on banners or partial config.
    • Complex authentication and flows not modeled correctly: scanner misses the true state and misreads error messages or behavior.

    Practical strategies for dev teams:

    1. Tune scanners with proper authentication and scope

    • Configure authenticated scans (credentials for admin and user roles) so tools see the real application behavior and configuration.
    • Define clear scan scopes: which domains/routes, which environments (staging vs prod), and what’s out of bounds.

    Better coverage reduces guesswork and false positives.

    2. Use quality gates and baselines in CI/CD

    • Set up quality gates: builds fail if new vulnerabilities above a certain severity appear, but known baseline issues are tracked separately.
    • Maintain a list of accepted risks and known false positives so scans don’t constantly block on the same noise.

    This helps keep scanning actionable without freezing development over non‑critical findings.

    3. Configure matching behavior and ignore rules

    Modern scanners often let you tune how they match vulnerabilities:

    • Adjust matching per ecosystem (for example, turn off certain matching methods for Java, tweak for Python).
    • Add ignore rules for specific packages or conditions known to be false positives, after careful review.

    The goal isn’t to hide real problems; it’s to stop wasting time on alerts you’ve proven are not exploitable.

    4. Combine automated scanning with manual review

    • Use automation to find likely issues and keep up with new CVEs, but complement it with manual inspection for business logic flaws, complex flows, and high‑risk areas (checkout, account functions).
    • Security experts or experienced devs can validate critical findings, especially those that would lead to data exposure or payment compromise.

    False positives become manageable when you treat scanners as tools in a process, not as oracles.

    Building a simple vulnerability management workflow for ecommerce devs

    Automated scanning is just one piece; you need a lightweight workflow so findings actually get fixed.

    A simple flow:

    1. Scan
      • Run dependency, web app, and infra scans on a regular schedule and after major changes.
    2. Triage
      • Categorize findings by severity, exploitability, and business impact (e.g., does it affect checkout or customer data?).
      • Filter out obvious false positives using tuned rules and manual checks.
    3. Create tickets
      • Turn validated vulnerabilities into issues in your tracker, linked to code, configs, or dependencies that need changes.
    4. Fix and verify
      • Patch dependencies, update configs, or refactor vulnerable code.
      • Re‑run scans and, for critical findings, manually verify that the vulnerability is gone.
    5. Monitor over time
      • Track trends: are you introducing fewer critical vulnerabilities over time? Are scan results getting cleaner as your pipeline and configs improve?

    For ecommerce developers, this flow aligns with existing dev practices: code → review → CI → deploy → monitor. Scanning becomes part of that loop, not a separate painful event.

    The bottom line for ecommerce developers

    Automated vulnerability scanning won’t replace manual security work, but it catches a huge class of bugs and misconfigurations early, especially in fast‑moving ecommerce environments. By choosing tools that fit your stack, scanning at sensible intervals tied to change and risk, and deliberately managing false positives, you can turn vulnerability scanning from noisy compliance into a practical part of your dev workflow.

    For your ecommerce app, the aim is simple:

    • Scan regularly.
    • Fix what matters.
    • Tune out the noise without ignoring the signal.

    That way, your store stays faster and safer for customers—and the security work stays achievable for your development team rather than overwhelming.

    security.txt 101: How to create it, where to put it, and why it helps your ecommerce security

    If someone finds a serious security bug on your site today, do they know how to reach you? If they have to dig through WHOIS records or random contact forms, there’s a good chance they’ll give up—or go public in a way that hurts you. That’s exactly the problem security.txt was created to solve.

    What is a security.txt file?

    security.txt is a small text file, published at a well‑known location on your domain, that tells security researchers how to report vulnerabilities to you in a clear, standardized way.

    • It lives at:
      • https://yourdomain.com/.well-known/security.txt (preferred)
      • Optionally also at https://yourdomain.com/security.txt as a fallback.
    • It follows an Internet standard (RFC 9116) that many security tools and researchers already know to check.
    • It’s similar in spirit to robots.txt, but instead of crawl rules, it exposes security contact and policy information.

    The goal: make it easy and fast for ethical hackers and “finders” to tell you about problems so you can fix them before attackers exploit them.

    Why bother with security.txt? Practical benefits

    Adding security.txt is a simple change, but it sends a strong signal about your security posture.

    Some concrete benefits:

    • Easy vulnerability reporting
      Researchers don’t have to guess email addresses or ping random social accounts; they can go straight to /.well-known/security.txt and find the right contact info.
    • Fewer unreported or “dropped” bugs
      When people don’t know how to contact you, they may never report serious vulnerabilities—or they might post them publicly, increasing risk.
    • Shows you take security seriously
      Governments, large organizations, and platforms are starting to recommend or adopt security.txt as a best practice. Having it in place demonstrates transparency and willingness to engage with researchers.
    • Standardization for tools and automation
      Security scanners and platforms (Cloudflare, bug bounty providers, validators) can automatically discover your security.txt and surface details to their users.

    For an ecommerce site, this is an especially useful signal—your store handles payments, customer data, and logins, making you an attractive target. Anything that shortens the path between “someone found a bug” and “you’ve fixed it” reduces risk.

    What goes inside a security.txt file?

    The standard defines several fields. You don’t have to use every possible directive, but there are a few core ones you should almost always include.

    At minimum, plan to add:

    • Contact: how researchers should reach you
      • Example formats: Contact: mailto:security@yourdomain.com or Contact: https://yourdomain.com/security-report.
      • This should be a monitored inbox or form, not a dead alias.
    • Policy: link to your vulnerability disclosure policy
      • Example: Policy: https://yourdomain.com/vulnerability-disclosure.
      • This page explains what kind of testing is allowed, what you expect from researchers, and how you handle reports.
    • Expires: when the information should be considered stale
      • Example: Expires: 2026-12-31T23:59:59Z.
      • This forces you to review and update your contact info periodically so researchers aren’t using old data.

    Optional but recommended fields:

    • Encryption: link to your PGP public key or other method for encrypted communication
      • Example: Encryption: https://yourdomain.com/pgp-key.txt.
      • Useful if you expect sensitive reports and want them encrypted.
    • Acknowledgments: where you thank researchers
      • Example: Acknowledgments: https://yourdomain.com/hall-of-fame.
      • Helps build goodwill with the security community.
    • Preferred-Languages: languages you accept reports in (e.g., Preferred-Languages: en, es).

    Each directive appears on its own line, and the file remains plain text—easy to read and parse.

    How to create a security.txt file step-by-step

    You can create the file manually or use a generator. The process is straightforward.

    Step 1: Decide on your security contact and process

    Before touching the server:

    • Choose a dedicated email address (for example, security@yourdomain.com or security-report@yourdomain.com) or a secure web form.
    • Decide who will read and triage these reports (security team, dev lead, ops), and set internal expectations for response times.

    If you already have a public Vulnerability Disclosure Policy (VDP) or a bug bounty program, note the URL—you’ll reference it as the Policy field.

    Step 2: Draft the security.txt content

    Create a new plain text file named security.txt locally, and add something like:

    Contact: mailto:security@yourdomain.com
    Contact: https://yourdomain.com/security-report
    Policy: https://yourdomain.com/vulnerability-disclosure
    Encryption: https://yourdomain.com/pgp-key.txt
    Acknowledgments: https://yourdomain.com/security-hall-of-fame
    Preferred-Languages: en
    Expires: 2026-12-31T23:59:59Z

    Adjust URLs and dates for your site. Keep lines simple and strictly in the format expected by RFC 9116.

    If you don’t want to write this from scratch, you can:

    • Use an online generator such as securitytxt.org or similar tools, which guide you through fields and produce a valid file.

    Step 3: Upload the file to /.well-known/

    On your web server or hosting platform:

    • Create the directory: .well-known at the root of your domain if it doesn’t exist yet.
    • Upload security.txt into that directory.

    The file should then be accessible at:

    • https://yourdomain.com/.well-known/security.txt.

    Optionally, you can also put a copy at https://yourdomain.com/security.txt, but /.well-known/security.txt is the primary standard location.

    If you’re using a CDN or security platform like Cloudflare, some offer built‑in ways to manage security.txt directly in their dashboard.

    Step 4: Test and validate

    After uploading:

    • Visit the URL in your browser and confirm the file loads correctly (no extra HTML, headers, or formatting).
    • Use a security.txt validator tool to check for syntax and standard compliance.
    • Make sure any links (policy page, PGP key, contact form) work and are secure (HTTPS).

    If you sign the file with an OpenPGP cleartext signature, note that some guidance recommends this to add authenticity—so researchers know the file wasn’t planted by an attacker.

    Keeping your security.txt useful over time

    A security.txt file is not “set and forget.” To keep it helpful:

    • Update contact info and policy URLs whenever you change teams, addresses, or disclosure processes.
    • Refresh the Expires date regularly (typically less than a year ahead), so researchers know the file is current.
    • Review the file at least every few months as part of your security checklist—just like certificates, backups, and access control.

    You can integrate this into your operations:

    • Add security.txt review to your deployment or quarterly security review checklist.
    • Track inbound reports separately so you see how often researchers use this path and how quickly you respond.

    Why ecommerce sites should adopt security.txt

    For ecommerce businesses, implementing security.txt is a small, high‑ROI step:

    • You handle sensitive data: customer accounts, saved payments, order history.
    • You’re a likely target for carding, credential stuffing, and web exploits.
    • Ethical hackers actively scan and test ecommerce sites; giving them a clear channel helps you fix issues faster.

    By putting a simple text file at /.well-known/security.txt, you make your vulnerability disclosure process discoverable in seconds, reduce unreported issues, and show customers and partners that you take security seriously.

    If your ecommerce stack is based on OpenCart, Magento, or similar platforms, you can even add this as a standard hardening step in your deployment checklist—alongside HTTPS, proper headers, WAF rules, and secure payment configuration

    Here’s a simple, standards‑aligned security.txt you can use for webocreation.com based on the email you provided.

    You’ll put this exact text in a file named security.txt and upload it to https://webocreation.com/.well-known/security.txt (and optionally also https://webocreation.com/security.txt).

    Contact: mailto:webocreation.com@gmail.com
    Contact: https://webocreation.com/contact-us/
    Policy: https://webocreation.com/privacy-policy/
    Preferred-Languages: en
    Expires: 2029-12-31T23:59:59Z

    Note: Webocreation currently does not have a bug bounty program or any kind of financial compensation for valid reports. However we are happy to credit researchers with their name and a link to a professional profile (e.g. linkedin) on our Hall of Fame for valid reports that lead to corrective action.

    A few notes so you can adjust as needed:

    • Contact:
      • You already have webocreation.com@gmail.com, which is good.
      • If you have a contact page or a specific “report a security issue” page, keep or update the second Contact: line to that URL.
    • Policy:
      • If you don’t yet have a vulnerability disclosure policy page, you can either:
        • Create one at /vulnerability-disclosure/ and keep this line, or
        • Temporarily remove the Policy: line until that page exists.
    • Preferred-Languages:
      • Right now it’s set to en. Add more codes if you’re happy to receive reports in other languages (e.g., en, ne).
    • Expires:
      • Update this date once or twice a year so researchers know the file is current. It should be an ISO 8601 timestamp in UTC (like above).

    Once it’s uploaded, you can test by visiting:

    • https://webocreation.com/.well-known/security.txt

    and checking that:

    • It loads as plain text (no HTML).
    • The lines look exactly as above, each on its own line.

    Adding a security.txt file to website is a small, high‑impact step that makes it easier for ethical hackers and security researchers to help you, instead of harm you. By publishing a simple text file at /.well-known/security.txt with clear contact details, a disclosure policy link, preferred languages, and an expiry date, you give finders a standard, well‑known place to learn how to report vulnerabilities responsibly. This shortens the path from “bug discovered” to “bug fixed”, reduces the chance that serious issues go unreported or are disclosed in risky ways, and shows customers, partners, and platforms that you take security communication seriously. For any ecommerce site—especially one handling logins, payments, and customer data—implementing security.txt belongs alongside HTTPS, secure checkout, and regular security reviews as part of basic hardening.

    Top Trending Products to Sell Online in 2026 (Data‑Backed Ideas)

    Introduction: Why “data‑backed” trending products matter in 2026

    • Briefly explain why chasing random “winning products” is risky (hype, short‑lived fads, heavy competition).
    • Introduce your angle: products chosen based on real signals—search trends, marketplace demand, and repeat purchases.
    • Promise the reader: by the end, they’ll have several product ideas plus a simple framework to judge whether a product is truly worth testing.

    How to identify trending products (your method)

    Set up credibility and give context before listing products.

    • 2.1. Core data signals to watch
      • Search interest (e.g., Google Trends): rising vs flat vs declining.
      • Marketplace demand: bestseller lists, review counts, ratings.
      • Social proof: TikTok/Reels, YouTube, niche communities showing usage.
      • Repeat purchase/consumable potential: products people buy again.
    • 2.2. Filters to avoid “fake winners”
      • Avoid overly saturated products where everyone sells the same item at the same price.
      • Prefer products with specific niches (e.g., “pet anxiety blanket” vs generic “blanket”).
      • Consider shipping complexity, return risk, and support needs.
    • 2.3. How to match products to your strengths
      • Print‑on‑demand vs dropshipping vs stocking inventory.
      • Physical vs digital products (depending on your skills, capital, and audience).

    3. Health & wellness: functional products with real demand

    Introduce the category: people keep spending on health, fitness, and better sleep; these products show sustained search and marketplace demand.

    • 3.1. Smart and convenient fitness gear
      • Examples: app‑connected yoga mats, posture correctors, resistance band sets bundled with digital workouts.
      • Data angle: increasing interest in at‑home fitness and “smart” accessories; look at reviews and growth in “home gym” products.
    • 3.2. Recovery and pain‑relief gadgets
      • Examples: massage guns, neck massagers, heating pads with ergonomic designs.
      • Explain why: high price tolerance, strong gift potential, lots of repeat word‑of‑mouth when they work.
    • 3.3. Portable wellness devices
      • Examples: portable blenders, air purifiers for small rooms, sleep‑aid devices (white‑noise machines, light alarm clocks).
      • Suggest how to differentiate: bundle with guides, target specific niches (students, office workers, parents).

    For each sub‑section, add:

    • Who it’s best for (dropshipper, brand builder, boutique store).
    • Key risk: regulation, quality, returns—and how to mitigate.

    4. Pet products: evergreen, emotional, and shareable

    Explain why pet owners are high‑value customers and why pet spending keeps growing.

    • 4.1. Interactive pet toys
      • Examples: treat‑dispensing toys, smart ball launchers, puzzle feeders.
      • Data angle: recurring presence in trend lists; strong engagement on social posts.
    • 4.2. Functional pet gear
      • Examples: slow feeder bowls, car seat covers, travel carriers, GPS tags.
      • Show how these solve real problems (choking risk, car mess, safety) and can be marketed with educational content.
    • 4.3. Personalized pet accessories
      • Examples: custom name tags, embroidered harnesses, printed pet portraits, personalized bowls or blankets.
      • Explain synergy with print‑on‑demand and how personalization raises perceived value.

    Include:

    • Upsell ideas (bundles: toy + accessory, travel kit).
    • Content ideas: Instagram/TikTok showcasing pets using the products.

    5. Beauty & skincare “ingredient” products

    Frame the trend: consumers are more informed and look for specific ingredients, not just generic “cream.”

    • 5.1. Ingredient‑focused skincare
      • Examples: peptide serums, ectoin moisturizers, niacinamide toners, and multi‑active serums targeted at specific concerns.
      • Mention that search interest around certain ingredients has been rising, and product reviews often mention ingredients by name.
    • 5.2. Niche beauty tools and accessories
      • Examples: facial massage tools, gua sha sets, travel‑friendly skincare organizers, refillable travel bottles.
      • Explain how these complement consumable products and can be sold as bundles.
    • 5.3. How to stay compliant and trustworthy
      • Emphasize clear labeling, honest claims, and sourcing from reputable suppliers.
      • Suggest partnering with white‑label labs or established manufacturers rather than ad‑hoc suppliers.

    Add:

    • Branding tip: lean into education and “skincare routine” content.
    • Monetization options: starter kits, subscription refills, bundles.

    6. Eco‑friendly & reusable products

    Explain the long‑term sustainability trend and how it shapes purchasing decisions.

    • 6.1. Everyday sustainable swaps
      • Examples: bamboo tumblers, reusable water bottles, stainless steel straws, beeswax wraps.
      • Show how they align with “small lifestyle upgrades” people share on social media.
    • 6.2. Personalized eco gear
      • Examples: custom‑engraved tumblers, personalized reusable bags, and eco‑gift sets.
      • Talk about combining sustainability with emotional personalization for higher margins.
    • 6.3. Eco‑friendly phone and tech accessories
      • Examples: biodegradable phone cases, laptop sleeves made from recycled materials.
      • Point out that tech and sustainability together hit strong buyer intent.

    Include:

    • Branding angle: explain carbon footprint, materials, and impact.
    • Cross‑sell: bundles for “starter eco kit,” travel kits, and office eco packs.

    7. Tech accessories & small electronics

    Position this category as “practical tech,” not hype gadgets.

    • 7.1. Everyday mobile accessories
      • Examples: wireless chargers, MagSafe accessories, high‑quality phone cases, cable organizers.
      • Explain strong, ongoing demand due to device turnover and damage/upgrade cycles.
    • 7.2. Micro‑gadgets for home and office
      • Examples: mini‑fridges, USB desk fans, LED desk lights, smart plugs.
      • Show how they connect to work‑from‑home and productivity trends.
    • 7.3. How to compete without racing to the bottom on price
      • Bundle products (e.g., “work‑from‑home starter kit”).
      • Focus on design, durability, or niche targeting instead of generic listings.

    Add:

    • Content ideas: “desk setups,” “phone upgrade kits,” “productivity hacks” posts and videos.

    8. Personalized and print‑on‑demand products

    Highlight that customization and emotion give strong staying power.

    • 8.1. Custom apparel and accessories
      • Examples: personalized hoodies, family name shirts, location‑based designs, event merch.
      • Explain low inventory risk with print‑on‑demand services.
    • 8.2. Custom home décor
      • Examples: custom wall art, family name signs, map posters, milestone prints (birth, wedding, anniversary).
      • Emphasize giftability and Q4 seasonality.
    • 8.3. Event‑based products
      • Examples: wedding gifts, baby shower gifts, graduation products.
      • Show how seasonal events can drive spikes.

    Include:

    • How to stand out: original designs, language/localization, niche communities.
    • SEO angle: long‑tail keywords like “[city] skyline poster” or “[pet name] bandana”.

    9. Digital products that save time

    Explain why digital products have high margins and scale well.

    • 9.1. Templates for productivity and business
      • Examples: Notion setups, spreadsheet calculators, social media planners, and ecommerce store audit checklists.
      • Highlight that templates selling “time saved” tend to do well for entrepreneurs, creators, and students.
    • 9.2. Small tools and micro assets
      • Examples: icon packs, design kits, pre‑built email flows, automation scripts for common tasks.
      • Discuss targeting specific platforms (Shopify, Magento, WooCommerce) to match your existing audience.
    • 9.3. Bundles and memberships
      • Sell bundles of templates or small subscription access to ongoing updates.
      • Connect them to your blog content and tutorials.

    Add:

    • Cross‑promotion: include CTAs in your blog posts and YouTube/videos.
    • Note the appeal of “earn money online” and “save time” keywords.

    10. How to choose the right product for you

    Bring everything together in a simple decision framework.

    • 10.1. Align with your skills and resources
      • If you’re strong in design → print‑on‑demand, and digital templates.
      • If you’re strong in logistics/sourcing → physical goods and bundles.
    • 10.2. Test small, measure quickly
      • Validate with small ad tests, influencer seeding, or marketplace listings.
      • Track key metrics: click‑through rate, add‑to‑cart, purchase rate, and refund/return rate.
    • 10.3. Think long‑term, not just “hype”
      • Prefer categories with evergreen demand (pets, wellness, productivity) over one‑week TikTok trends.
      • Keep iterating products within a niche instead of constantly switching niches.

    11. Conclusion + CTA

    • Re‑emphasize that trends are useful, but data + niche focus + execution matter more than “magic” products.
    • Encourage readers to pick one category and one product from the list to research and test next week.
    • Invite them to explore your other posts on ecommerce (e.g., checkout optimization, security, starting an online store) to help them actually launch and grow.

    Hardening Your Checkout: AVS, CVV, 3‑D Secure, and When to Turn Them Up

    When you “turn up” AVS, CVV, or 3‑D Secure, you’re really turning the dials between conversion, fraud loss, and chargeback/processor risk—not just “more security.” This post walks through how each control works, where it helps most, and how to be analytical about those trade‑offs instead of guessing.

    Start with a simple measurement framework

    Before you change any setting, decide how you’ll measure whether it helped or hurt.

    For each checkout change, track at least:

    • Authorization rate – approved transactions ÷ attempts.
    • Checkout conversion – completed orders ÷ sessions that started checkout.
    • Fraud rate – confirmed fraud or fraud chargebacks ÷ approved transactions.
    • Chargeback ratio – chargebacks ÷ total transactions, especially card‑scheme ratios.

    Then, when you tweak AVS/CVV/3DS, compare before/after windows (for example, 2–4 weeks) and by segment (country, device, product type) so you see where you’re helping or hurting.

    AVS: address checks as a blunt but powerful filter

    Address Verification Service (AVS) compares the billing address your customer enters to the address on file with the issuer. You typically get results like “full match”, “ZIP only”, “street only,” or “no match.”

    Fraud teams like AVS because:

    • Stolen card data often does not include full, correct billing addresses.
    • “No match” responses correlate strongly with card‑not‑present fraud and carding attempts.

    But it’s imperfect:

    • Legitimate customers move and forget to update their bank.
    • International AVS coverage is patchy, especially outside North America and the UK.

    How hard should you lean on AVS?

    Think of AVS as a slider, not a switch. You choose what happens on each result.

    Common patterns:

    • Full match → auto‑approve (subject to other checks).
    • Partial match (ZIP only or street only) → approve but possibly route to higher 3DS risk or manual review on high‑value orders.
    • No match → decline outright on high‑risk segments (e.g., new customers, cross‑border, high‑ticket), or send to strong authentication.

    Analytically, you want to:

    1. Measure fraud by AVS result.
      For a recent period, calculate fraud and chargeback rates separately for full match, partial match, and no match.
    2. Measure approval/conversion by AVS result.
      See how many legitimate approvals live in the “partial match” bucket, especially in countries where AVS is unreliable.
    3. Adjust rules where the gap is worst.
      For example, if “no match” has 10× the fraud rate of “full match” but only 1–2% of your approved volume, treating “no match” much more strictly likely improves your risk with little conversion impact.

    In contrast, if “ZIP only” has only slightly higher fraud than “full match” but a big chunk of your international revenue, you probably don’t want to auto‑decline that entire bucket.

    CVV: low friction, high value verification

    The CVV is the 3–4 digit code printed on the card that is generally not stored in databases or on magnetic stripes. Because CVVs often aren’t present in large data breaches, a fraudster may have a card number without the correct CVV.

    Requiring CVV:

    • Adds very little friction—customers are used to entering it.
    • Provides strong evidence that the cardholder physically has the card.
    • Reduces card‑not‑present fraud by making simple number‑only attacks harder.

    Most guidance treats “always require CVV” as a baseline for CNP ecommerce.

    When and how to “turn up” CVV

    You have two main decision points:

    1. Always require CVV vs. sometimes skip
      • Always requiring CVV is recommended for standard ecommerce transactions because it provides extra protection and is widely supported.
      • Some merchants consider relaxing CVV for returning customers or subscription rebills to reduce friction, but this can open the door to account takeover abuse if logins are compromised.
    2. What to do with CVV mismatches
      • Many gateways let you choose whether to decline on mismatch, accept but flag, or send to review.
      • Since CVV responses are more reliable than AVS, mismatches are often treated as a strong fraud signal, especially combined with AVS failures or high‑risk geos.

    Analytically:

    • Measure fraud and approval by CVV result (match vs mismatch vs not provided) over a few months.
    • If “mismatch” transactions show much higher fraud and very low genuine approval volume, you can justify auto‑declining them, at least for high‑risk segments.
    • If you choose to accept some mismatches, consider routing them to adaptive 3DS or manual review for higher amounts.

    In practice, many merchants end up with a very strict CVV policy (“must match, otherwise fail or challenge”) and use AVS and 3DS as more nuanced levers.

    3‑D Secure: big dial with big consequences

    3‑D Secure (3DS) adds an extra authentication step—like approving in a banking app or entering a one‑time code—so the issuer can verify the cardholder before authorizing the transaction.

    Properly used, 3DS:

    • Reduces certain types of card‑not‑present fraud, especially stolen card details abuse.
    • Shifts chargeback liability from merchant to issuer in many schemes, protecting your ratios.
    • Helps you stay below monitoring thresholds (such as the 0.3% chargeback ratio often cited in scheme programs).

    But there are real trade‑offs:

    • Forcing 3DS on every transaction adds friction and can reduce approval and conversion rates if misconfigured.
    • Mobile implementations can be clunky in some markets, hurting cart completion.

    Expert guidance now strongly favors adaptive or dynamic 3DS, where only higher‑risk transactions get challenged, while low‑risk ones pass without extra steps.

    How to decide when to “turn up” 3‑D Secure

    Instead of “3DS on everything” vs “3DS on nothing,” use these axes to decide when to challenge:

    • Risk signals – high AVS/CVV risk, unusual device, new account, IP or geo anomalies.
    • Ticket size – high‑value orders tolerate more friction; customers expect extra checks on expensive items.
    • Customer segment – new customers vs trusted repeat buyers; cross‑border vs domestic.
    • Fraud and chargeback posture – if you’re near scheme/program thresholds, 3DS becomes more valuable as a risk‑reduction tool.

    Analytically, aim for:

    1. Baseline metrics without 3DS (or with current 3DS mix):
      • Fraud rate, chargeback ratio, approval rate, and checkout completion.
    2. Segmented tests where you “turn up” 3DS for a specific slice:
      • For example, only cross‑border orders over a certain amount, or only orders with AVS “no match.”
    3. Compare the unit economics:
      • How many additional orders did you lose from added friction?
      • How many fraud losses and chargeback fees did you avoid (plus softer benefits like staying under monitoring thresholds)?

    Industry practitioners note that poorly configured 3DS can knock a few percentage points off approval or conversion, while good adaptive setups can cut fraud and chargebacks significantly with minimal impact on overall conversion.

    Putting it together: a risk‑based checkout strategy

    Once you understand each tool, you can combine them into a tiered decision engine that balances fraud vs conversion:

    • Low‑risk transactions (known customer, domestic, full AVS & CVV match, normal behavior)
      • Require CVV.
      • AVS result: full match.
      • 3DS: usually skip to keep the flow frictionless.
    • Medium‑risk transactions (new customer, partial AVS match, mid‑ticket)
      • Require CVV and decline outright on a mismatch in higher‑risk regions.
      • Allow some partial AVS matches but route them to adaptive 3DS rather than auto‑approve.
    • High‑risk transactions (no AVS match, strange IP/geo, high‑ticket, or you’re close to chargeback thresholds)
      • Require CVV and treat mismatches as hard fails.
      • Require 3DS challenge; consider declining if authentication fails or friction is refused.

    Operationally, this gives you dials:

    • When fraud or chargebacks spike (for example, during a carding wave or campaign abuse), you tighten rules: more transactions flow to 3DS or get declined based on AVS/CVV.
    • When fraud is under control, and you’re missing revenue in a specific market or channel, you can relax specific segments: allow certain partial AVS matches or reduce 3DS challenges for trusted repeat customers, then watch conversion and fraud metrics.

    How to iterate safely (lots of analytical examples)

    To keep iterations safe and data‑driven:

    • Always A/B or time‑box changes.
      Apply new rules to a small subset of traffic or for a limited time, then compare against a control.
    • Evaluate changes with multi‑metric views.
      Look at authorization rate, conversion, fraud rate, and chargeback ratio together; a “win” is rarely visible in a single metric.
    • Drill down by segment.
      A rule may be great for domestic desktop traffic but terrible for cross‑border mobile; adjust by geography, device, and customer cohort.

    Concrete ways to experiment:

    • AVS test: For a month, treat “no match” as auto‑decline for new customers in a high‑risk region and compare fraud/approval there to regions where you kept current rules.
    • CVV test: If you currently accept some “mismatch” results, start declining them for high‑value orders only and watch chargeback rates for those SKUs.
    • 3DS test: Turn on adaptive 3DS just for cross‑border orders over a threshold and measure how much fraud and chargebacks drop versus how much conversion moves in that slice.

    Each of these gives you a measurable ROI story: “We added friction here, and here’s how much fraud/chargeback cost we avoided relative to the revenue we gave up.”

    The bottom line

    AVS, CVV, and 3‑D Secure are not just generic “security features”—they are adjustable levers in your checkout economics. The goal isn’t zero fraud at any cost; it’s an acceptable fraud and chargeback profile that keeps you safe with issuers and schemes while maximizing good customer conversion.

    If you treat each control as a dial, measure the impact on approval, conversion, fraud, and chargebacks by segment, and iterate in small, analytical steps, you can harden your checkout intelligently instead of guessing and hoping.

    Carding Attacks 101: How Stolen Card Testing Hits Your Ecommerce Store

    Carding attacks are one of the most common—and least understood—ways fraudsters abuse ecommerce checkout forms, quietly racking up fees, chargebacks, and reputational damage before anyone notices. This post walks through what carding looks like in practice, how it hits your payment processor relationship and chargebacks, and the first‑line defenses every store should have in place.

    What a carding attack actually is

    At its core, carding (or card testing) is the process of taking stolen card data and running small, automated transactions to find out which cards are still “alive.”

    • Fraudsters buy or harvest large batches of card numbers, expiry dates, and sometimes billing details from breaches or the dark web.
    • They then use bots or scripts to push those cards through your checkout or payment form—usually for very low‑value purchases—to see which ones authorize successfully.
    • Any card that works is added to a “validated” list that can be resold at a premium or used later for high‑value fraud (electronics, gift cards, resellable items).

    Because the test transactions are tiny and spread across many merchants, they often fly under the radar—until chargebacks and processor warnings start rolling in.

    What carding looks like in your ecommerce store

    From your point of view, a carding attack doesn’t look like a Hollywood hack. It looks like “weird checkout behavior.”

    Common symptoms include:

    • Spikes in failed or low‑value transactions
      You suddenly see lots of tiny orders (cents to a couple of dollars), many of which are declined or reversed.
      These often cluster in short time windows and off‑peak hours, without a matching rise in normal site traffic.
    • Rapid‑fire attempts from the same source
      Multiple payment attempts from the same IP, device fingerprint, or small IP range in minutes—not normal shopper behavior.
    • Odd billing data patterns
      Many transactions where ZIP, country, or address do not match card issuer records (AVS mismatches), or obviously fake names and emails.
    • Chargebacks and disputes on tiny charges
      Cardholders spot random “test” charges and dispute them, turning even low‑value tests into chargebacks for your business.

    In more advanced attacks, carders pair card testing with credential stuffing—logging into real user accounts and then testing the saved cards on file, which can look even more like legitimate traffic at first glance.

    How carding impacts your payment processor and chargebacks

    Carding doesn’t just cost you a few dollars in fraudulent charges; it hits you at multiple layers of the payments ecosystem.

    1. Direct financial costs per attempt and chargeback

    • Processors charge fees even on declines.
      A high‑volume carding run with thousands of declines generates gateway and network fees with zero revenue.
    • Successful tests become chargebacks.
      When cardholders dispute unauthorized test transactions, each chargeback hits you with a fee (often tens of dollars) plus the loss of the transaction amount.
      Industry analyses estimate that every dollar of fraud often costs merchants multiple dollars when you include chargebacks, fees, and operational overhead.

    2. Chargeback ratios and monitoring programs

    Payment schemes and acquirers closely monitor your chargeback ratio and other risk signals:

    • Carding attacks can generate a burst of disputes in a short period, pushing your chargeback ratio above thresholds that trigger fines and monitoring programs.
    • Visa’s updated VAMP (Visa Acquirer Monitoring Program) specifically calls out high‑volume card testing (“enumeration”) as a basis for penalties, including per‑chargeback fees if enumeration exceeds certain ratios.

    If your chargeback and enumeration ratios stay elevated:

    • You may be reclassified as a high‑risk merchant, facing higher processing fees, rolling reserves, and stricter approval rules.
    • In extreme cases, processors can freeze funds or terminate your merchant account altogether, leaving you scrambling for a new (more expensive) provider.

    3. Collateral damage to legitimate customers and revenue

    Carding also hurts good customers:

    • Legitimate transactions may get declined more often as processors tighten risk rules or your own fraud tools become more aggressive in response.
    • Customers experiencing unexplained declines or seeing your store associated with card fraud lose trust and may not come back.

    So even if the fraud amount itself looks “small,” the downstream impact on your payment’s reputation and customer experience can be huge.

    First‑line defenses against carding attacks

    Completely eliminating carding risk is impossible, but basic hardening will make your store a much less attractive target. Many carders simply move on to the next, easier merchant once friction and controls increase.

    Think of defenses in three layers: checkout configuration, traffic and bot controls, and monitoring & operations.

    1. Harden your checkout and payment configuration

    These are “table stakes” settings you should review with your payment provider today:

    • Require AVS and CVV checks
      Turn on Address Verification Service (AVS) and make CVV mandatory. Carders often lack full billing details even if they have card numbers.
      Configure your gateway to decline mismatched AVS or CVV where appropriate for your market.
    • Use 3‑D Secure / SCA where available
      Implement schemes like Verified by Visa or Mastercard SecureCode that require an extra step (e.g., SMS code), shifting liability in many regions, and blocking many automated tests.
    • Set sensible minimum transaction amounts
      Because carding often uses very small test charges, setting a minimum order value just below your cheapest real product makes micro‑tests uneconomical.
      This is especially important for donation or “pay what you want” pages, which are a common target.
    • Limit or re‑think guest checkout in high‑risk flows
      Requiring an account for certain payment flows adds friction for bots and allows you to monitor behavior per user as well as per IP.

    Work with your acquirer or gateway—they often have additional rulesets and tools (velocity checks, risk scoring, Radar‑style tools) that can be toggled or tuned for card testing scenarios.

    2. Control automated traffic before it reaches payment

    Since carding is heavily bot‑driven, controlling automated traffic is a primary defense.

    Baseline controls include:

    • CAPTCHA or similar challenges on payment forms
      CAPTCHA on checkout or high‑risk payment endpoints can block many simple scripts and low‑effort bots while remaining tolerable for real users.
    • Rate limiting on payment attempts
      Enforce velocity limits such as:
      • Max X payment attempts per IP or account per minute/hour
      • Max Y declines per card before blocking further attempts
        Humans rarely attempt dozens of payments in quick succession; bots often do.
    • WAF and bot management in front of your store
      Web Application Firewalls (e.g., Cloudflare and similar services) can detect and throttle known botnets, suspicious user agents, and abusive IP ranges before traffic hits your app or gateway.
      Dedicated ecommerce security platforms analyze behavior patterns and fingerprints to distinguish real shoppers from sophisticated bots.
    • Geo and network‑based rules
      If you do not sell into certain high‑risk regions, consider blocking or challenging traffic from them, especially on checkout.

    These controls dramatically reduce the number of test transactions that ever reach your payment provider.

    3. Monitor, respond, and clean up quickly

    Even with defenses, you should assume you’ll see some attempts—and treat them like incidents.

    • Monitor for early indicators
      Set alerts for:
      • Sudden spikes in declines or low‑value transactions
      • Unusual checkout activity outside normal traffic patterns
      • Clusters of attempts from the same IP, ASN, or device fingerprint
    • Respond fast when you spot carding
      Recommended steps from payment and security experts include:
      • Immediately notify your processor; they can help identify patterns and mitigate risk on their side.
      • Block or challenge suspicious IPs and routes using your WAF, bot tools, or firewall rules.
      • Temporary measures like disabling vulnerable “donation” or “name your price” products, and turning off saved‑card features if they’re being abused.
    • Refund suspicious successful transactions proactively
      Quickly reversing likely test charges reduces the chance they turn into chargebacks, which protects your ratios and reputation.
    • Review and update your rules after each incident
      Post‑attack, tighten fraud rules, update velocity thresholds, and adjust CAPTCHA or geo rules based on what you learned.

    Bringing it all together

    Carding attacks are appealing to criminals precisely because the damage is diffuse and delayed: lots of tiny, automated tests spread across many merchants, with the real hits—chargebacks, higher fees, stricter monitoring—showing up weeks later.

    By recognizing what carding looks like in your own metrics, understanding the downstream impact on your processors and chargeback ratios, and putting solid first‑line defenses in place at checkout and at the edge, you dramatically reduce the odds that your store becomes an easy card‑testing playground.

    Bot Incidents 101: Treating Traffic Spikes as Security and Reliability Events

    Bot traffic spikes shouldn’t just be treated as “weird analytics.” They are security incidents, reliability incidents, and sometimes quiet money leaks—all at once. In many ecommerce verticals, bots already make up a huge share of traffic, and they’re increasingly sophisticated, fast, and hard to distinguish from real shoppers.

    Why bot spikes are not “just noise”

    Several independent reports now estimate that bots account for 40–50% or more of ecommerce traffic, with some datasets showing bots actually outnumber human shoppers in peak seasons. Attack reports have documented triple‑digit growth in carding, scraping, and account takeover attempts over recent years, showing that automated abuse is climbing faster than organic traffic.

    At the same time, analytics experts warn that bot sessions quietly corrupt every metric you rely on—traffic, engagement, conversion, and funnel performance—unless you actively filter them. Bot surges can make you think you have a growth or conversion problem when the real issue is that your reporting is lying to you.

    Treating bot spikes as incidents forces you to ask three critical questions:

    • Security: Is this card testing, credential stuffing, scraping, or another attack?
    • Reliability: Is this traffic spike overloading our servers and slowing or breaking the site?
    • Analytics & marketing: Are we making decisions on polluted data, or even paying for fake clicks?

    What a “bot incident” actually looks like

    Bot activity is normal up to a point—you’ll always see good bots (search crawlers) plus some low‑level noise. A bot incident is when that activity changes suddenly in a way that threatens security, reliability, or data quality.

    Common patterns include:

    • Sudden traffic spike that doesn’t match reality
      • Sessions or requests jump 2–10×, but orders don’t move in sync.
      • Spikes may concentrate on a few endpoints (search, PDPs, cart, specific APIs).
    • Weird geography, devices, or user agents
      • New “top country” that doesn’t match your market, often from data‑center IPs.
      • Unusual user agents, or too many different ones in a short period.
    • Strange behavior in analytics
      • Very short session durations (under a second), single‑page sessions, or bizarrely low/high bounce rates.
      • Conversion rate suddenly tanks—or appears to tank—because bots inflate sessions without buying.
    • Infrastructure and reliability symptoms
      • CPU and I/O spike, cache hit ratios drop, or backend services show elevated error rates and timeouts.
      • Real users start seeing slow pages or 5xx on search or checkout.

    When those patterns appear together, you’re not just looking at noisy analytics—you’re in the middle of a bot incident.

    The main types of ecommerce bot incidents

    Reports on ecommerce bots generally group attacks into a few categories, each with its own signature.

    1. Scraping and content harvesting storms

    Scraper bots aggressively copy your product catalog, pricing, or content.

    • Impact:
      • Infrastructure: extra load on PDPs, category pages, and APIs.
      • Business: competitors can undercut prices or clone your catalog quickly.
      • Analytics: inflated pageviews and sessions with no conversions.

    2. Carding and checkout abuse

    Carding bots test stolen credit cards by running many small transactions through checkout.

    • Impact:
      • Security/fraud: chargebacks, fraud fines, and brand damage.
      • Reliability: spikes on checkout and payment endpoints, triggering timeouts or 5xx.
      • Analytics: lots of failed transactions, bogus “customers,” and distorted funnel numbers.

    3. Credential stuffing and account takeover

    Bots reuse leaked usernames/passwords to break into customer accounts.

    • Impact:
      • Security: account takeovers, fraudulent orders, loyalty point theft.
      • Reliability: login endpoints hammered, rate limits kicked in, some users locked out.
      • Analytics: login error spikes, strange login geos, and weird session patterns.

    4. Inventory hoarding and scalping

    Bots hold or buy up limited stock (tickets, consoles, drops) faster than humans can click.

    • Impact:
      • Revenue/brand: real customers can’t buy, blame you for unfair drops, and churn.
      • Analytics: product pages show huge interest but poor legitimate conversion.
      • Security: ties to resale markets and organized abuse.

    5. AI and crawler overload

    AI crawlers and aggressive SEO bots hit content and APIs more frequently, sometimes overwhelming caches and backends.

    • Impact:
      • Reliability: increased CPU, I/O, and bandwidth lead to slower responses for real users.
      • Analytics: your “traffic growth” is mostly bots, not humans.
      • Costs: higher infra bills with no matching revenue.

    Why bot spikes are both security and reliability events

    The key mindset shift: bot incidents sit at the intersection of security, reliability, and analytics.

    • Security
      • Carding, credential stuffing, and account takeover are clearly abuses.
      • Even “just” scraping can expose pricing strategies, aggregated PII, or proprietary structures.
    • Reliability / performance
      • Bots can trigger what some call an “I/O death spiral”: they consume CPU and I/O until real users see >5s load times and start bouncing.
      • Cache and database systems are especially vulnerable to sustained bot load.
    • Analytics & marketing
      • Bot sessions massively inflate traffic, distort engagement metrics, and drag down apparent conversion, leading to bad decisions.
      • Ad platforms may charge you for fake clicks, polluting audiences and campaigns.

    If you only treat bots as a “security thing,” you’ll miss the performance and revenue angle. If you only see them as “analytics noise,” you’ll miss the fraud and abuse risks.

    Cloudflare analytics spikes

    Detecting bot incidents early: what to monitor

    Bot detection tools and WAFs help, but you still need to design what you watch for. Practical indicators include:

    • Traffic and behavior metrics
      • Sessions or requests per minute by route, segmented by suspected bot vs human.
      • Session duration & pages/session anomalies: very short or oddly uniform patterns.
      • Conversion rate with and without suspected bot traffic.
    • Source & infrastructure signals
      • Geos and ASNs (data‑center IP ranges, unexpected countries jump to the top).
      • User agent fingerprints (toolkits, headless browsers, rotated UAs).
      • CPU, memory, and I/O spikes on web/app servers aligned with unusual traffic patterns.
    • Security‑specific events
      • Login failure bursts, password reset spikes, or unusual 401/403 patterns.
      • Surge in failed payment attempts with small values or identical SKUs.

    Many teams build dashboards that overlay traffic volume, error rates, latency, and conversion so bot incidents pop out visually rather than being buried in separate tools.

    Treating bot spikes as incidents: a simple lifecycle

    You can apply a standard incident lifecycle—detect → triage → escalate → communicate → resolve → review—to bots just like any other outage.

    1) Detect and declare

    When you see the patterns above, declare a bot incident rather than quietly tweaking filters.

    • Create an incident record with time, routes affected, suspected bot type, and early impact.
    • Include analytics screenshots: traffic spike, conversion drop, or error/latency graphs.

    2) Triage: what kind of bot and how bad?

    Ask:

    • Is this clearly malicious (carding, credential stuffing) or “just” abusive scraping?
    • Are real users slowed down, getting errors, or blocked?
    • Are we wasting ad spend or corrupting audiences?

    Set severity based on:

    • Security risk (fraud, account takeover, compliance issues).
    • Performance impact (p95 latency, 5xx on key routes).
    • Business impact (conversion/revenue drop, ad budgets on).

    3) Escalate: bring in security, ops, and marketing

    Bot incidents often require a cross‑functional response:

    • Security/fraud – lead on classifying the attack and long‑term mitigation.
    • Ops/engineering – protect infrastructure, adjust rate limits, tune WAF, and caching.
    • Analytics/marketing – filter bots from reports, adjust campaigns, and protect ROAS.

    Paging and incident‑response tools (PagerDuty, etc.) are useful here because you can define bot‑related alert rules and escalation paths just like for other production incidents.

    4) Communicate: internally and sometimes externally

    Internal comms:

    • Brief leadership and marketing: “We are seeing a bot attack affecting X routes; real users are currently Y% impacted; here’s what we’re doing.”
    • Coordinate with support so they know what to tell customers.

    External comms (for severe cases):

    • If real customers can’t log in or check out, treat it like any other outage: short status updates, possible banners, and reassurance that fraud is being addressed.

    5) Resolve: contain first, then clean up

    Mitigation tactics depend on incident type, but common steps include:

    • Tightening WAF and bot rules, especially on search, PDPs, and checkout.
    • Adding or adjusting rate limits on critical endpoints.
    • Blocking or challenging certain IPs, ASNs, or geos temporarily (with caution).
    • Adjusting analytics filters and GA4 bot filters/segments so that reporting is usable again.

    As a Reddit ecommerce discussion notes, a combination of good WAF/bot protection (for example, via Cloudflare), targeted rate limiting, and filtered analytics usually gives the fastest relief.

    6) Review: learn, quantify, and harden

    After a bot incident, do a short postmortem:

    • How much real traffic and revenue were impacted?
    • How much ad spend went to bots?
    • Which controls worked, and which didn’t?
    • What SLOs or alerts should we add or tighten (for example, bot‑filtered conversion SLOs)?

    Update runbooks with concrete playbooks: “If we see pattern X on route Y, apply mitigation Z.”

    Long‑term defenses: from one‑off incidents to durable posture

    Bot‑incident handling gets easier when you invest in prevention and observability up front.

    Key longer‑term steps:

    • Deploy robust bot detection/WAF tooling that can distinguish good bots, bad bots, and humans, and adapt as attacks change.
    • Segment and filter analytics so every dashboard has a “human only” view.
    • Set SLOs and alerts that account for bots, such as conversion stability excluding suspected bots, and latency/error SLOs on key routes even under noisy conditions.
    • Coordinate with marketing to monitor bot impact on ad clicks, pixels, and audience building.

    When you treat bot spikes as first‑class incidents—complete with detection, triage, escalation, communication, resolution, and review—you stop seeing them as background noise and start treating them as what they are: security and reliability events that can quietly erode your margin, your data, and your customers’ trust.