How to Install OpenCart 4.1: Step-by-Step Guide With the Three Security Steps Most Tutorials Skip
A step-by-step OpenCart 4.1.0.4 installation, from the server requirements and database to the installer screens, followed by the three security steps OpenCart asks for afterwards: deleting install/, moving storage outside the web root and renaming the admin folder.
 Rupak NepaliPublished Nov 15, 2026
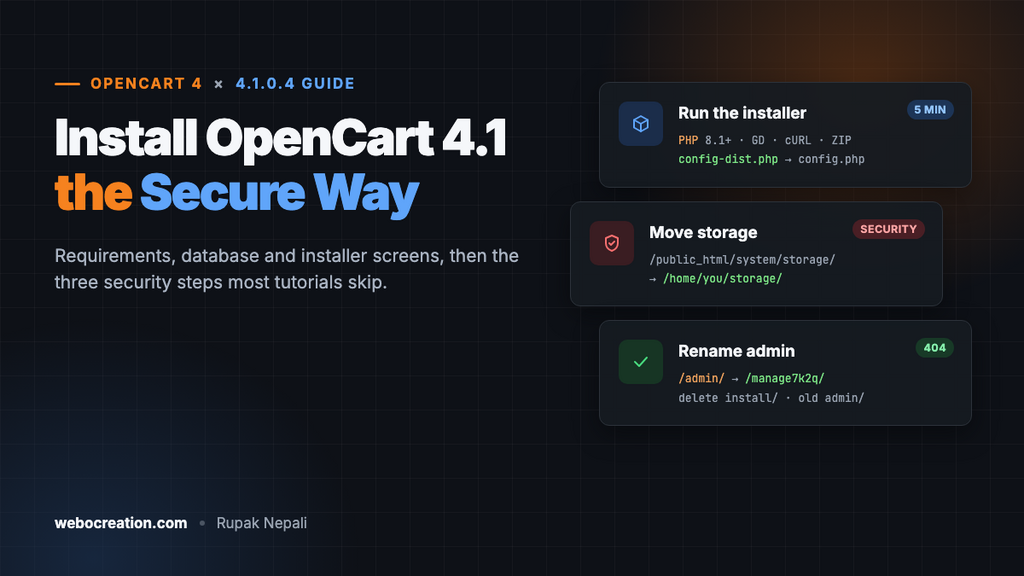
OpenCart’s installer takes about five minutes. What most tutorials stop short of is the screen you see straight after: an Important Security Notification asking you to delete the install folder, move the storage folder out of the web root and rename the admin folder. Skipping those leaves a new store more exposed than it needs to be.
This guide installs OpenCart 4.1.0.4, the current release, from the official download, then works through all three security steps. Every screenshot comes from a fresh install we ran for this article.
What you need
| Requirement | OpenCart 4.1 |
|---|---|
| PHP | 8.1 or newer (8.3 recommended) |
| PHP extensions | mysqli or PDO, GD, cURL, OpenSSL, ZLIB, ZIP |
| PHP settings | File uploads on, session auto start off |
| Database | MySQL 5.7+ or MariaDB, with a database and a user of its own |
| Web server | Apache (with mod_rewrite for SEO URLs) or Nginx |
The installer checks all of this for you on its second screen, so you’ll know before anything is written.
Step 1: Download OpenCart 4.1
Download opencart-4.1.0.4.zip from the OpenCart releases page on GitHub (it’s also linked from opencart.com). The zip contains documentation and developer files at the top level; the store itself is the upload/ folder inside it.
Step 2: Upload the files
Upload the contents of upload/ to your web root (public_html/ on cPanel, httpdocs/ on Plesk), or to a subfolder such as public_html/shop/ if the store won’t live at the domain’s root. With SSH, it’s quicker to upload the zip and unpack it on the server:
cd ~
unzip opencart-4.1.0.4.zip -d opencart-4.1.0.4
cp -r opencart-4.1.0.4/upload/. ~/public_html/
Step 3: Create the config files
OpenCart ships two templates for its configuration files. Copy them to their real names; the installer writes your settings into them:
cd ~/public_html
cp config-dist.php config.php
cp admin/config-dist.php admin/config.php
Both files must be writable by the web server during installation. On most shared hosting they already are; otherwise set them to 664 (or 666 if PHP runs as a different user) and tighten them again afterwards.
Step 4: Create the database
In cPanel, use MySQL Databases; on a VPS, the MySQL command line. Create an empty database and a user that can only access it. Don’t use the database root user: if the store is ever compromised, that user’s password is in config.php.
CREATE DATABASE shop CHARACTER SET utf8mb4 COLLATE utf8mb4_general_ci;
CREATE USER 'shop'@'localhost' IDENTIFIED BY 'a-long-random-password';
GRANT ALL PRIVILEGES ON shop.* TO 'shop'@'localhost';
FLUSH PRIVILEGES;
Step 5: Run the installer
Open your domain in a browser. With no configuration in place, OpenCart redirects you to /install/.
License
The first screen is the GPL license and a language menu. Click Continue.
Pre-installation check
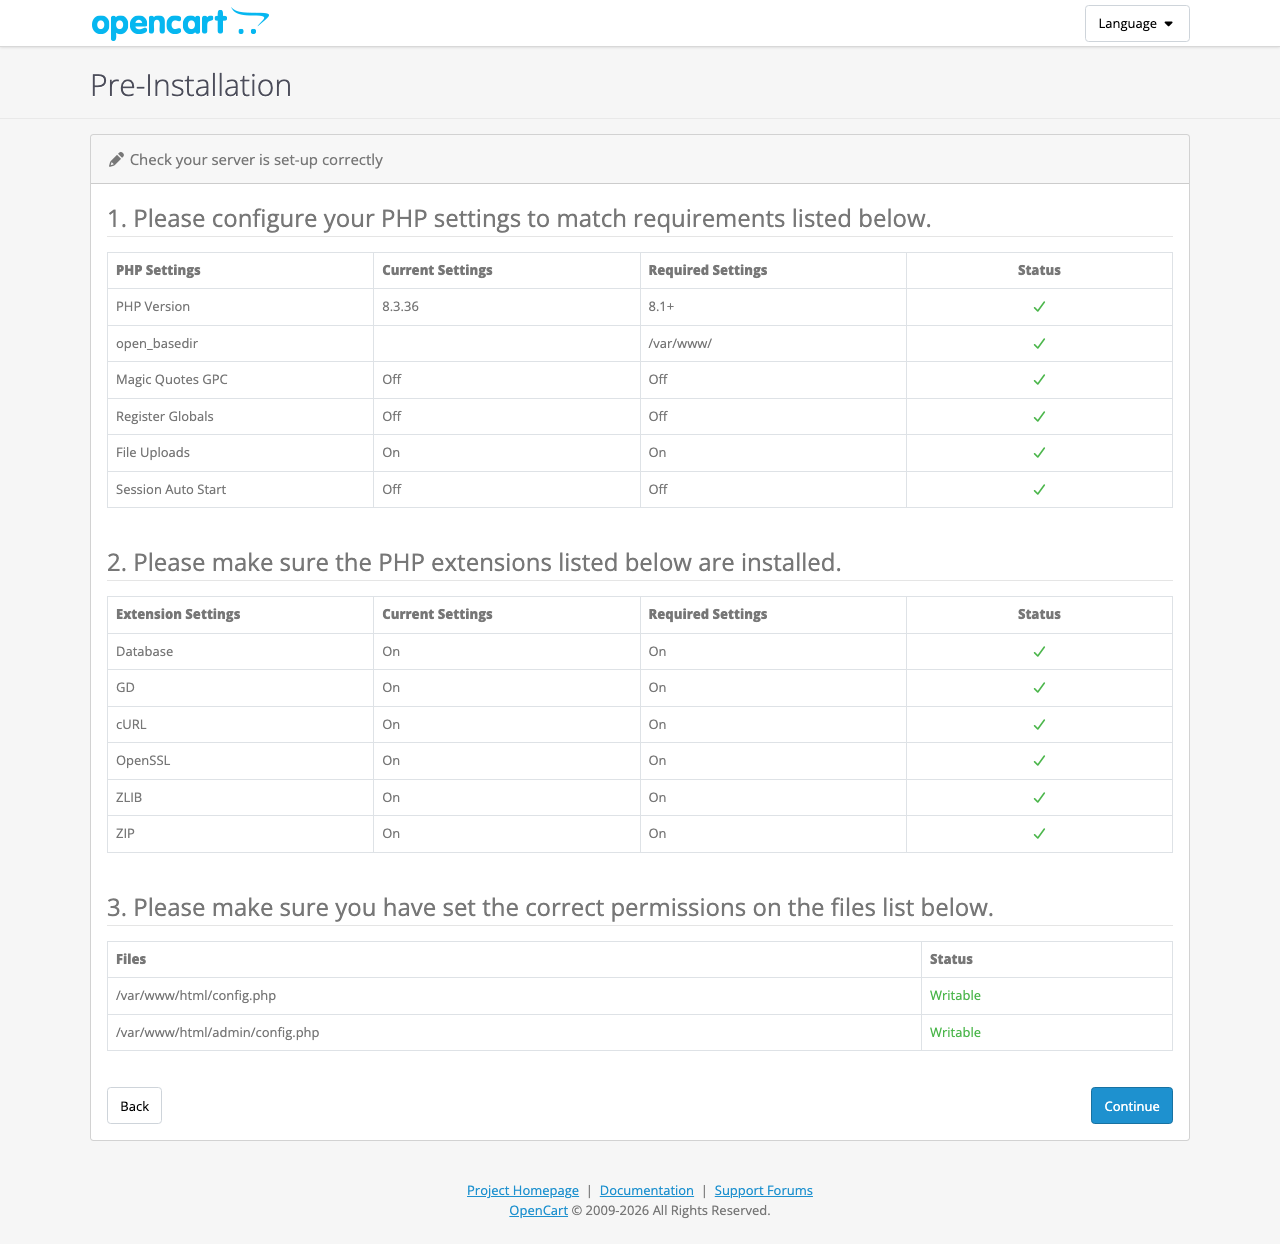
This screen checks the PHP version, PHP settings, required extensions and whether the two config files are writable. Fix anything red (your host’s PHP settings page usually covers it), reload, and continue.
Database and admin account
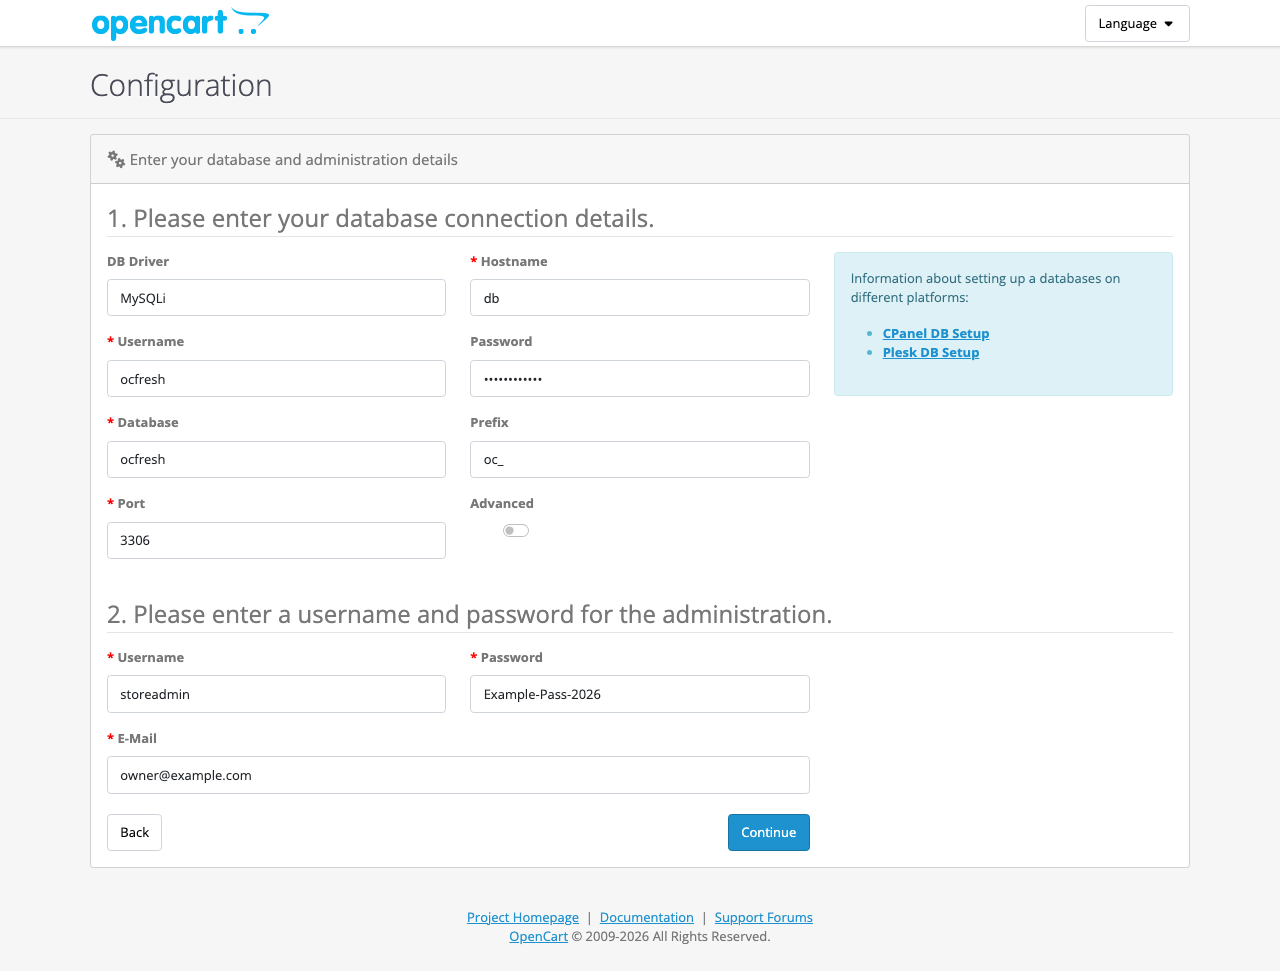
| Field | What to enter |
|---|---|
| DB Driver | MySQLi (the default) unless your host says otherwise |
| Hostname | Usually localhost. Some hosts and Docker setups use a separate name, such as db |
| Username, Password, Database | From step 4 |
| Port | 3306, unless your host uses another |
| Prefix | oc_ is fine. Change it if several applications share one database (lowercase letters, numbers and underscores only) |
| Advanced | Only for databases that need SSL certificates (some managed cloud databases) |
| Username, Password, E-Mail (administration) | Your first admin login. Avoid admin as the username, and use a long password |
Click Continue. The installer creates the tables and writes both config files. It takes a few seconds.
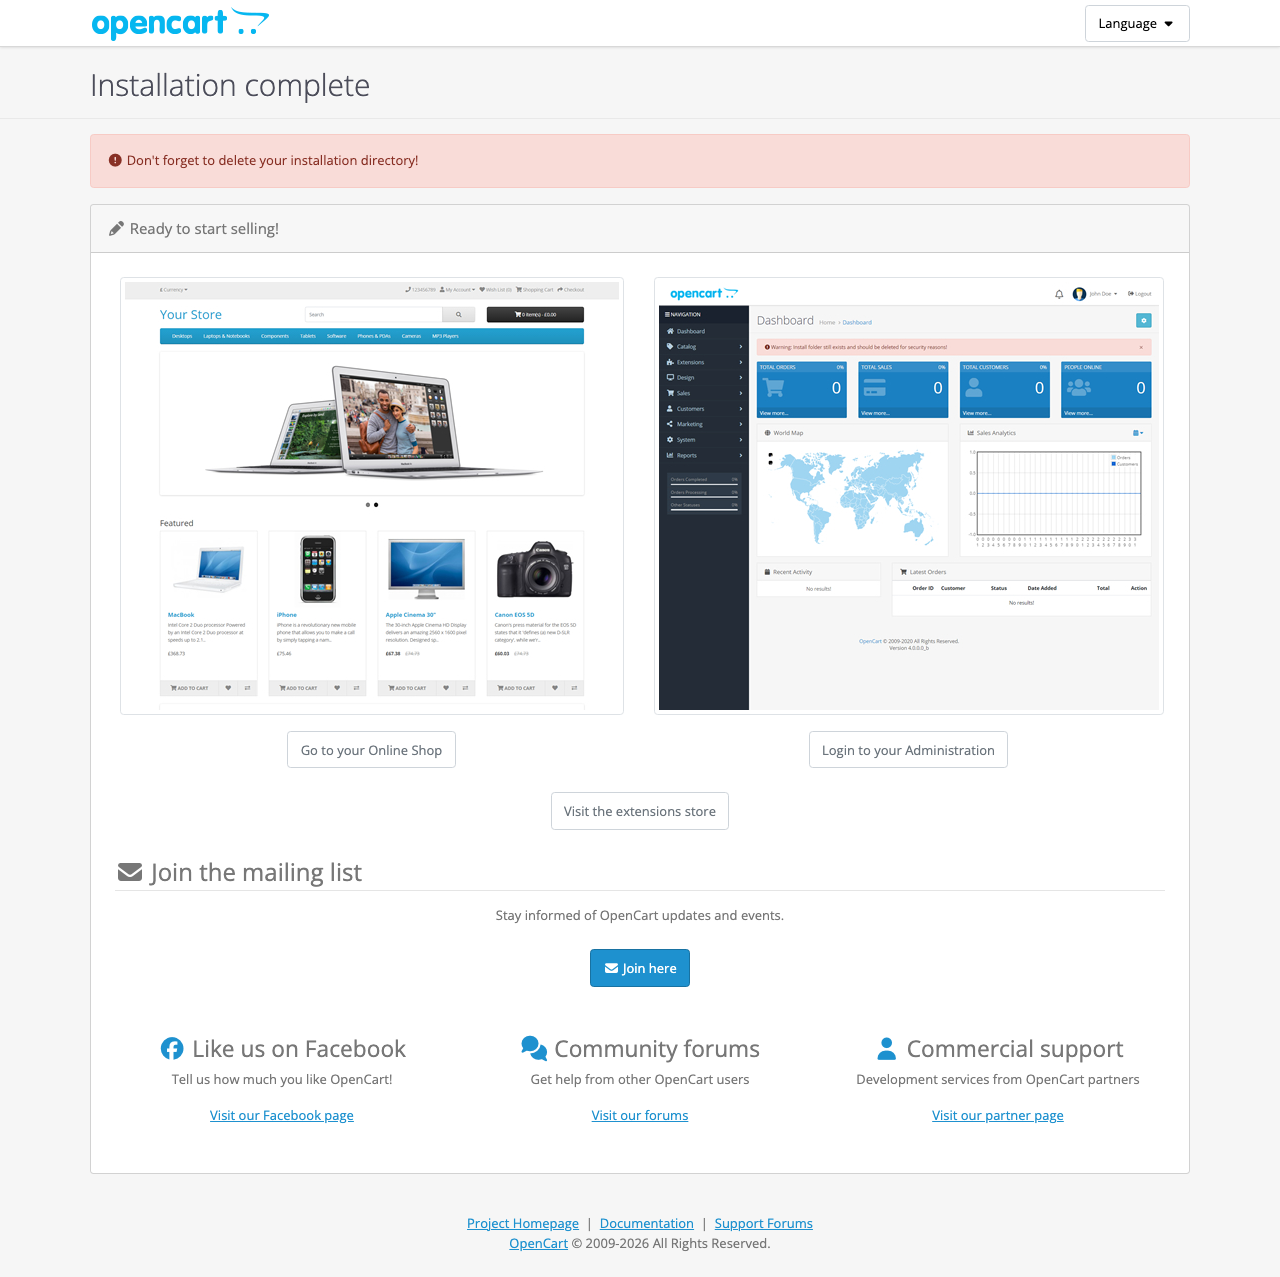
Step 6: The three security steps
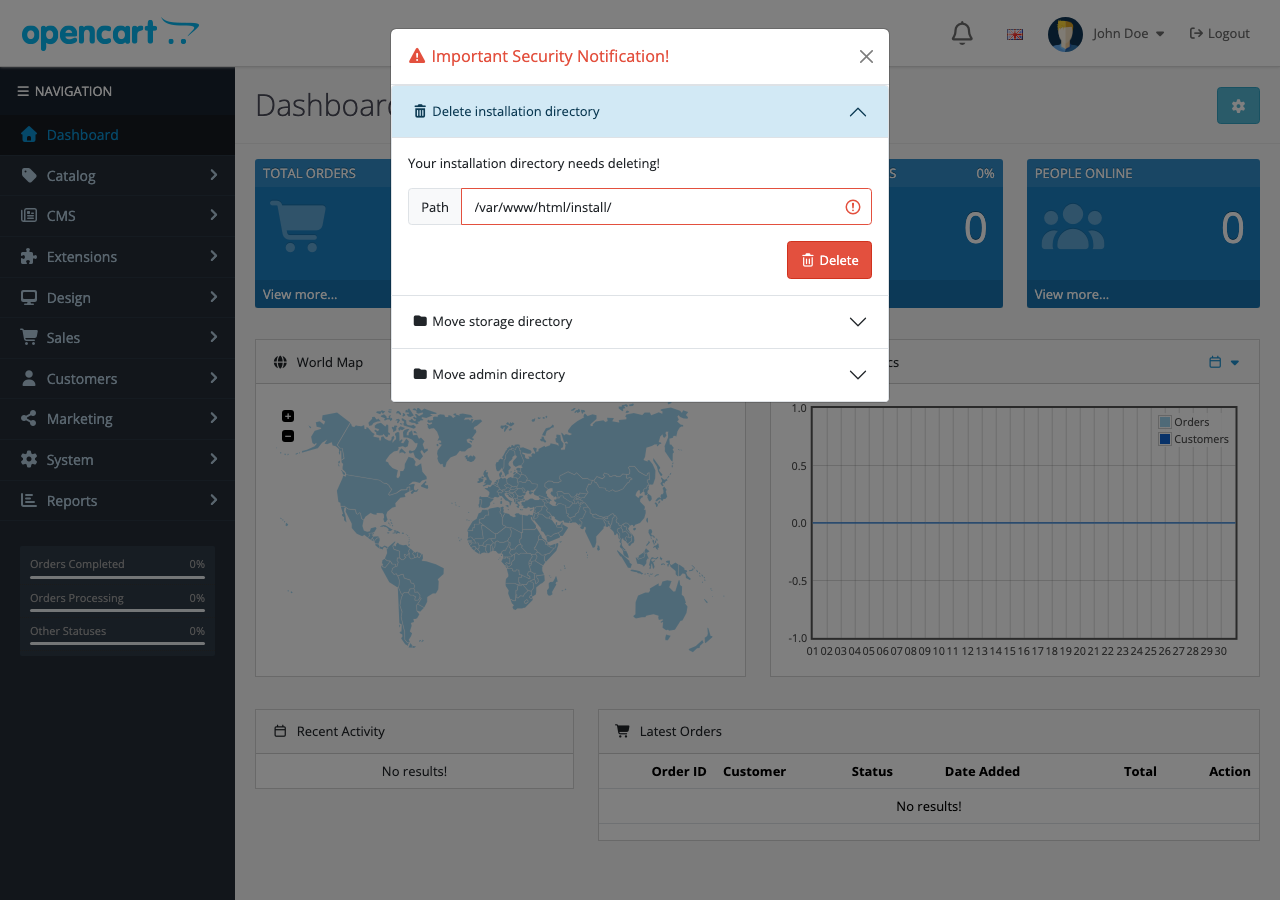
Log in to the admin at https://your-domain/admin/. The dashboard opens with this dialog:
1. Delete the installation directory
While /install/ exists, anyone can open it. Click Delete in the first panel, or remove the folder over FTP or SSH (rm -rf ~/public_html/install).
2. Move the storage directory
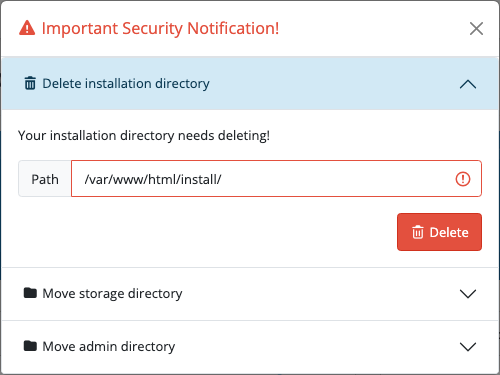
The storage folder holds sessions, cache, logs, customer uploads, paid downloads and the Composer libraries OpenCart runs on. Inside the web root, a misconfigured server can serve those files to anyone who guesses a path. Moving it one level up puts it out of reach.
Choose the folder above your web root (for /home/you/public_html/, that’s /home/you/), keep the name storage or add a suffix (the name must start with storage), and click Move. In our test, OpenCart moved 862 files in batches of 200, updated DIR_STORAGE in both config files and removed the old folder:
// config.php and admin/config.php, after the move
define('DIR_STORAGE', '/var/www/storage/');
If you get “permission denied”, the web server user can’t write to the parent folder. Ask your host, or create the folder yourself over SSH, move the contents with mv, and change DIR_STORAGE in both files by hand.
3. Rename the admin folder
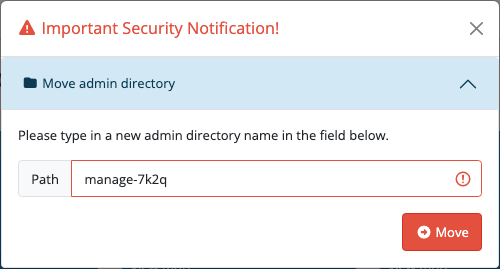
Bots try /admin/ on every OpenCart site they find. A different folder name won’t stop a determined attacker, but it removes you from that automated noise. Enter a new name and click Move. Three things we noticed when testing:
- Only letters and numbers survive. We entered
manage-7k2q; OpenCart createdmanage7k2q, silently dropping the hyphen. Note the name it redirects you to. - It copies first. OpenCart copies all 2,360 admin files to the new folder, updates the config and sends you to the new login page. The old
admin/folder still exists at that point. - Then delete the old folder. Log in at the new address and the dialog shows one more panel, Delete previous admin directory. Click it; the old
/admin/then returns a 404.
Bookmark the new admin URL. Names such as admin, catalog, system and image are refused because they’d clash with OpenCart’s own folders.
Step 7: Finish the basics
- Lock the config files: set
config.phpandadmin/config.phpback to644(or444). - Store details: System → Settings → edit your store: name, address, email, telephone, logo, time zone.
- HTTPS: install a certificate (most hosts include a free one), then make sure both config files use
https://URLs. Our guide to SSL certificates on OpenCart covers it. - Mail: set up SMTP in System → Settings → Mail so order emails arrive. See Gmail SMTP setup.
- Two-factor login: once mail works, turn on admin 2FA. Our users, permissions and 2FA guide walks through it.
- Remove the demo data: delete the sample products, categories and banners before you add your own.
- Error display off: in
system/config/default.php, set$_['error_display'] = false;for a live store, so PHP warnings aren’t shown to customers.
Troubleshooting
| Problem | Fix |
|---|---|
Blank page or HTTP 500 at /install/ | Usually the PHP version. Check it’s 8.1 or newer in your hosting panel |
| config.php “Unwritable” on the pre-installation screen | Copy the config-dist.php files to config.php (step 3) and make them writable |
| “Error: Could not connect to the database…” | Wrong hostname, username, password or database name. Some hosts prefix both user and database names with your account name |
| “Error: Could not write to config.php…” | The config files exist but aren’t writable by the web server. Fix their permissions and click Continue again |
| Stylesheets missing, links point to the wrong address | The URLs in the two config files don’t match the address you’re using (http vs https, www vs none) |
Next steps: add extensions (how to install extensions in OpenCart 4), arrange modules with layouts, and set up automated offsite backups before your first order.

Rupak Nepali is a web developer, manage Webocreation website and the author of six books:
Getting Started with OpenCart Module Development (Packt, 2013),
OpenCart Theme and Module Development (Packt, 2015),
OpenCart 4: Dev Guide for Themes & Extensions (2024),
OpenCart 4: User Manual (2025),
Cloudflare for the Enterprise Website (2026) and
The Technical Web Guide for Marketers (2026).
Rupak has built OpenCart stores and extensions since 2010, has published more than 600 tutorials on Webocreation, and shares free OpenCart extensions on GitHub.
Find Rupak on
GitHub | Amazon | LinkedIn | X | YouTube.