Bug Bounty Methodology: How to Find Bugs That Get Paid
Successful bug hunters are not lucky. They read the policy, pick the right targets, understand the app deeply, and write reports that triagers love. Here is a repeatable methodology.
 Rupak NepaliPublished Nov 19, 2026
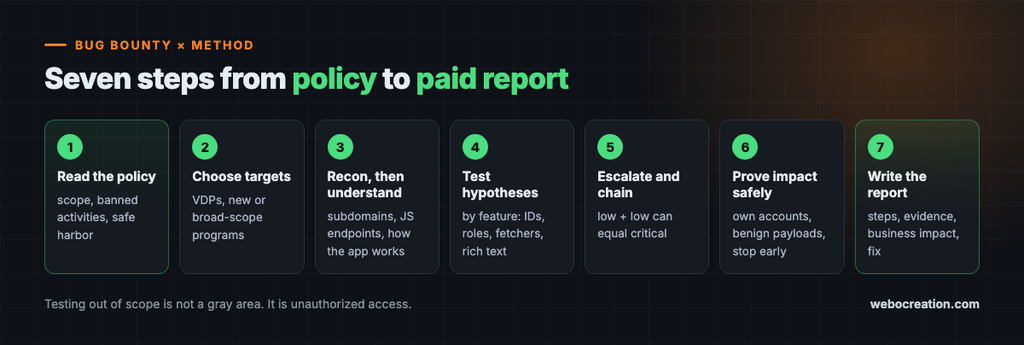
Bug bounty programs pay independent researchers to find and report vulnerabilities. Vulnerability disclosure programs (VDPs) offer a safe, legal channel to report them, usually without payment. Both give you something essential: permission.
Plenty of people sign up, run a scanner against a famous target, find nothing but duplicates, and quit. The hunters who succeed treat it as a craft with a method. Here is that method.
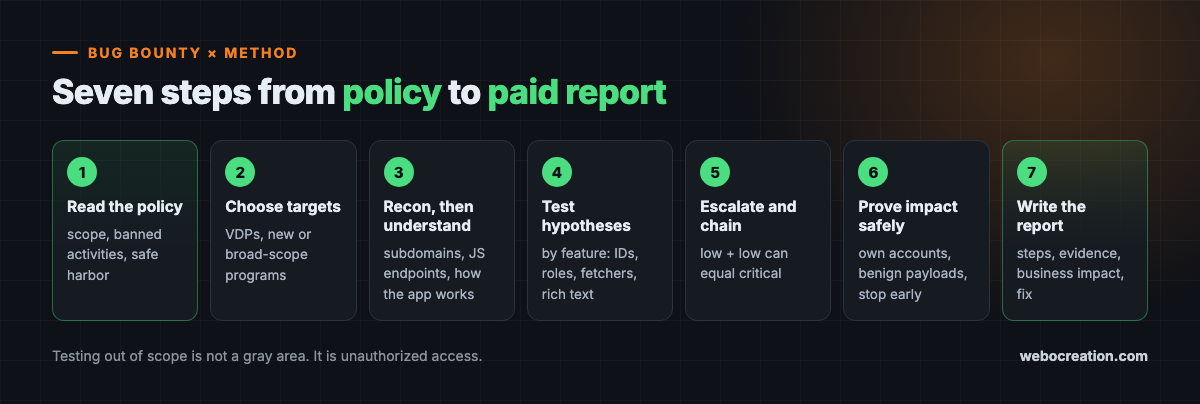
Step 1: Read the policy. Really read it.
Before you send a single request, read the program’s policy end to end. Note:
- Scope: which domains, apps, and APIs are in, and which are explicitly out.
- Prohibited activities: many programs ban denial of service, social engineering, automated scanning above a rate limit, or accessing other users’ data.
- Safe harbor: the program’s commitment not to pursue legal action for good-faith research within the rules.
- Reward and severity guidelines: what the program considers high impact.
Testing out of scope is not a gray area. It is unauthorized access.
Step 2: Choose targets wisely
Your first program should not be the one with ten thousand researchers. Better options for beginners:
- VDPs, which see less competition and are great for building skills and reputation.
- Newer programs, before the easy bugs are gone.
- Broad-scope programs (like
*.webocreation.com/), where recon can uncover assets others missed.
Step 3: Recon, then understanding
Recon finds the attack surface: subdomains through certificate transparency logs and passive DNS, live hosts, historical URLs, JavaScript files that reveal API endpoints, and forgotten admin or staging sites.
But recon is only the start. The biggest edge comes from understanding the application better than other hunters do. Use it like a real customer. What are the roles? What is valuable? How do invitations, billing, sharing, and exports work? Where does data cross between users or tenants?
Step 4: Test hypotheses by feature type
Instead of firing payloads randomly, form hypotheses based on what each feature does:
| Feature | Questions to ask |
|---|---|
| Object IDs in URLs or APIs | Can I access another user’s object? (IDOR/BOLA) |
| Roles and admin functions | Can a low-privilege user call admin endpoints? |
| URL fetchers, webhooks, imports | Can I reach internal addresses? (SSRF) |
| Rich text, Markdown, file names | Can I get script to execute? (XSS) |
| Search, filters, sorting | Is input reaching a query? (Injection) |
| Login, reset, MFA, OAuth | Can I bypass, skip, or take over? |
| Coupons, credits, limits | Can I race it or replay it? (Logic flaws) |
| AI chat or agent features | Can content I control steer the model’s actions? |
Step 5: Escalate and chain
A single low-severity bug can become critical when chained. An open redirect plus a lax OAuth redirect check can mean account takeover. Self-XSS plus login CSRF can become real XSS. A minor information leak may reveal the ID you need for an IDOR. Always ask: what is the worst realistic outcome, and what else would make it possible?
Step 6: Prove impact responsibly
Demonstrate impact without causing harm:
- Use your own test accounts to show cross-account access. Do not view, change, or download real users’ data.
- Use benign payloads, like
alert(document.domain)or a harmless string, not destructive commands. - Stop once impact is clear. You do not need to dump a database to prove SQL injection.
Step 7: Write a report triagers love
A great report gets triaged faster, rated more fairly, and paid sooner. Include:
- A clear title naming the bug class, location, and impact.
- A short summary of what is wrong and why it matters.
- Exact reproduction steps that a triager can follow without guessing.
- Evidence: requests, responses, and screenshots.
- Impact explained in business terms.
- An honest severity estimate. Inflating severity erodes trust.
- A suggested fix.
Using AI the right way
AI assistants are genuinely useful for bug hunting: explaining unfamiliar code or frameworks, brainstorming test cases, writing small scripts, and polishing report language. But every claim in your report must be something you personally verified. Programs are increasingly flooded with AI-generated reports describing bugs that do not exist, and submitting one is a fast way to lose reputation or be banned.
Coordinated disclosure
Do not publish details until the program allows it, usually after the fix ships. Many programs support public disclosure of resolved reports, and well-written public write-ups are one of the best ways to build a reputation.
Key takeaways
- Read the policy and stay strictly in scope. Permission is everything.
- Start with VDPs, new programs, or broad-scope targets.
- Understand the app deeply and test hypotheses feature by feature.
- Chain bugs to show real impact, but prove it using only your own accounts and benign payloads.
- Write clear, reproducible, honest reports, and verify everything AI helps you produce.
Go deeper with the book
This article is adapted from Web Security in the Age of AI: Attacks, Defenses, Tools, and Bug Hunting for Modern Web Applications and LLM Systems by Rupak (see Chapter 20, “Bug Bounty Methodology and Bug Bounty Programs”).
The book pairs every attack with its fix across 27 chapters, from core vulnerabilities and professional tools to bug bounty hunting, attacking and defending LLM applications, and lessons from real breaches. It includes hands-on labs, review questions, a full testing checklist, a security headers reference, and an LLM red teaming playbook.
Related reading
- Burp Suite vs OWASP ZAP: Which Web Testing Proxy Should You Use?
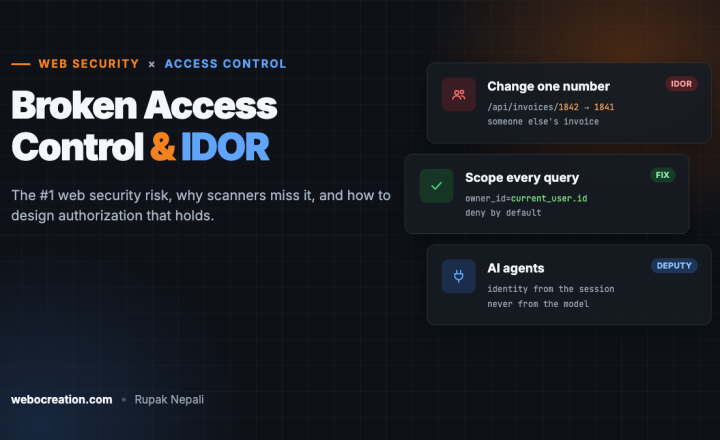
- Broken Access Control and IDOR: The #1 Web Security Risk

Rupak Nepali is a web developer, manage Webocreation website and the author of six books:
Getting Started with OpenCart Module Development (Packt, 2013),
OpenCart Theme and Module Development (Packt, 2015),
OpenCart 4: Dev Guide for Themes & Extensions (2024),
OpenCart 4: User Manual (2025),
Cloudflare for the Enterprise Website (2026) and
The Technical Web Guide for Marketers (2026).
Rupak has built OpenCart stores and extensions since 2010, has published more than 600 tutorials on Webocreation, and shares free OpenCart extensions on GitHub.
Find Rupak on
GitHub | Amazon | LinkedIn | X | YouTube.