

You always have a choice, Options in OpenCart allow you to provide customers with selectable choices for your products. These could include variations such as size, color, or customizations like engraving. Managing options effectively ensures your customers can personalize their purchases while keeping your store organized.
Accessing Options Management
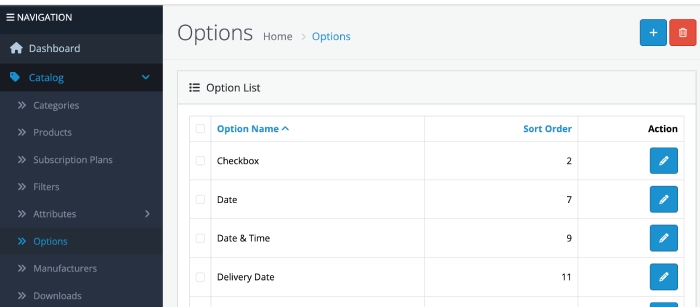
- Log in to the Admin Panel.
- Navigate to Catalog > Options from the main menu.
- This will open the Options List page, where you can view, add, edit, or delete product options.
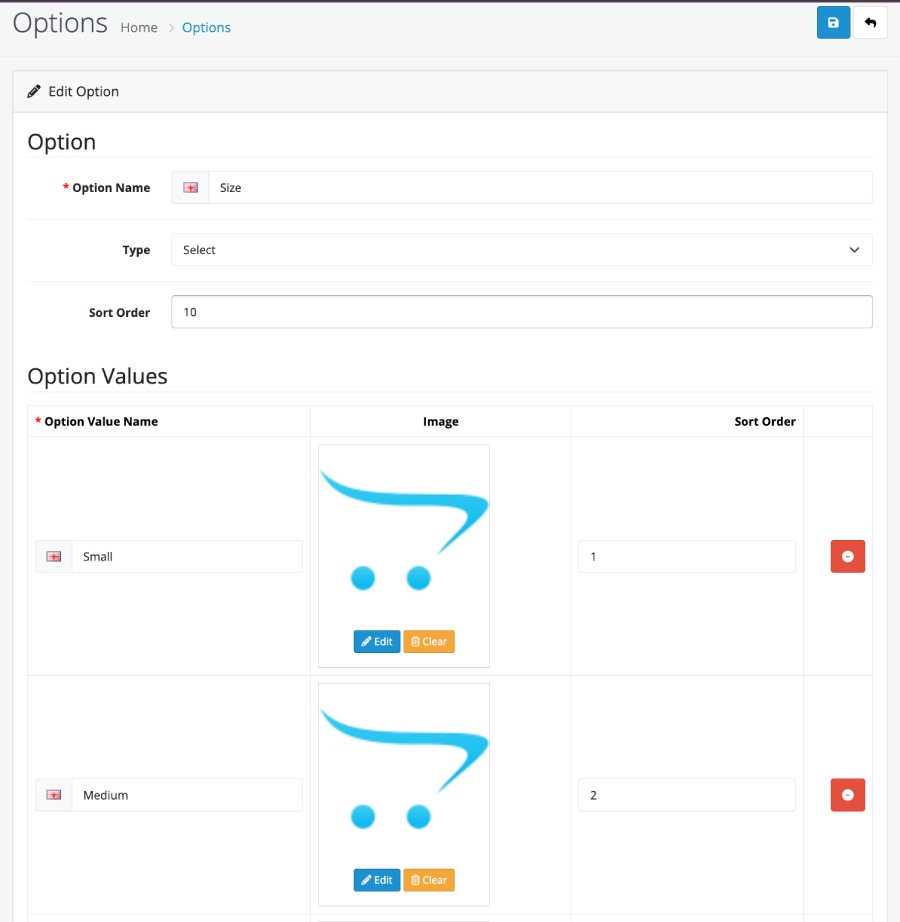
Adding a New Option
- Click on the “Add New” (+) button on the top right.
- Fill out the following fields:
- Option Name: Enter a descriptive name (e.g., “Size”, “Color”).
- Option Type: Select the type of option from the dropdown. Types include:
OpenCart 4 supports several types of product options:- Select Option: Dropdown menu for selecting variations
– Ideal for choosing sizes, colors, or configurations.
– Can impact product price, weight, and stock
Example:
T-Shirt Size: Small, Medium, Large
Color: Red, Blue, Green - Radio Option: Mutually exclusive selection
– Good for simple choices with few alternatives
– Displays as radio buttons
Example:
Warranty: Standard (Free), Extended (+$29.99)
Gift Wrapping: Yes, No - Checkbox Option: Multiple selections allowed
– Perfect for additional features or add-ons
Example:
Computer Accessories: Keyboard (+$50), Mouse (+$30), Extended Warranty (+$99) - Text Option: Free-form text input
– Useful for personalization
Example:
Engraving message
Special instructions
Custom text on products - Textarea Option: Longer text input
– Ideal for detailed customizations
Example:
Gift card message
Product customization details
Special requests - File Option: Allow customers to upload files
– Great for custom design services
Example:
Logo upload for custom printing
Design file for personalized products
Supporting documentation - Date Option: Select specific dates
– Useful for bookings, reservations
Example:
Event date selection
Delivery date preference
Service scheduling
- Select Option: Dropdown menu for selecting variations
- Sort Order: Enter the position this option will appear relative to others.
- Add Option Values (if applicable):
- Click the “Add Option Value” button.
- Enter the value name (e.g., “Small”, “Medium”).
- Set a sort order for the values.
- Click Save to create the new option.
Editing an Existing Option
- From the Options List, locate the option you want to edit.
- Click the Edit button (pencil icon) next to the option.
- Make the necessary changes to the option name, type, values, or sort order.
- Click Save to apply your changes.
Deleting an Option
- From the Options List, select the checkbox next to the option(s) you wish to delete.
- Click the Delete button at the top.
- Confirm the deletion when prompted.
Note: Deleting an option will remove it from all products that use it. Be cautious when deleting options.
Assigning Options to Products
- Navigate to Catalog > Products.
- Locate the product you want to assign options to and click Edit.
- Go to the Options tab in the product form.
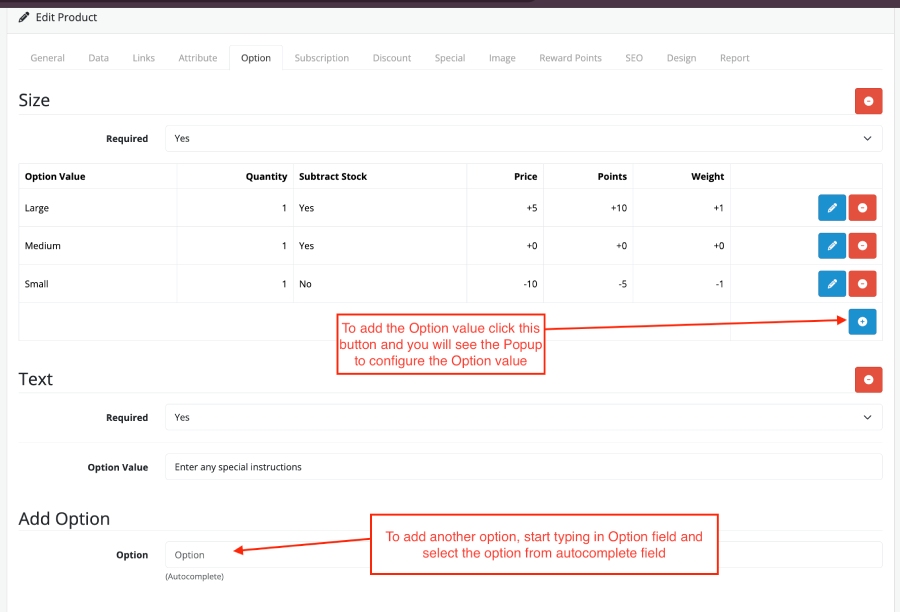
- Start typing the name of an option in the Option Name field, then select it from the dropdown.
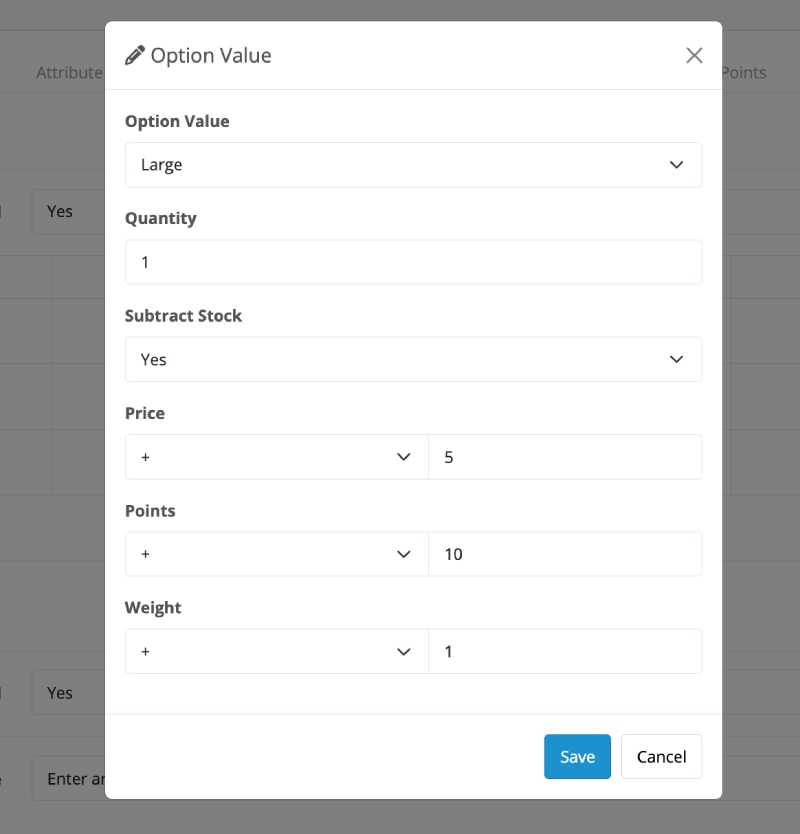
- Configure the option for the product:
- Set Option Values: Select applicable values (e.g., “Red”, “Blue”).
- Quantity: Specify the stock for each option value.
- Subtract Stock: Indicate whether stock for the option should decrease upon purchase.
- Price: Add or subtract an amount for the option value.
- Points: Add or subtract loyalty points.
- Weight: Add or subtract weight for shipping calculations.
- Repeat for additional options if needed.
- Click Save to update the product.
Real-World Examples
1. Custom T-Shirt Store
- Size (Select)
- Color (Select)
- Custom Text (Text)
- Upload Design (File)
2. Electronics Retailer
- Storage Capacity (Radio)
- Extended Warranty (Checkbox)
- Installation Service (Select)
3. Personalized Gifts
- Engraving Message (Textarea)
- Gift Wrapping (Checkbox)
- Delivery Date (Date)
Best Practices for Options Management
- Use Descriptive Names: Make option names clear and customer-friendly.
- Group Related Options: Keep similar options together for better organization.
- Limit Option Types: Avoid overloading products with too many options to reduce customer confusion.
- Test on the Frontend: After adding options, check the product page to ensure they display and function correctly.
- Keep Stock Updated: Use the subtract stock feature to manage inventory for specific option values.
Common Issues and Troubleshooting
- Options Not Displaying: Ensure the option is assigned to the product and saved correctly.
- Incorrect Pricing: Double-check the price adjustments for each option value.
- Duplicate Options: Avoid creating duplicate options by checking the list before adding new ones.
By effectively managing options in OpenCart, you can enhance the shopping experience for your customers and improve operational efficiency. For further assistance, refer to the OpenCart documentation or community forums.