Add new module position in opencart 3 and Opencart 2

0

Opencart tips and tricks we are showing you how to add a new module position in Opencart. Here we are showing an example of opencart version 2 but it is similar for Opencart version 3, we already created OCMOD and VQmod for the full width so that we can add a full-width module position in opencart.

Our requirement is to show a banner on the product page just below add to cart button and banner should be manageable from the admin. So, we found one easiest way to do it, by creating a new module position and use the Banner module.

You can download the free module for OpenCart 3 with OCMOD at:

For my easiness we did not use vQmod for now, maybe we will launch for the next tutorial. If you want to add a new module position for OpenCart Version 2.3.0.2 then click the following link:

Admin Section changes to be done to add a new position

Open file admin/view/template/module/banner.tpl and find following code:

<?php if ($module['position'] == 'column_right') { ?>
<option value="column_right" selected="selected"><?php echo $text_column_right; ?></option>
<?php } else { ?>
<option value="column_right"><?php echo $text_column_right; ?></option>
<?php } ?>

Just below it adds the following code, we are quite lazy so we have not to take languages into account 🙂

<?php if ($module['position'] == 'product_banner') { ?>
<option value="product_banner" selected="selected">Product Banner</option>
<?php } else { ?>
<option value="product_banner">Product Banner</option>
<?php } ?>

After adding the code, save the file.

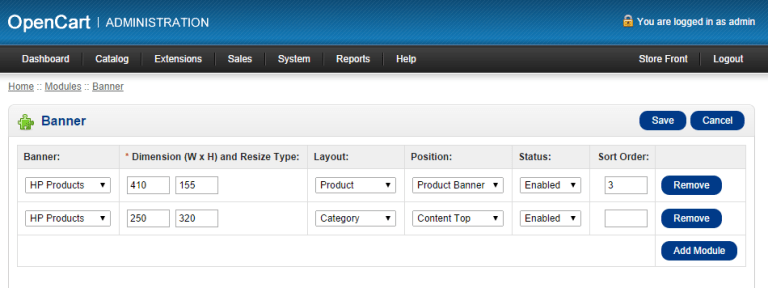
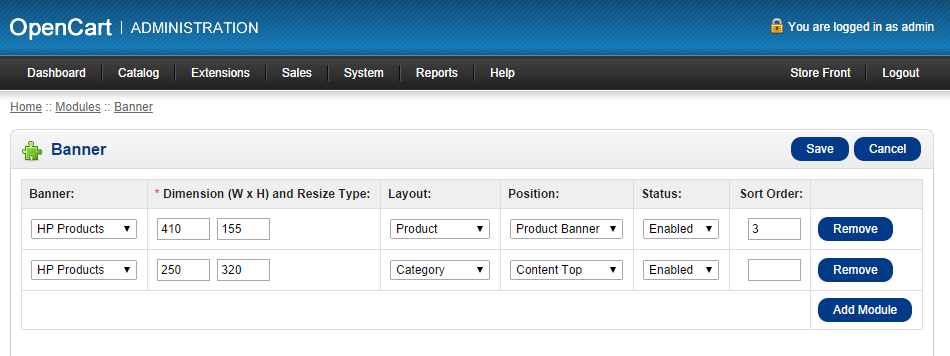
This code is to add the new position named Product Banner and it will be shown in the banner module. Now go to Admin Dashboard >> Extensions Menu >>Module >> then edit the Banner module. And you see the already inserted value and see in the position select box you will see Product Banner.

add_new_position_in_Opencart

When you click the Add Module button then it does not show options to select the Product Banner, let’s add it.

In the opened admin/view/template/module/banner.tpl find the following lines of code:

html += '<option value="column_right"><?php echo $text_column_right; ?></option>';

Then just below it adds the following code:

html += '<option value="product_banner">Product Banner</option>';

Save the file.

Now refresh the admin section and click Add Module button and you will see Product Banner in the Position select box.

Now add the new position and click save button

Doing this we completed the admin coding and settings.

Frontend or Catalog works to add a new module position

We are showing the “Product Banner” position module on the product page.

Open file catalog/controller/product/product.php and find the following code:

$this->children = array(
'common/column_left',
'common/column_right',
'common/content_top',
'common/content_bottom',
'common/footer',
'common/header'
);

The code above provides a list of the module’s position. So we have to add a “Product Banner” position in it. So add product banner position in above code by adding common/content_bottom and it will look like the below code:

$this->children = array(
'common/column_left',
'common/column_right',
'common/content_top',
'common/product_banner',
'common/content_bottom',
'common/footer',
'common/header'
);

Now we have to make the route common/product_banner. So go to catalog/controller/common and copy column_left.php and paste it and rename to product_banner.php and open it and change the class name to following:

class ControllerCommonProductBanner extends Controller {

Then, find “column_left” and replace it with “product_banner”. We have replaced it in four places.

One at the following code:

if ($module['layout_id'] == $layout_id && $module['position'] == 'product_banner' && $module['status']) {
$module_data[] = array(
'code'=> $extension['code'],
'setting'=> $module,
'sort_order' => $module['sort_order']
);
}

And the other three at the following code:

if (file_exists(DIR_TEMPLATE . $this->config->get('config_template') . '/template/common/product_banner.tpl')) {
$this->template = $this->config->get('config_template') . '/template/common/product_banner.tpl';
} else {
$this->template = 'default/template/common/product_banner.tpl';
}

After replacing click save

Now we have to create product_banner.tpl, so go to catalog/view/theme/default/template/common and copy column_left.tpl and paste it and rename it to product_banner.tpl and open it. Remove those codes and add the following code:

<?php if ($modules) { ?>
<?php foreach ($modules as $module) { ?>
<?php echo $module; ?>
<?php } ?>
<?php } ?>

Save file.

Now our last step is to show the module on the product page.

So open catalog/view/theme/default/template/product/product.tpl and find the following code:

<?php if ($review_status) { ?>

And just above this code add the <?php echo $product_banner; ?> and save the file and you are ready to go.

Opencart 2 improvement: SEO of home page remove index.php?route=common/home

Today we found one Vqmod which removes all the index.php?route=common/home and linked to the URL only. It will help to improve the SEO on the home page as well as it will help to remove multiple links to the home page as per the SEO showing the same content from multiple URLs is not good.

For OpenCart 2

  • Download the Vqmod file
  • Upload jg_no_common_home.xml into the Vqmod/XML folder and all are set. If you did not find the Vqmod folder then you have to install the VqMod.
  • Enjoy the module and improve your OpenCart site

For OpenCart 3

Insert SEO Keyword automatically in opencart for already inserted products

Hi, today we made the script that inserts the SEO keyword automatically in opencart for already inserted products, the SEO keyword will be the product name. Opencart SEO tips and tricks to insert SEO keyword automatically in opencart for already inserted products, the keyword is the product name.

Once done please don’t forget to delete the seourl.php

You can enable SEO URLs in the OpenCart but inserting the SEO keyword for each product is quite tedious and time-consuming. Some time webmaster imports large data and at this time inserting the SEO keyword by editing each product will take a lot of time. So taking this into consideration we have made a script that takes the product name and replaces the space with dashes (-).

First, download the following zip file:

Then extract is and you just have to upload the “seourl.php” file to the root directory of the Opencart installation, where your admin and catalog folder is and run the following URL http://www.YOURURL.com/seourl.php, with this, it inserts the SEO keywords for the products.

Following is the main codes that play the role

<?php
// Configuration
if (is_file('config.php')) {
	require_once('config.php');
}
require_once(DIR_SYSTEM . 'library/config.php');
require_once(DIR_SYSTEM . 'library/db.php');
require_once(DIR_SYSTEM . 'library/db/mysqli.php');
require_once(DIR_SYSTEM . 'engine/registry.php');
// Registry
$registry = new Registry();
// Config
$config = new Config();
$config->load('default');
$config->load('catalog');
$registry->set('config', $config);
// Database
$db =  new DB($config->get('db_engine'), $config->get('db_hostname'), $config->get('db_username'), $config->get('db_password'), $config->get('db_database'), $config->get('db_port'));
$pi=0;
$pc=0;
$limit="";
if(isset($_GET['limit'])){
    $limit= " limit 0, ".$_GET['limit'];
}
$query = $db->query("select * from " . DB_PREFIX . "product_description" );
$products = $query->rows;

foreach ($products as $product) {
    $pi++;
    $name = $product['name'];
    $name = str_replace("'", '-', strtolower($name));
    $seoname = preg_replace('/s/', '-', $name);
    $seoname = str_replace([':', '\\', '/', '*', ' ','&', "'"], '-', $seoname);
    $seourl = "product_id=" . $product['product_id'];
    $query12 = $db->query("select * from " . DB_PREFIX . "seo_url where query='" . $seourl . "'");
    //echo "<pre>";
    //print_r($query12);
    if (!$query12->row) {
        $db->query("insert into " . DB_PREFIX . "seo_url set query='" . $seourl . "', keyword='" . $seoname . "'");
        echo "<br>Inserted " . $seoname;
        $pc++;
    }
}
echo "<br>Total products ".$pi;
echo "<br>Number of products seo title changed- ".$pc;

It retrieves the name from the product_description table and replace ‘,&,/, space with the dash (-) and check whether the URL already exists and if not then it inserts the SEO keyword. if you need to remove and then just add the replace statement again.

Insert SEO Keyword automatically in opencart

In this way, you can insert the SEO keyword automatically for already inserted products. Please let us know if you have any questions or suggestions, please subscribe to our YouTube Channel for Opencart video tutorials. You can also find us on Twitter and Facebook. Enjoy!

Worked, tested Opencart DragonPay Module and its APIs

Today we worked on the DragonPay module and have tested it successfully and now my client is able to accept the orders successfully.

Dragonpay provides alternative online payment solutions to businesses of all sizes in the Philippines.

We can get the test account with the help of support of DragonPay

dragonpay opencart module
dragon pay opencart module

Merchant ID: *******
Pwd:*****

Test Gateway: http://test.dragonpay.ph/Pay.aspx
Admin URL: http://test.dragonpay.ph/AdminWeb

For the full API specification
You can forward this link:

For testing purposes, use the “Bogus Bank Online” (with an id and password) and the “Bogus Bank Over-the-Counter” payment channel
simulators to test the behavior of online banking and OTC payments.

We feel free to contact them for assistance on the integration and they have helped us fully.

Following is the last form that we used to make before sending the data to the DragonPay

<form action="http://test.dragonpay.ph/Pay.aspx" method="get">
  <input type="HIDDEN" name="merchantid" value="****">
  <input type="HIDDEN" name="txnid" value="56">
  <input type="HIDDEN" name="amount" value="1000.00">
  <input type="HIDDEN" name="ccy" value="PHP">
  <input type="HIDDEN" name="description" value="Order Of Dec 2013">
  <input type="HIDDEN" name="email" value="rupaknpl@gmail.com">
  <input type="HIDDEN" name="digest" value="e66ec5ac75d9816ff3a4f88889e592223868673a">
  <div class="buttons">
    <div class="right">
      <input type="submit" value="Confirm Order" class="button">
    </div>
  </div>
</form>

Let me know if you like to integrate the Dragon pay into your website or in the Opencart store.

If you like to learn more about how to integrate the API in opencart then you can watch the video below:

Let us know if you have any questions or suggestions, please subscribe to our YouTube Channel for Opencart video tutorials. You can also find us on Twitter and Facebook. Enjoy!

Price Range filter module free for Opencart

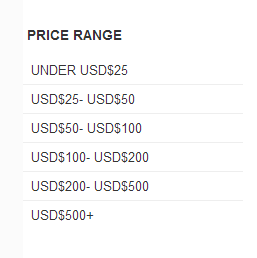
This Opencart 1.5.2.1 free module is with the price range filter module, it lists the range of prices and the products are filtered out as per the prices. Special thanks to me Rupak Nepali who work on Opencart module and provide most for free 🙂 After a long time, I worked in another opencart module Price range filter which refines Search as Per Price limits provided.

Download, documentation, and demo of the Price Range filter Module are below:

DOCUMENTATION
You don’t need any programming knowledge to install this module. Just upload and enable the module, that’s all.
If you don’t know how to upload the module then you can see this documentation.
Install the Module
After clicking the [Install] click [Edit] and set up the Price Filter module where ever you like to show.

Version supported:
Opencart Version 1.5.6 tested but am sure it will support above 1.5.2.1

Show files and folders in WordPress file-away plugins

http://wordpress.org/plugins/file-away/ to show the sub-folders and show its files and folders respectively, though I am not able to work out in the plugin itself. This plugin displays file download links from your server directories or page attachments in stylized lists or sort-able data tables

Show files and folder in file away wordpress plugins
Show files and folder in file away WordPress plugins

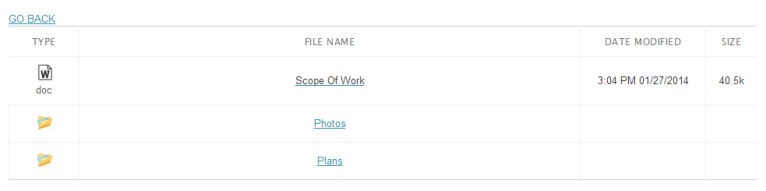
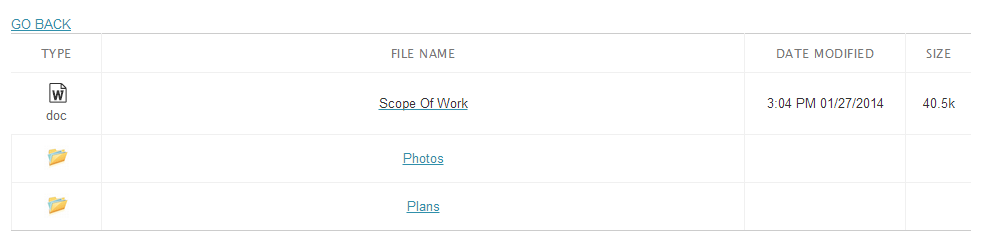
How I achieve it? I just worked in the plugin to show the directory and for the repetitive folder, I make another page and on another page, it shows up the list of the files and folders and shows it repetitively.

fileaway files and folder showing
file away-files-and-folder-showing

Determine the classes needed for an order tracking system

0

Question: Determine the classes needed for an order tracking system with the following specifications:
Customers can place one order for any number of products. Every product has a product number, product description, and price. A customer can order more than one product at once (in one order). When a customer orders two products in one order, and product 1 is in stock and product 2 is not, then we ship first product 1, and later ship product 2. We need to keep track of the status of every order, and shipping date of every product. At this moment we make a distinction between corporate customers and personal customers. For all customers, we keep track of their credit rating. Corporate customers can have an excellent, good, or poor credit rating. Personal customers have by default a poor credit rating. If the credit rating is poor, then the order must be prepaid before we send out the product. This means that all orders from personal customers must be prepaid by credit card. If the credit rating is not poor, then the order does not need to be prepaid. Every corporate customer also has a certain credit limit. If the total order price is higher than the credit limit, the order must be prepaid. The system will generate a monthly bill for all corporate customers who did not prepay their order(s).
When a customer buys a lot of products at our store, we want to reward that customer with a certain discount. If customers buy a computer-related product, then they get two points for every computer-related product they buy. For every health-related product, they get one point, and for every audio/video related product, they get 1/2 point. For all other products, they get 1/4 point. If customers accumulate 25 points, they get a 40% discount on their next order. If they receive this discount, then their number of points is reset to zero.

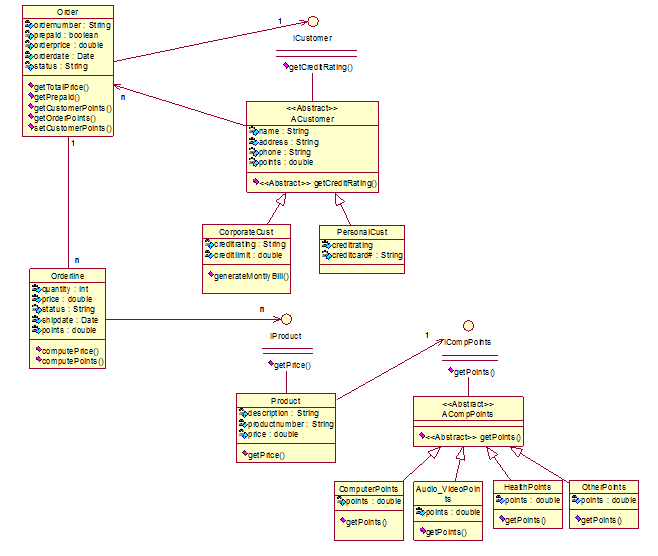
Although I have to determine only classes I have made the UML diagram so you can separate the classes as per your requirements:

Following are the classes that I have found appropriate:

  1. Product
  2. A Customer
    Corporate Customer
    Personal Customer
  1. Order
  2. Points
  • Computer Points
  • Audio Video Points
  • Health Points
  • Other Points

1. Product

The product should be in class because it is to be ordered by the customer and each product has some points.

2. Customer

A customer should be class because customers are the one who orders the products and they differentiate into two more customer corporate customer and personal customer.

Each corporate customer and the personal customer have their own characteristics so they must be made another class.

3. Order

Customer orders products so we need to take one class for each order.

4. Points

Each product has points assigned as per products. So there will be points class and its subclasses will be computer points, audio-video points, health points, and other points

Uncaught TypeError: Object [object Object] has no method ‘live’ in Opencart when using jquery-2.1.0.min.js

Today we were working on the latest version of the jquery-2.1.0.min.js because our client sliced with the use of it. And we got the error because of the upper version and some method gets deprecated like Uncaught TypeError: Object [object Object] has no method ‘live’ as the live method is deprecated and removed from version 1.9 so need to change it to ‘on’. Thus we changed all .live into .on

We have also removed all the msie also $.browser.msie which was showing error like Uncaught TypeError: Cannot read property ‘msie’ of undefined

We have updated the catalog/view/theme/default/template/checkout/checkout.tpl and catalogviewjavascript/common.js

We need to update other files also product.tpl, register.tpl, cart.tpl, etc

Once you replace “.live” into “.on”, you will be able to remove the error.

Please let us know if you have any questions or suggestions, please subscribe to our YouTube Channel for Opencart video tutorials. You can also find us on Twitter and Facebook. Enjoy!

Opencart error xmlParseEntityRef: no name, rendering of the page

In Opencart we got the following error when we activated the Google Sitemap from Extensions>> Product Feed, then when we visited the google sitemap URL like Google Sitemap http://webocreation.com/index.php?route=feed/google_sitemap

This page contains the following errors:
error on line 1 at column 5844: xmlParseEntityRef: no name
Below is a rendering of the page up to the first error

xmlParseEntityRef: no name

How to remove it?

Go to PHPMyAdmin of the site and choose the database that you are using and in the oc_url_alias table, “oc_ is the prefix of the table”, search for the & and replace with something else like ‘-‘ or ‘_’ etc and the above error will be removed.

Let me know if you get something else and for support.

SEO URL’s activated for OpenCart at localhost

As opencart uses the SEO URL but we found most of the programmers are not using it in localhost, so today we are showing how to enable URL redirect in OpenCart in localhost. To use SEO URLs, the apache module mod-rewrite must be installed and you need to rename the htaccess.txt to .htaccess.

Enabling .htaccess in Xampp

Open the httpd.conf file with your favorite text editor. In XAMPP, this file is found in the apache/conf directory (or /LAMP/etc in Linux)

Locate the following line of code:

#LoadModule rewrite_module modules/mod_rewrite.so

Remove the # from the line as seen below to enable the module:

LoadModule rewrite_module modules/mod_rewrite.so

Save the Httpd.conf file

Restart your Apache Server

Now in the opencart admin activate SEO URL from

Admin>>System >> Setting >> Edit your store >>then at Server tab >> Enabled the SEO URL.

After that rename the .htaccess.txt to .htaccess

Now if your SEO URL does not work then find RewriteBase / / in .htaccess file and add folder name between slashes.

For eg: if your folder name inside the Htdocs is YOURSTORENAME then it will be

RewriteBase / YOURSTORENAME /

Make url redirect in opencart at localhost
Make URL redirect in opencart at localhost

Then save and you will be able to work with the SEO URLs in localhost

We hope this opencart tutorial helps you understand the affiliate flow of Opencart 3. Let us know if you have any questions or suggestions, please subscribe to our YouTube Channel for Opencart video tutorials. You can also find us on Twitter and Facebook.