The protocol that use newlines to separate messages, we’ll call this protocol Line Delimited JSON (LDJ). There are no line breaks in JSON messages. Although JSON is whitespace agnostic it ignores whitespace outside of string value.
Serializing Messages with JSON
Let’s develop the message-passing protocol that uses JSON to serialize messages. Each message is a JSON-serialized object, which is a hash of key-value pairs. Here’s an example JSON object with two key-value pairs:
{"key":"value","anotherKey":"anotherValue"}
The net-watcher service we’ve been developing in this chapter sends two kinds of messages that we need to convert to JSON:
When the connection is first established, the client receives the string
Now watching target.txt for changes…
Whenever the target file changes, the client receives a string like this: File “target.txt” changed: Sat Jan 12, 2013, 12:35:52 GMT-0500 (EST)
We’ll encode the first kind of message this way:
{"type":"watching","file":"target.txt"}
The type field indicates that this is a watching message the specified file is now being watched.
The second type of message is encoded this way:
Here the type field announces that the target file has changed. The timestamp field contains an integer value representing the number of milliseconds since midnight, January 1, 1970. This happens to be an easy time format to work within JavaScript. For example, you can get the current time in this format with Date.now().
To relieve the client program from the danger of split JSON messages, we’ll implement Line Delimited JSON (LDJ) buffering client module. Then we’ll incorporate it into the network-watcher client.
First, let’s have a look at how the Node does inheritance. The following code sets up LDJClientto inherit from EventEmitter.
LDJClient is a constructor function, which means other code should call new LDJClient(stream) to get an instance. The stream parameter is an object that emits data events, such as a Socket connection. Inside the constructor function, we call the EventEmitter constructor on this. That line of code is roughly equivalent to calling super() in languages with classical inheritance.
Finally, we call util.inherits() to make LDJClient’s prototypal parent object the EventEmitterprototype. If this sounds cryptic to you, don’t worry. It’s like saying classLDJClientinherits from EventEmitter in languages with a classical inheritance model. It means that if you look for a property on an LDJClientand it’s not there, the EventEmitteris the next place to look
Exporting Functionality in a Module
Let’s pull together the previous code samples and expose LDJClientas a module. Open a text editor and insert the following: /ldj.js
“Account login module for free OpenCart version 2.0” is another opencart free extensions when it is enabled you will be able to see the login form only when the customer is not logged in and if the customer is logged in then the form will be replaced with account links.
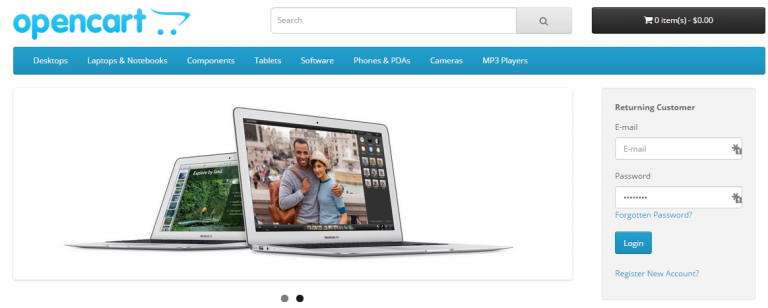
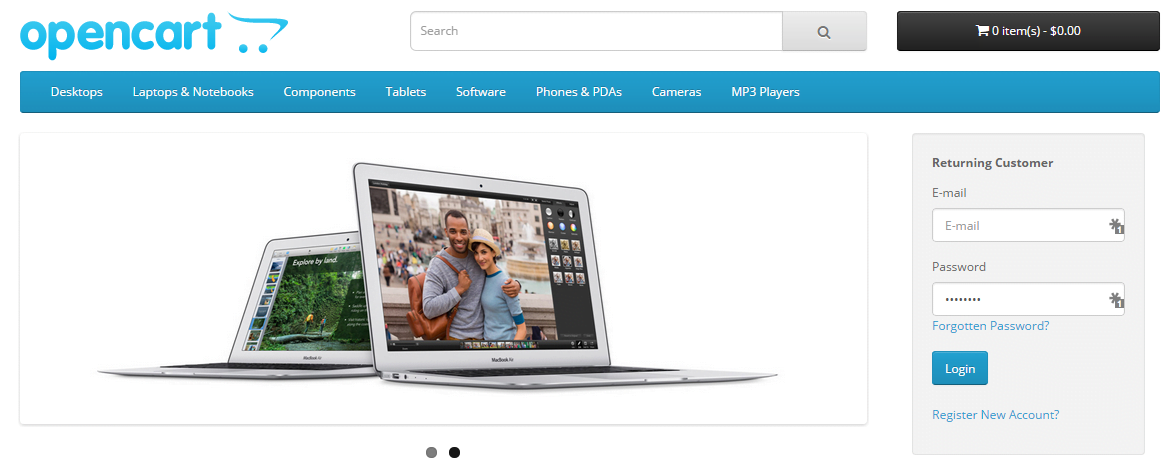
When the customer is not logged in you will see a form like this:
When logged in it will be seen the link the image below:
account_login_form_display
Download Account Login Form display free module from the link below:
Upload the files in the root folder to your server, no file is overwritten.
Then activate the “Account Login” module.
Activating the “Account Login” module:
After uploading files to servers, it’s time to install the “Account Login” module
We are showing the “Account Login” module at the right column of the Home page (Home Layout) but you can show it wherever you like as this acts as a normal module.
Go to Admin section
Then click on Extensions on the left menu
After that Click Modules and go to “Account Login” in the modules list
Then click the Green button for the “Account Login” to install the module (see the image below)
Then click the blue edit button
After that, you will see the form which has the status field, select “Enabled” and then click the Save button.
Your module is active and is ready to use in the layout.
Setup layout for the sidebar “Account Login” module at the right column of home page:
From the admin section go to System >> Design >> Layouts.
You will see a list of layouts, from which edit the “Home” layout.
Then click Blue add the button to add rows at the module section which is shown in the image below:
Second, you choose the “Account Login” in the module column and Column right in the Position column and insert the sort order as required.
Then click save button
Your custom home page is ready with the “Account Login” module in the right column. Likewise, you can show in many other layouts and pages.
Codes of “Account Login” modules of the presentation layer’s controller:
Please let us know if you have any questions or concerns. Please don’t forget to post your questions or comments so that we can add extra topics and Opencart free module. You can follow us at our twitter account @rupaknpl and subscribe to our YouTube channel for opencart tutorials.
We have had great experienced working with Limelight CRM. Here are the following things that we have worked:
Campaign management and offer management
Maintain the servers
Sites are all hosted in RackSpace and have load balancing to balance the visitor’s load.
Maintain security: Uses Cloudflare to maintain security and have performed many other tasks to obtain the best security
Maintain page loads
Integrate limelight in more than 50 websites. Uses both the Webform and API form and integrated into the design, sometimes 2-page checkout sometime one-page-checkout
Subscription management of the campaign Have not to design the PSD but can perform image changing and editing as per the necessity of the site.
Bootstrap uses for responsiveness
Upsell management for each offer and campaigns
Payment load balancing management
and many more.
Let us know if you have any questions or suggestions or requirements. You can also find us on Twitter and Facebook.
Hi, today we are publishing another free Opencart module “Sidebar Shopping Cart” and we made this for OpenCart version 2.0.3.1. Problem is we cannot edit js file with vQmod so you need to override the common.js file. But we have described where you need to put the extra code below in this post.
JS/CSS files are rendered at the browser level, not at the server level, so vQmod has no effect on these files. You can, however, create new files and use vQmod to alter the tpl files to point to these new CSS/JS files.
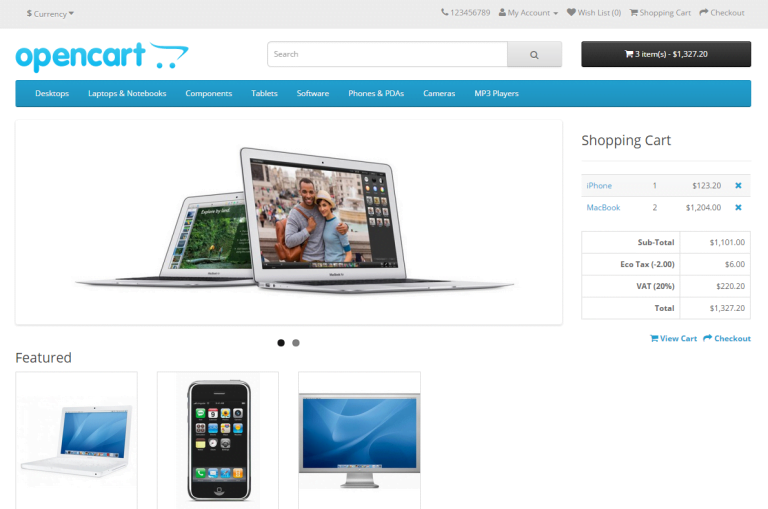
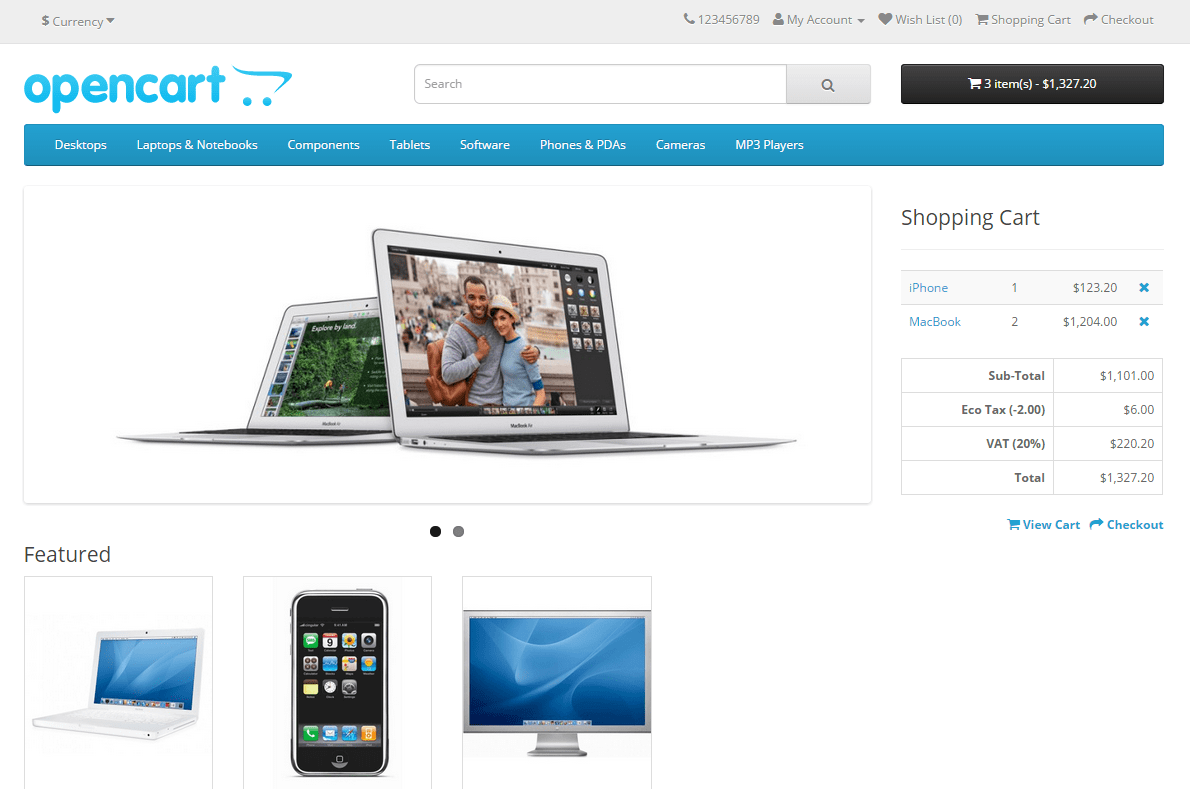
Output after installing the module is shown as in the image below:
Sidebar Shopping Cart
You can see how we copied the header cart section and show it as a module inside the cart box or side shopping cart. You can show anywhere you like as this is a module so you can show at the left column, right column or top content or bottom content.
Upload the files in the root folder to your server, the common.js file is overwritten so if you have any kind of custom javascript used then please transfer to the file and upload the common.js.
Then activate the Shopping Cart module.
Activating the Sidebar Shopping Cart module:
After uploading files to servers, it’s time to install Sidebar shopping cart module
We are showing the sidebar shopping cart in the right column but you can show it wherever you like as this is acts as a normal module.
Go to Admin section
Then click on Extensions on the left menu
After that Click Modules and go to “Shopping Cart” in the modules list
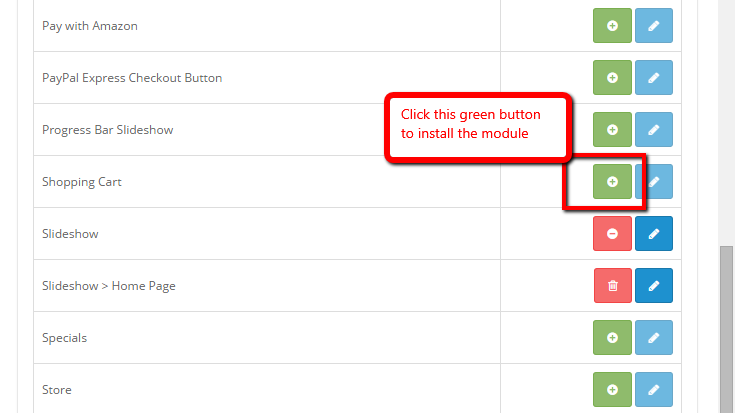
Then click the green button to install the module (see the image below)
installation_of_module
Then click the blue edit button
After that, you will see the form which has the status field, select “Enabled” and then click the Save button.
Your module is active and is ready to use in the layout.
Setup layout for the sidebar shopping cart at home page:
From the admin section go to System >> Design >> Layouts.
You will see a list of layouts, from which edit the “Home” layout.
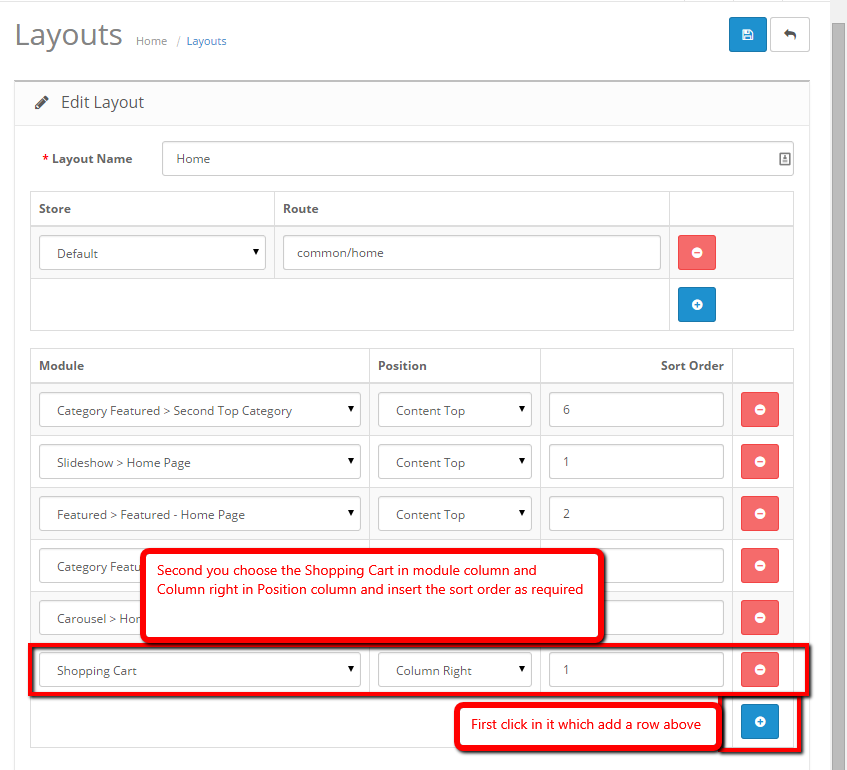
Then click Blue add the button to add rows at module section which is shown in the image below:
siderbar_shopping_cart_installation
Second, you choose the Shopping Cart in the module column and Column right in the Position column and insert the sort order as required.
Then click save button
Your custom sidebar shopping cart is showing in the right column of the home page. Likewise, you can show in many other layouts and pages.
Codes to added to common.js if you don’t want to override it:
Open catalog/view/javascript/common.js
Find the following lines of code
$('#cart > ul').load('index.php?route=common/cart/info ul li');
In part 1 we showed how to activate google reCaptcha in contact us page, now we show how to show it on the registration page. Although it is not that simple as showing in the contact us page, we have to make some changes in code. For now, we are changing directly into the default file although it is not recommended :). We will try to provide OCMOD soon in the next post so you need to wait for the next post.
First go to catalog/language/english/account/ and open register.php file.
Add the following code to the end of the file. $_['text_google_recaptcha']= 'Google reCaptcha'; $_['error_captcha'] = 'Verification code does not match the image!';
Save the file
Changes to be made at the controller file:
Go to catalog/controller/account/ and open register.php file
Find the following lines of code which is inside the index method $data['column_left'] = $this->load->controller('common/column_left');
Just above that code paste following code $data['text_google_recaptcha'] = $this->language->get('text_google_recaptcha'); if (isset($this->error['captcha'])) { $data['error_captcha'] = $this->error['captcha']; } else { $data['error_captcha'] = ''; } if ($this->config->get('config_google_captcha_status')) { $this->document->addScript('https://www.google.com/recaptcha/api.js'); $data['site_key'] = $this->config->get('config_google_captcha_public'); } else { $data['site_key'] = ''; }
Now find the following lines of code which is inside the validated method. // Agree to terms if ($this->config->get('config_account_id')) { $this->load->model('catalog/information'); $information_info = $this->model_catalog_information->getInformation($this->config->get('config_account_id')); if ($information_info && !isset($this->request->post['agree'])) { $this->error['warning'] = sprintf($this->language->get('error_agree'), $information_info['title']); } }
Now above that code paste following code. if ($this->config->get('config_google_captcha_status')) { $recaptcha = file_get_contents('https://www.google.com/recaptcha/api/siteverify?secret=' . urlencode($this->config->get('config_google_captcha_secret')) . '&response=' . $this->request->post['g-recaptcha-response'] . '&remoteip=' . $this->request->server['REMOTE_ADDR']); $recaptcha = json_decode($recaptcha, true); if (!$recaptcha['success']) { $this->error['captcha'] = $this->language->get('error_captcha'); } }
Save the file and your controller is ready
Changes to be made at the template theme file:
Go to catalog/view/theme/default*/account/ and open register.tpl, default* means if you are not using default theme then it will be theme name you are using.
Find the following line of code <?php if ($text_agree) { ?>
Just above the code above, paste the following code <fieldset> <legend><?php echo $text_google_recaptcha; ?></legend> <?php if ($site_key) { ?> <div class="form-group"> <div class="col-sm-offset-2 col-sm-10"> <div class="g-recaptcha" data-sitekey="<?php echo $site_key; ?>"></div> <?php if ($error_captcha) { ?> <div class="text-danger"><?php echo $error_captcha; ?></div> <?php } ?> </div> </div> <?php } ?> </fieldset>
Save the file
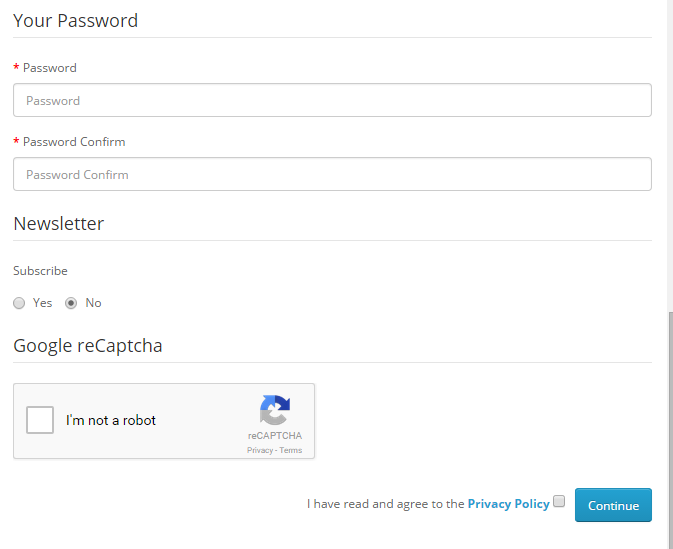
Now go to your registration page and you will see the page like below:
Activate google ReCaptcha at registration page in Opencart
Let us know if we missed anything and if you need any help.
I have started to read laravel and started it with registering http://laravelshop.com and all my updates will be posted at laravelshop.com. Today I make logo and set up server and register domain. Likewise I set up facebook page https://www.facebook.com/pages/Laravel-Shop/1420260531616136
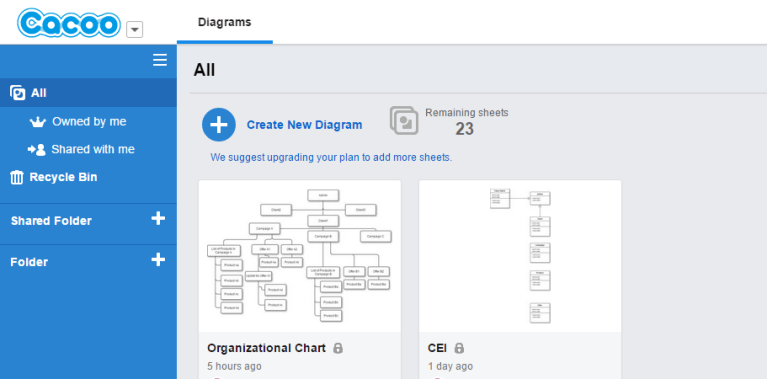
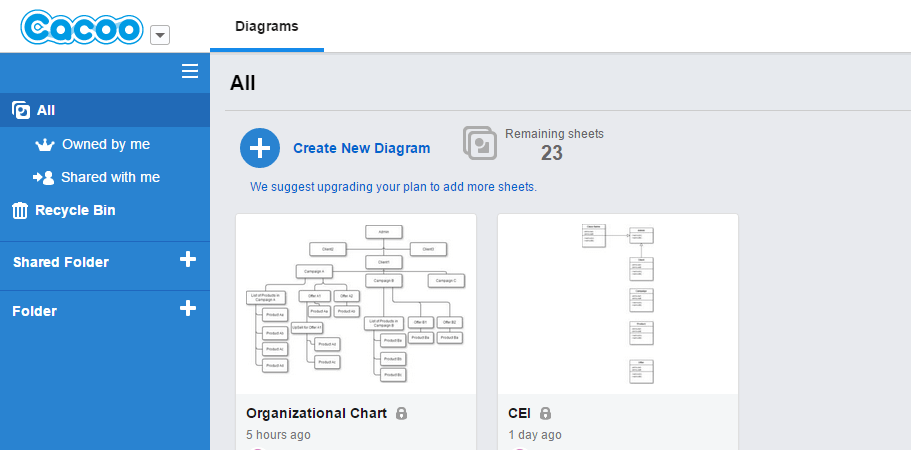
I was searching for the best website where I can create a class diagram for free and I found Cacoo which provides a website to create class diagram for free and can store it privately and collaborate with multiple users. Being a developer I have to design a class diagram, flow charts, business organizational chart, matrix diagram, Venn diagram, SWOT diagram, and schedule diagram and many more. I was looking for a free and private class diagram and found this Cacoo and am very happy to use it and it’s drag and drop system is so easy to use.
create class diagram for free
We can draw:
Business Diagram like: Business organizational chart, matrix diagram, Venn diagram, SWOT diagram, and schedule diagram
Flow Chart
Mind Map
Network Map like network diagram and AWS design template
Office layout
Sitemap
Wireframe for different devices
UML where you can draw state machine diagram, use case diagram, sequence diagram, class diagram, activity diagram, package diagram
Database design
Greeting Card design, Happy New Year, happy holidays, happy birthday and many more
Electronics diagrams like Ohm’s law
And also contained User-defined Templates.
So containing many drawing sections, I am happy to use it and hope it keeps on providing a free account. https://cacoo.com/
Second-week status Update: Dad called me when he read my previous status and told me following things 🙂
Pachilo status padeyachan buda ley.
Dad ko phone aiyoo. Choro k cha sarai bigreychas yo sab yeklo pan ley garda vako ho abba bihe garnu parcha, kt ta taliley nai khojiyako chas hola.
Yo sunna sath hindi film ma jasto purai flash back ma gaiyoo… 10 class samma love vaniyako taha thiyana 12 class ma kt thiyana Abba bachelor ma ta keai hola vaniyako bachelor ma pani khalee boka gang purai sukka. Kam pani Freelancer vai gariyoo ani kaha bata kt khojnu, dukkha bujiyo abba master garchu vane garna bidesh lagiyo ani Mastery ma k vannu ba sab kali matra thiyee. Aile kam garna suru gariyoo office ma sabbai budi matra ba. ani maile kasaree KT khojnu. Yo flashback ko douran budaley k k vanee kunni. Ani mailee Dad ailee time vako chaina vanee.
Dad: Maile tero age ma timi haru tin jana daju vai lai janmai sakiyako thiyee yo ajjai time vako chaina vancha. Bujney lai kasaree bujaunu. Suteako manchelai po uthauna sakincha. Suteako natak garne lai kasaree uthaunu. Ani sun, talai euta warning cha hai Bihe chai Nepal mai aai garnu parche ne. Buda ley yo kura pani milayarai vaniyaka hunu buda lai thaha cha yo programmer ho khale error lai matra dhyan dincha warning lai didaina vaannee. Ani office kasto cha ta dad ko question. Babbal cha dad, 2 din dhilo gako thiyee gadi kinee diyo, ani ma pani bato vai laptop pani slow vairako cha vandai chu 🙂. Ani Office ma bachha bachi ko matra kura huncha dad, sab jana budi chan, matra k vaniyako thiyee. Budaley tero pani kapal ta chaina ta vane peylee halee.
Ani buda pani hasey ma chai mutu mathi dhunga rakhi hasna chai chodina hai.
असारे महिना, हातमा ठेला उठाई खनी तयार पारेको खेतमा पानी लगाई, कच्याक–कच्याक गरी थिचेको अालि । अालि थिच्दा थिच्दै भत्केको कान्लो अनि कुद्दै गई बनाएको कान्लो अनि फेरि उहि कच्याक–कच्याक गरि थिचेको आलि। अनि थिचेको आलि लगाएर टलपल टलपल पारी जमाएको पानी।
अब त्यहि पानीले गलाएको ड्यागहरु सम्माउने काम, पानीलाई level measuring tape मानि जता गहिरो उत्तैबाट ड्याग फाडन सुरु र अग्लो ठाउँबाट होचो ठाउँमा मरि मरि फालेको माटो। जति सम्म बनाउन सक्यो त्यति धेरै धान फल्छ भन्ने सिकाई। यसरी ड्याग सम्माइ, रोपाईको लागि तयार र रोपाई भोलि ।
आज रोपाई, बिहानै अाज उठ बाबु भोलि सुत्लास् झट्टो गरी ब्याडमा चिया पुराइ आउ भनि आमाले अराएको मिठो बोलि।
उठि रातो चियाको थरमस, गिलास लिइ ब्याडमा पुगि, जरामा समाइ काटेको धानको बिउ र बिउ काट्दै जादा कुन सर्कोमा कमिला तिघ्रामा चडि, रातो हुने गरी चिसिक पार्ने। बिउको मुठ्ठा पनि तयार भो, अब बिहानको खाना खाने बेला अनि अाज चाडै सक्नु पर्छ चाडै आएर बाउसे गर्नु है भन्दै सब अा-आफ्नो घर खाना खान।
खाना खाई कोदाली, घुम र पुजाको सरसामान ली पधेरामा गई पुर्व फर्की नाग देवतालाई निगालोमा राखेको कपास चढाइ गरेको पुजा र खेतमा पुगि दुइटा मुठोको बिउ र कलश राखि गरेको पुजासगै निधारमा रातो टिका।
अब रोपारहरु बिउ अोसार्ने, म चाही लाठे बाउसे गर्ने, अाली काटि बाउसे सुरु र जति सकिन्छ त्यति सम्म बनाउनु पर्ने। कोदालीले दायाँ-बायाँ गर्दै समाएर अग्लो देखिएको ठाउँको माटो होचो ठाउँमा फाल्दै अगि बढ्ने। हामी लाठेले सम्माएको ठाउँमा रोपारहरु छुप्लुप छुप्लुप रोप्न सुरु। हामी सम्माउने निउँमा छिन-छिनमा रोपार तिर फालेको माटोले रोपारलाई नित्थुक बनाई रमाइलो गर्ने। रोपारेहरु लामो भाका हाली गीत गाउदै रोप्ने।बर्षायाम पानी परेसँगै घुम अोड्नु र रोकिएसगँ घुम राख्नु।
अोहो त्यो उसिनेको अालुको अचार त्यसमा उसिनेकै हरियो खुर्सानी, भटमास र लसुनको अचार अनि टाइचिन चामलको चिउरा उफ मुखबाट पानि नै निक्लियो नि।
मसला बाढने काम, कसलाई ठुलो नरिवल र धेरै चक्लेट भन्दै कुदा कुद।
योसगँ मुरीका मुरी धान फल्ने आश र भरोसासगँ रातको मिठो निन्द्रा तर पारी पट्टी र जस्ताको छानामा चाही अजै तप तप गरि आवज आइरहेको छ तर पनि मस्त निन्द्रालाई रोक्न सक्ने कोही छैन।
Weekend, bhanna sath Party, पार्टी भन्ना साथ Beer यो तालि चाहि “Guinness Beer”, Beer हुनासाथ लेखाइ सुरु।
धेरै केटाहरुले किन लेखिन्स भनि सोधे, देशमा भुकम्प गएर थन्थिलो पारेको थियो त्यस लगत्तै तराइ आन्दोलन, देश जरजर अवश्थामा मैले नि केहि त गर्नु पर्यो भनि पुरै सोच र planning मा थिए। Plan के भन्दा “भट्टी Valley (BV)” खोल्ने।
क्षेत्रफल २०० रोपनी भन्दा बढि, कुल लागतः २ खर्ब १ रुपया।
१ रुपया चाही मैले जम्मा गरी सके, अब अरु साथी भाइलाई Investment ko सुर्वण अवसर!!!!
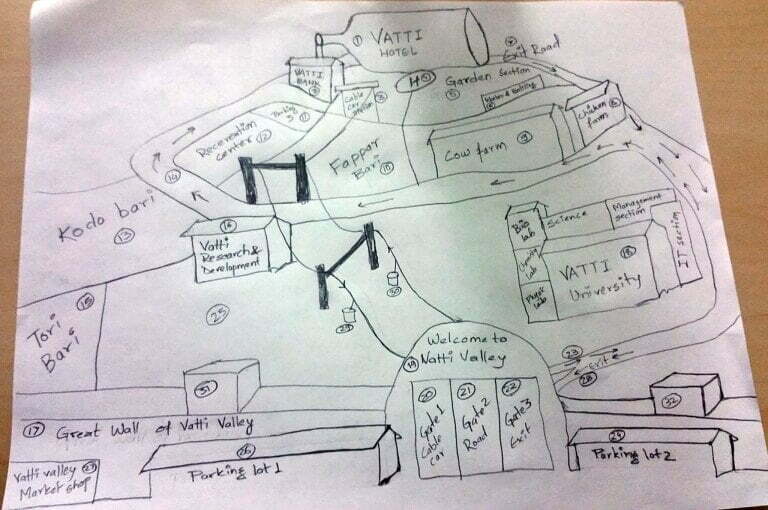
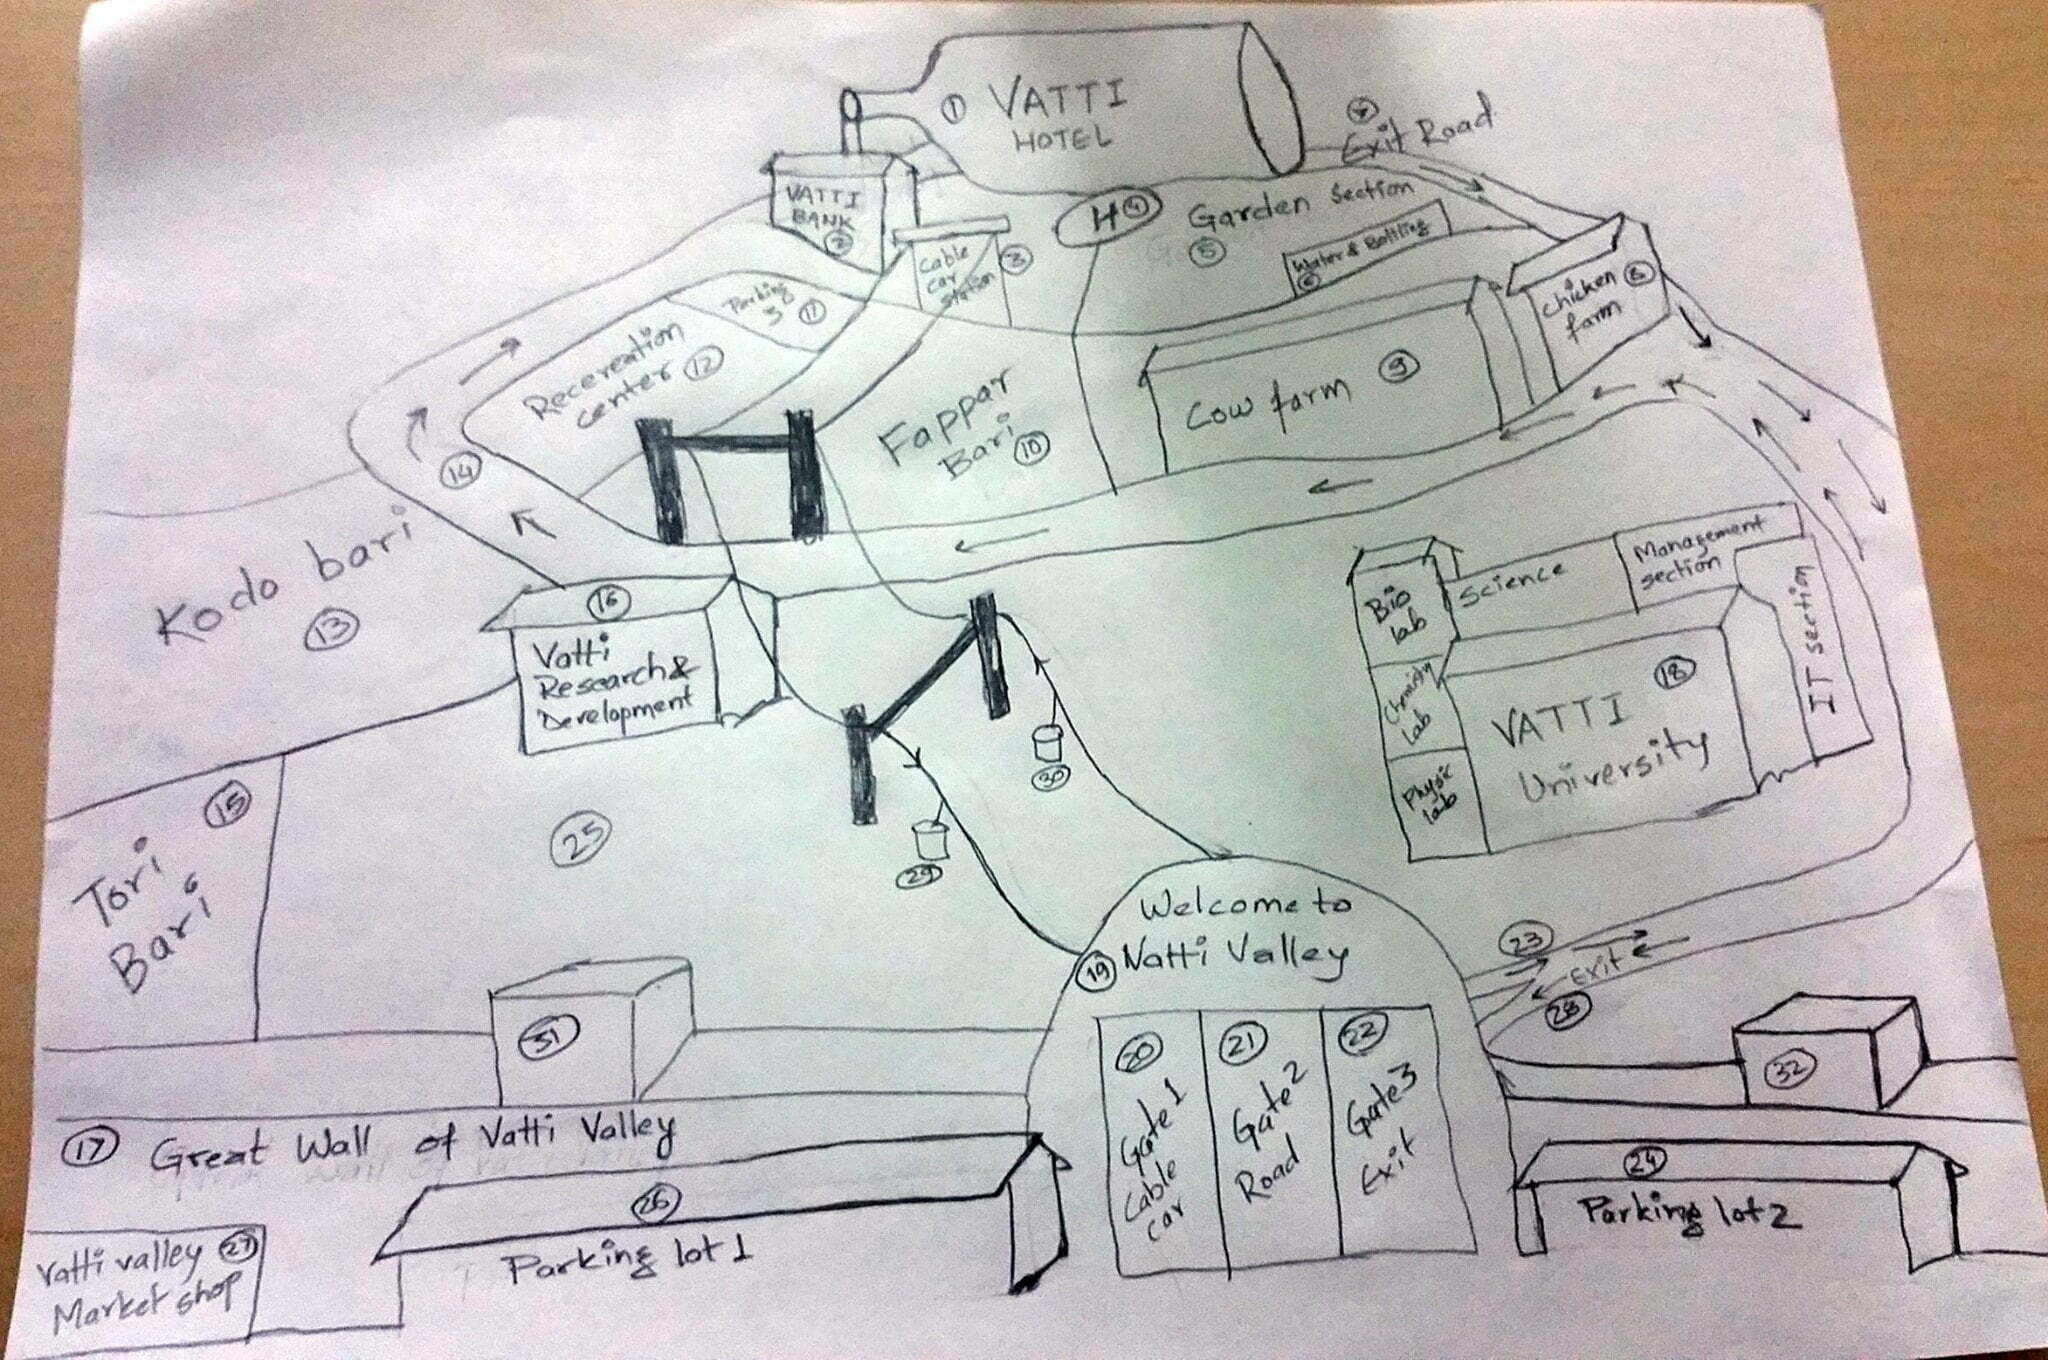
Planning चित्रमा देखाइएको छ। 1. पाहडको टुप्पामा भट्टी Hotel in beer bottle-shaped architecture 2. Vatti Bank 3. Cable Car loading/unloading section for भट्टी Hotel called it as CAN 2. 4. Helipad 5. Garden section 6. Water and Bottling Plant 7. Exit Road 8. Poultry farm 9. Cattle farm 10. फापर बारी 11. Parking lot 3 12. Recreation Center 13. कोदो बारी 14. Road 15. Tori Bari 16. Vatti Research and Development 17. Great Wall of Vatti Valley 18. The University of भट्टी 19. Entrance for Vatti Valley 20. Gate 1 is for the cable car 21. Gate 2 is for Road 22. Gate 3 is for Exit 23. Entry Road 24. Parking lot 2 25. Coming soon…….. 26. Parking lot 1 27. भट्टी Valley market 28. Exit road 29. Cable car 1 in shape of CAN beer to return from Vatti hotel 30. Cable car 2 in shape of CAN beer to go to Vatti hotel 31. Security 1 32. Security 2
सब कुरा राखि सकेको छैन, नत्र आइडा चोरी होला भन्ने पनि डर छ नि