

Laravel has matured into a versatile framework with a wide variety of features for developing responsive web apps. However, the framework hasn’t yet abandoned its reliance on conventional methods. Using Vue or React with a Laravel project is still doable and requires little effort.
To ensure that both Laravel developers and React.js developers can confidently go on with the project, we will step through the process of bootstrapping a new Laravel project and integrating React with it in this post.
A New Project’s Bootstrapping and Dependency Setup
So, let’s get started by creating a new Laravel project on your local device. The bootstrapping technique you use is up to you.
Laravel new guide-to-laravel-and-react
At this point, you may launch the project in your preferred integrated development environment (IDE) or text editor. Let’s go ahead and install all these prerequisites now that you know what they are:
NPM Setup
To ensure that everything is working properly when the installation is complete, use the following command.
dev npm run
Following the execution of the npm run dev command, Laravel Mix generates the files public/js/app.js and public/css/app.css from the resources/js/app.js and resources/css/app.css, respectively.
Setting Up React and Creating Your First Component
Let’s dive in and start integrating React into the mix to see how Laravel and React.js work together. There are two new JavaScript libraries that need to be included first. You may think of them as the react and react-dom libraries. Simply run this command to accomplish your goal:
npm install --save-dev react react-dom
Those libraries will be set up and made available for use throughout development. Since you will be combining all of your JavaScript into a single file and including it with your Blade templates, it is necessary to install these dependencies as a development prerequisite.
First, copy and paste the following into a brand new file named resources/js/components/HelloReact.js:
// resources/js/components/HelloReact.js
import React from 'react';
import ReactDOM from 'react-dom';
export default function HelloReact() {
    return (
        <h1>Hello React!</h1>
    );
}
if (document.getElementById('hello-react')) {
    ReactDOM.render(<HelloReact />, document.getElementById('hello-react'));
}
You can use this React component to print “Hello React!” on the page by attaching it to an element with the id “hello-react.” Adding this to your application’s JavaScript code bundle will make it accessible throughout. To make the necessary changes, open the resources/js/app.js file and insert the new code below.
// resoureces/js/app.js
require('./bootstrap');
// React Components
require('./components/HelloReact')
So, that’s the whole thing. Incorporating the React component into the application’s JavaScript code bundle is as simple as requiring it in this file. Blade templates will need to be recompiled before using the revised code.
You’ve transitioned from writing plain old JavaScript to developing code that makes use of React. To have the React component compiled correctly, you’ll need to adjust the Laravel Mix setup. Webpack.mix.js may be found at the root of the project; open it and make the necessary changes to the code as shown below.
// webpack.mix.js
const mix = require('laravel-mix');
mix.js('resources/js/app.js', 'public/js')
    .react()
    .postCss('resources/css/app.css', 'public/css', [
        //
    ]);
In its default state, the response() method is not invoked from the configuration file. A call to this method will cause Laravel Mix to download the babel-preset-react plugin, which is needed for the compilation of React components.
Simply re-run npm run dev after making changes to Laravel Mix’s setup. It’s important to remember that now isn’t the moment for the compilation to take place. Instead, Laravel Mix will detect the absence of required libraries and replace them automatically. In order to ensure success, retry executing the npm run dev command.
You’ll need to have a blade template ready now that the part is complete. Access the welcome.blade.php file located in resources/views and make the following changes:
<!DOCTYPE html>
<html lang="en">
<head>
    <meta charset="UTF-8">
    <meta name="viewport" content="width=device-width, initial-scale=1.0">
    <meta http-equiv="X-UA-Compatible" content="ie=edge">
    <title>Laravel React</title>
    <script src="{{ asset('js/app.js') }}" defer></script>
</head>
<body>
    <div id="hello-react"></div>
</body>
</html>
Make sure the script is executed either after the closing body tag or just before it. Make that the ID you provide in the render() method of your React component corresponds to the ID of the element.
Execute PHP artisan serve to launch the local development server, and then go to http://localhost:8000. with the aid of the web browser of your choice. These are the kind of results you should get:

If there is a complete lack of output, look in the browser’s console for any problems. Find the problem, fix it, and try again.
Creating a Counter Component Using React Hooks
Okay, let’s use the state hook to create a contrasting part. Make sure the following is saved in a file called Counter.js in the resources/js folder:
// resources/js/components/Counter.js
import React, { useState } from "react";
import ReactDOM from 'react-dom';
export default function Counter() {
  // Set the initial count state to zero, 0
  const [count, setCount] = useState(0);
  // Create handleIncrement event handler
  const handleIncrement = () => {
    setCount(prevCount => prevCount + 1);
  };
  // Create handleDecrement event handler
  const handleDecrement = () => {
    setCount(prevCount => prevCount - 1);
  };
  return (
    <div>
        <button onClick={handleDecrement}>-</button>
        <span> {count} </span>
        <button onClick={handleIncrement}>+</button>
    </div>
  );
}
if (document.getElementById('counter')) {
    ReactDOM.render(<Counter />, document.getElementById('counter'));
}
if (document.getElementById('counter')) {
    ReactDOM.render(<Counter />, document.getElementById('counter'));
}
To use the file, open resources/js/app.js and require it as you would any other file. If you’re tired of constantly using npm run dev, you can save yourself some time by using the npm run watch command instead. This command will keep a check on your files and trigger a compilation whenever they’re modified.
To finish, reopen the resources/views/welcome.blade.php file and make the following changes:
<!DOCTYPE html>
<html lang="en">
<head>
    <meta charset="UTF-8">
    <meta name="viewport" content="width=device-width, initial-scale=1.0">
    <meta http-equiv="X-UA-Compatible" content="ie=edge">
    <title>Laravel React</title>
    <script src="{{ asset('js/app.js') }}" defer></script>
</head>
<body>
    <div id="hello-react"></div>
    <div id="counter"></div>
</body>
</html>
If the webpage is still open in your browser, a refresh will reveal the following:
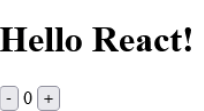
You can watch the number alter as you try incrementing and decrementing it. You have the same freedom here as you would with any other standard React component. You may even create custom class features.
Communicating With the Back-End
You have only done front-end work up to this point in the article. Here we’ll demonstrate how you may connect your React components to the Laravel backend.
Launch your favorite text editor and go to the routes/web.php file to make the necessary changes:
<?php
// routes/web.php
use Illuminate\Http\Request;
use Illuminate\Support\Facades\Route;
Route::get('/', function () {
    return view('welcome');
});
Route::post('count', function (Request $request) {
    return response()->json([
        'message' => $request->message,
    ]);
});
The front end may send a string with the name message to this straightforward route, and it will return the string to the sender.
To make these changes, open the Counter.js file under resources and replace its existing content with the following:
// resources/js/Counter.js
import axios from "axios";
import React, { useState } from "react";
import ReactDOM from 'react-dom';

export default function Counter() {
  // Set the initial count state to zero, 0
  const [count, setCount] = useState(0);

  // Create handleIncrement event handler
  const handleIncrement = () => {
    setCount(prevCount => prevCount + 1);
    notifyServer();
  };

  // Create handleDecrement event handler
  const handleDecrement = () => {
    setCount(prevCount => prevCount - 1);
    notifyServer();
  };
// Notifies the server about the change
  const notifyServer = () => {
      axios.post('/count', {
          message: 'Counter Updated!',
      })
  }
  return (
    <div>
        <button onClick={handleDecrement}>-</button>
        <span> {count} </span>
        <button onClick={handleIncrement}>+</button>
    </div>
  );
}
if (document.getElementById('counter')) {
    ReactDOM.render(<Counter />, document.getElementById('counter'));
}
The notifyServer() method sends a message to the /count API endpoint. The handleDecrement() and handleIncrement() methods must include a call to this method. Rebuild the resources and try again. Now, before you hit the up or down arrows, make sure the Network tab is active in your browser. Now, when you hit the up or down arrow, the following POST request will appear:

The server has processed the request and sent back a reply. This method of communicating with the server is universal. You should be able to connect to any of the web routes since the Axios library takes care of the CSRF token by including the XSRF-TOKEN cookie in each request.
Alternatively, you might utilize API routes, albeit doing so would need a stateless authentication mechanism. In my view, working using web routes is the way to go when incorporating React components into blade templates. It will save you a lot of time and effort while still letting you do almost all of the same actions available through the API’s routed mechanisms.
Vendor Extraction
The last point is the extraction of value from vendors, and this concludes the paper. However, long-term caching becomes more complicated when you combine your application-specific JavaScript code with the React framework. If you make even a little modification to your code, the browser will re-download the vendor library (in this case, React), even though it hasn’t changed.
Extracting the vendor library code to a new file is one approach to fixing this problem. Simply edit the webpack.mix.js file as shown below.
// webpack.mix.js
const mix = require('laravel-mix');
mix.js('resources/js/app.js', 'public/js')
    .react()
    .extract(['react'])
    .postCss('resources/css/app.css', 'public/css', [
        //
    ]);
With only one call to extract(), you may generate three distinct JavaScript files that include all of the vendor libraries in the array. Here are some of them:
- public/js/manifest.js: Time of execution for Webpack manifests
- public/js/vendor.js: That of your suppliers’ library collections
- public/js/app.js: This is the code for your application
Access the welcome.blade.php file located in resources/views and make the following changes:
<!DOCTYPE html>
<html lang="en">
<head>
    <meta charset="UTF-8">
    <meta name="viewport" content="width=device-width, initial-scale=1.0">
    <meta http-equiv="X-UA-Compatible" content="ie=edge">
    <title>Laravel React</title>
</head>
<body>
    <div id="hello-react"></div>
    <div id="counter"></div>

    <script src="{{ asset('js/manifest.js') }}"></script>
    <script src="{{ asset('js/vendor.js') }}"></script>
    <script src="{{ asset('js/app.js') }}"></script>
</body>
</html>
Conclusion
The scripts were simply placed at the end of the file so that they would run immediately rather than being delayed. The files must be loaded in this specific sequence. After the vendor script, you should place any JavaScript scripts that are exclusive to your application. There will never be a second copy of the manifest. When you refresh the page, you shouldn’t notice any differences in the results. In case you are trying to experiment with this combination for your project, you can get a lot of Laravel programmers for hire in the market.
Good One! Well explained about Laravel & ReactJS Futuristic Development.
Thanks for the article.