

In this hosting tutorial, we are looking into the AWS Lightsail LAMP stack, where we will host Opencart in AWS, and found out that there is no easy way to install it like WordPress or Magento even in AWS Lightsail, hope the Opencart package will be added soon, but for now, we need to use LAMP stack to host the Opencart in the AWS Lightsail. AWS Lightsail LAMP stack includes the latest versions of PHP 7+, Apache, and MySQL with phpMyAdmin and pre-configured components and PHP modules include FastCGI, ModSecurity, SQLite, Varnish, ImageMagick, xDebug, Xcache, OpenLDAP, Memcache, OAuth, PEAR, PECL, APC, GD, and cURL. All of the PHP modules and components needed for Opencart hosting are available in the LAMP stack of AWS Lightsail.
Let’s get started with AWS LightSail
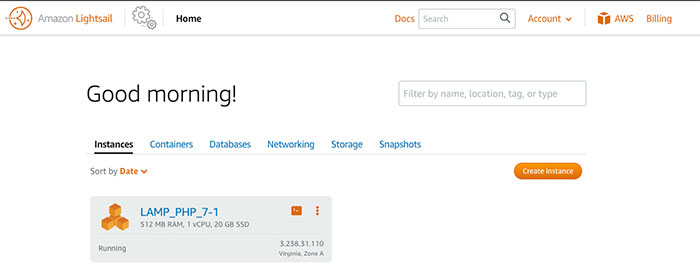
Go to https://aws.amazon.com/lightsail, and create an account or log in to your AWS account. The main AWS Lightsail dashboard page is separate from the main AWS dashboard. Or you can navigate from All services >> Compute >> Lightsail. It may look similar to the below screenshot.
Create a LAMP Instance for Opencart hosting
In the Lightsail dashboard click the “Create Instance” button. You will see a page where you can select instance details:
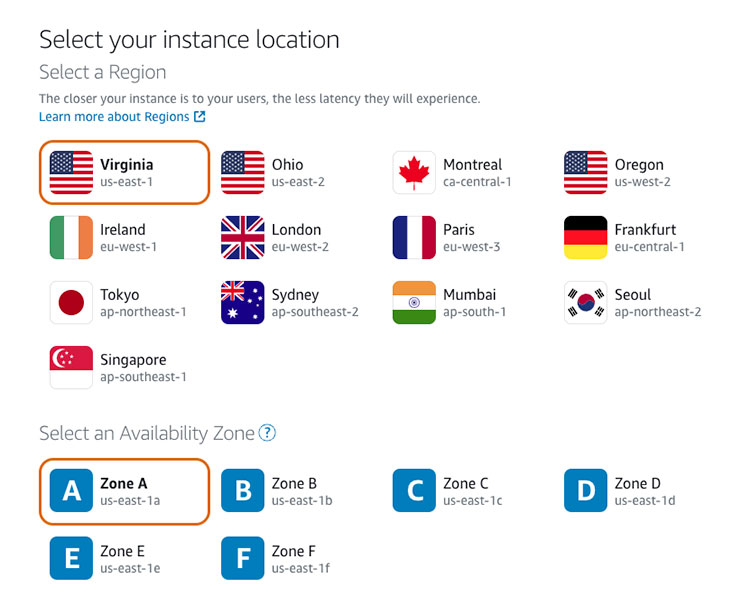
Instance Location and Availability Zone: The location is auto-selected as per your geo-location but you can change it as per your hosting need. Mostly we used Virginia, Zone A (us-east-1) as our website visitors are mostly from the USA, it is upon your requirement and decides which location and Availability zone to choose.
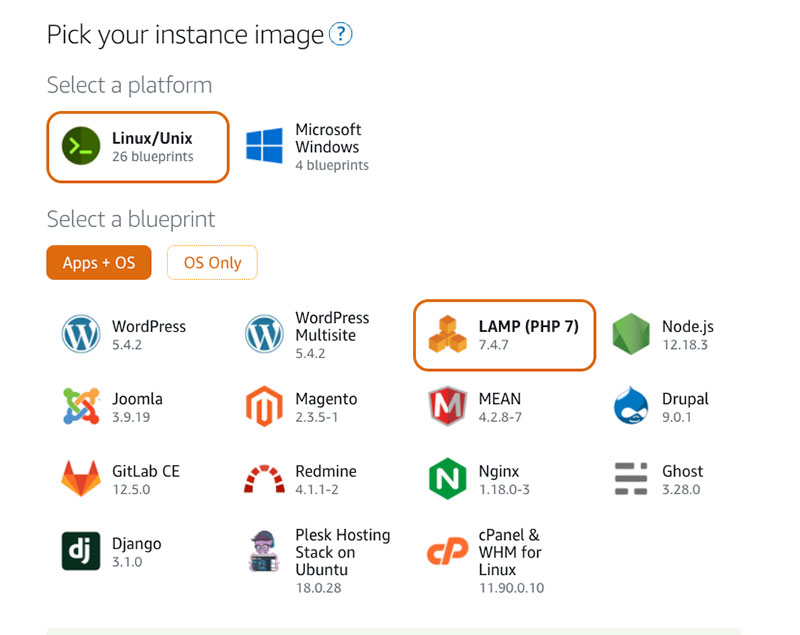
Platform instance image and Stack blueprint: We need linux/unix for the Opencart hosting so in “Select a platform” select the Linux/Unix. Then, in “Select a blueprint” select the LAMP (PHP 7)
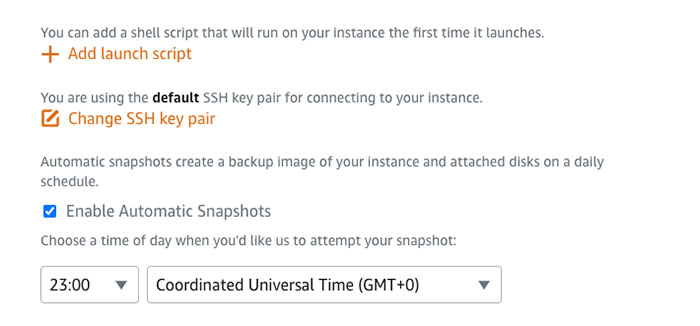
SSH key pair and Automatic snapshots: Now go more below and you will see “Add launch script”, for now, we are not adding any script there. We will run scripts one by one in a command shell. If your account is new then create an SSH key pair else by default the key is selected. If you want to create something new then you can change it by clicking “Change SSH key pair”. Then check the checkbox for “Enable Automatic Snapshots” as this acts as a backup for you. If you don’t need backup then no need to check it. After you enable it, select the time you want to create the snapshot. We select 23:00 Coordinated Universal Time.
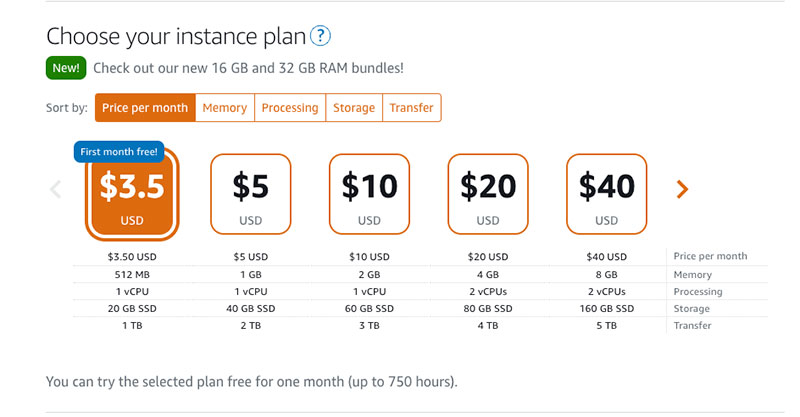
Choose your instance plan: For a start, for Linux/Unix-based instances, we can try the $3.50 USD Lightsail plan free for one month (up to 750 hours). Later, if we need to scale then we will scale by creating a new instance from the snapshots.
Identify your instance for Opencart: Now in the identify your instance, we entered the name as “Opencart_LAMP_PHP_7-2”, Key-only tags as Version1, and Key-value tags with Key as Framework and Value as Opencart. You can enter as per your need to identify your instance.
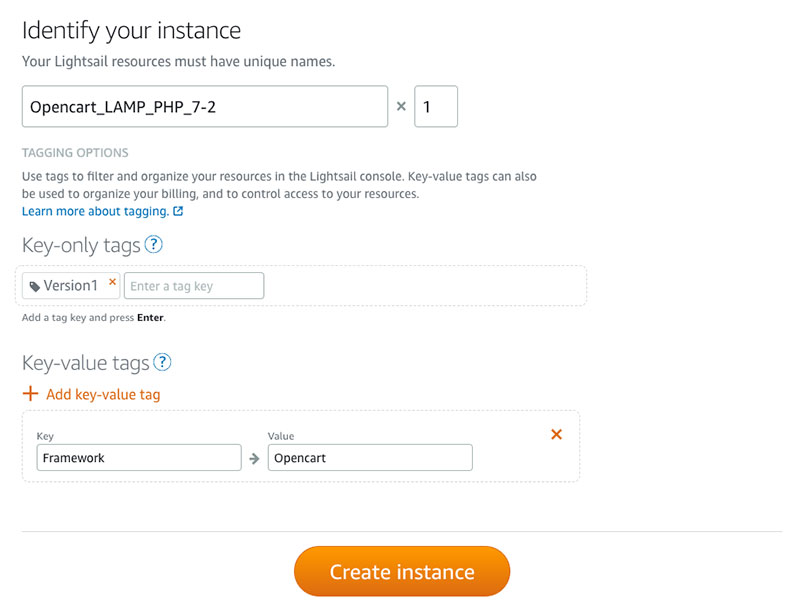
Now finally click the Create Instance button. It will take around 1 min to spin up your virtual machine with a LAMP stack. Then, you will see an instance in your dashboard like below:

Now, click on it and you will get the details of that instance. You can see the buttons to stop and reboot. You can see the “Connect using SSH” button, Public IP and Username.
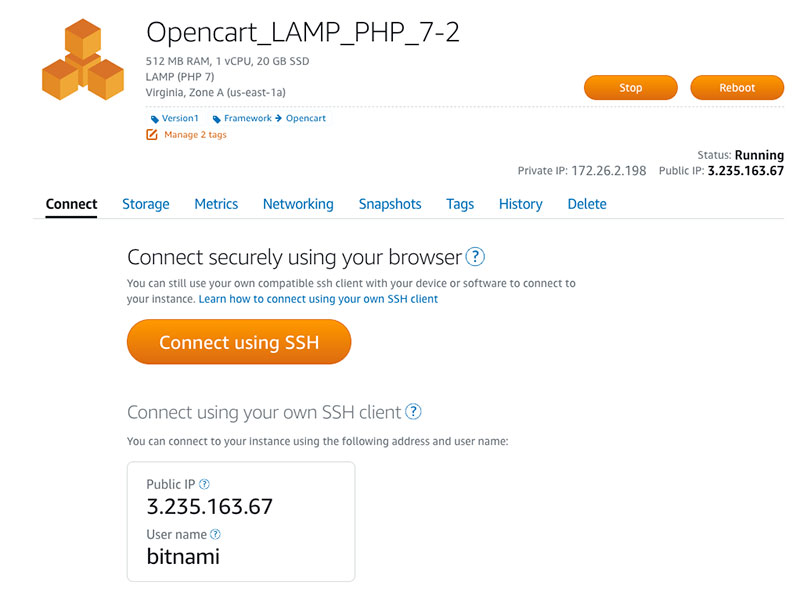
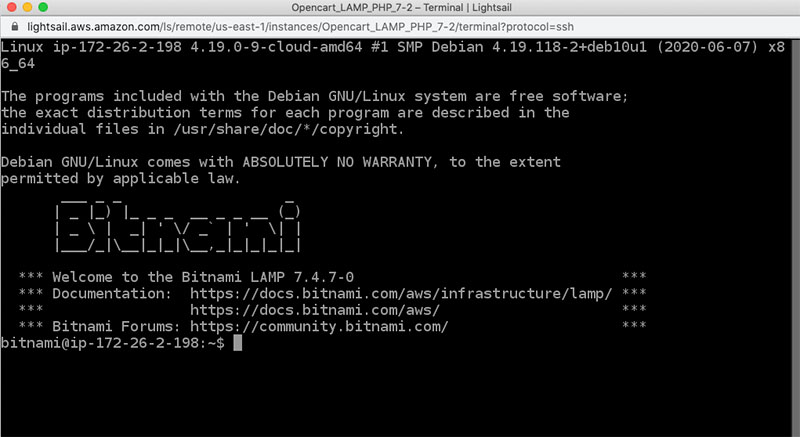
Click on the “Connect using SSH”, and you will see the command interface where you can enter your commands.
Update system and PHP version in AWS lightsail
To ensure your system is up-to-date, you can run the following command:
sudo apt update -y
Check your PHP version by the following command as Opencart needs PHP version 7.3. If your PHP version is less the 7.3 than you need to upgrade to PHP 7.3+
php -v
If you are using the latest LAMP stack in AWS Lightsail then it is greater than PHP 7.4.
Opencart installation steps in the AWS Lightsail LAMP stack
Change the directory to /opt/bitnami/apache2/htdocs
cd /opt/bitnami/apache2/htdocs
When you do the ls command then you will see index.html which shows the Bitnami page. So, let’s remove it by the following command:
sudo rm index.html
Now, let’s retrieve the Opencart zip code by using wget. You can get the zip URL from the Github Opencart releases. We are using the zip link of Opencart 3.0.3.6 as this is the latest version of Opencart now.
wget https://github.com/opencart/opencart/releases/download/3.0.3.6/opencart-3.0.3.6.zip
Let’s unzip the opencart-3.0.3.6.zip to backup/ folder
unzip opencart-3.0.3.6.zip -d ./backup
Now, move all the files and folder at backup/upload as these are the Opencart files
mv ./backup/upload/* .
Now, if you visit your Public IP, which is 3.235.163.67, then you will get a similar error to error no 1. So, let’s change the ownership of the files and folders to the daemon: daemon by running the following command:
sudo chown -R bitnami:daemon /opt/bitnami/apache2/htdocs/
If you want to be sure of files and folders permissions then you can run the following two commands as well:
sudo find . -type d -exec chmod 0755 {} \;
sudo find . -type f -exec chmod 0644 {} \;
Now, see files and folders permission in AWS Lightsail for Opencart by running the command ls-lh
ls -lh
You will see the output below:
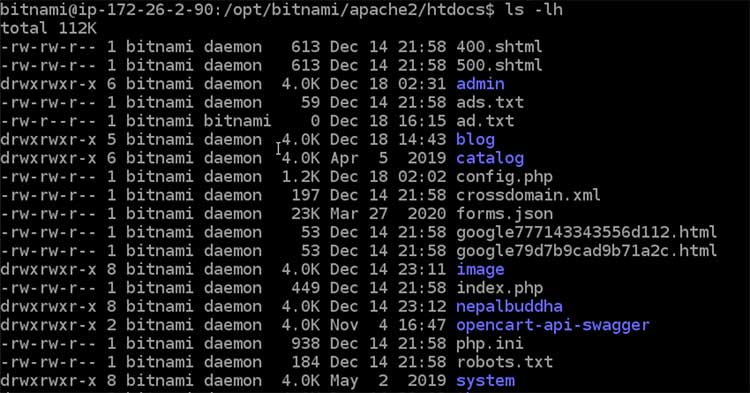
Now, if you go to public IP, then you will be able to see the first page of the Opencart installation.
Create Static IP
You can start the installation but it is better to set up static IP. For that, go to the instance detail page, and in the “Networking” tab in the IP addresses section, click the button “Create static IP“.
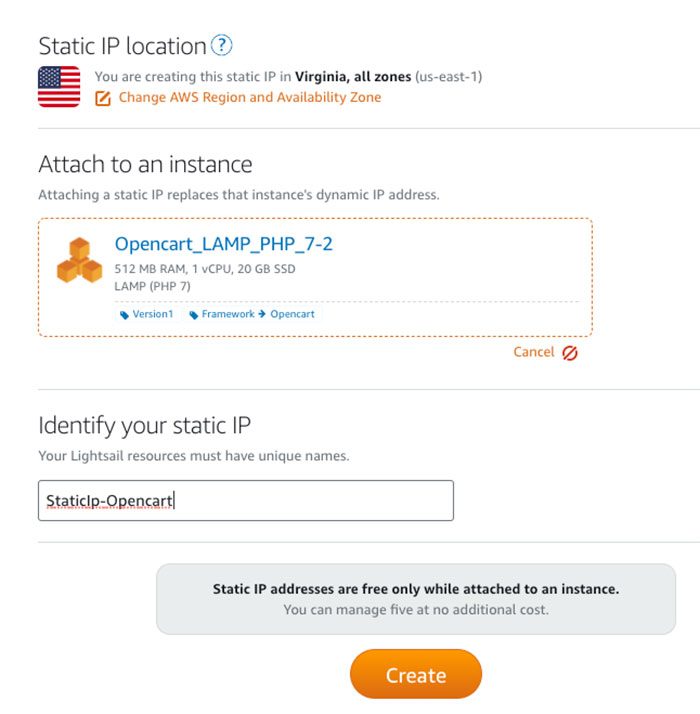
A static IP is a fixed, public IP address that you can assign and reassign to your instances. In the Static IP location, you left it default. In the Attach to an instance, select your instance, we select “Opencart_LAMP_PHP_7-2”. In the Identify your static IP, just give a unique name.
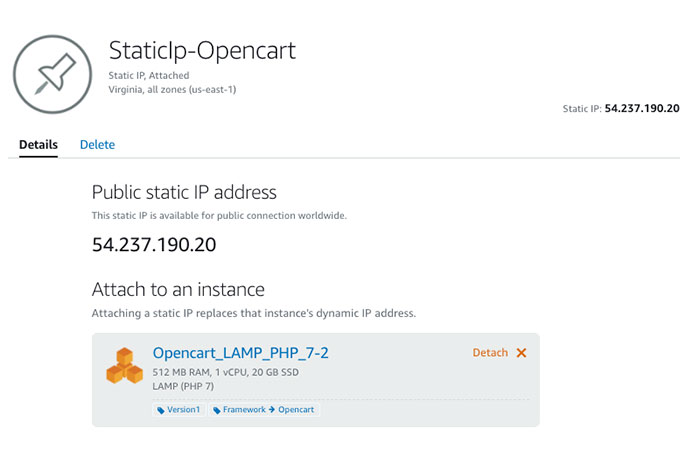
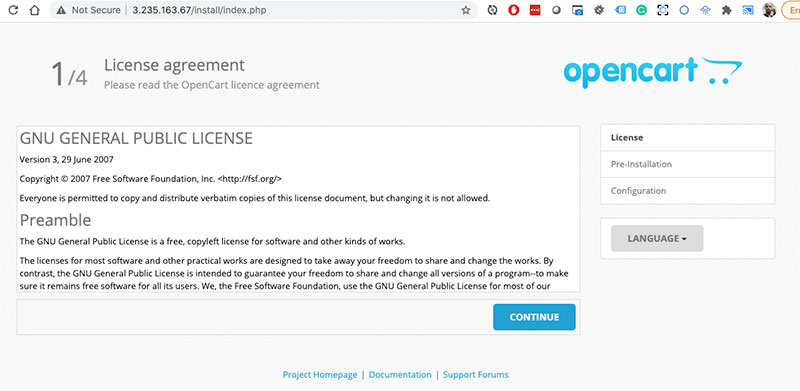
Now, your public IP as shown on the page, is 54.237.190.20. Now open the IP in the browser then you will see step 1 of the Opencart installation page.
Create DNS Zone
As we are using an external domain registrar than Route 53 of AWS, so we need to create the DNS zone so we can add the NS1 and NS2 in the domain. Go to the Lightsail dashboard and go to the “Networking” tab. As we already set up Static IP, you will see a button to create a DNS zone, click the button “Create DNS zone”. Enter the domain you have registered, which is dpsignadvertising.com, enter the key-only tags and key-value tags as per your requirements else leave it blank.
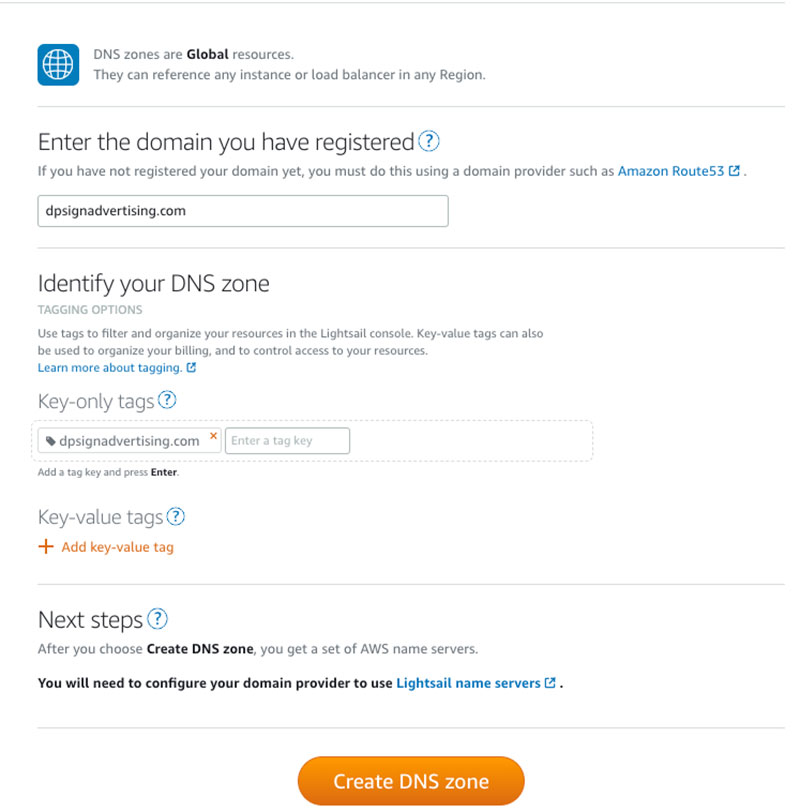
Once you submit the “Create DNS zone” then you will get the Name Servers like the below:
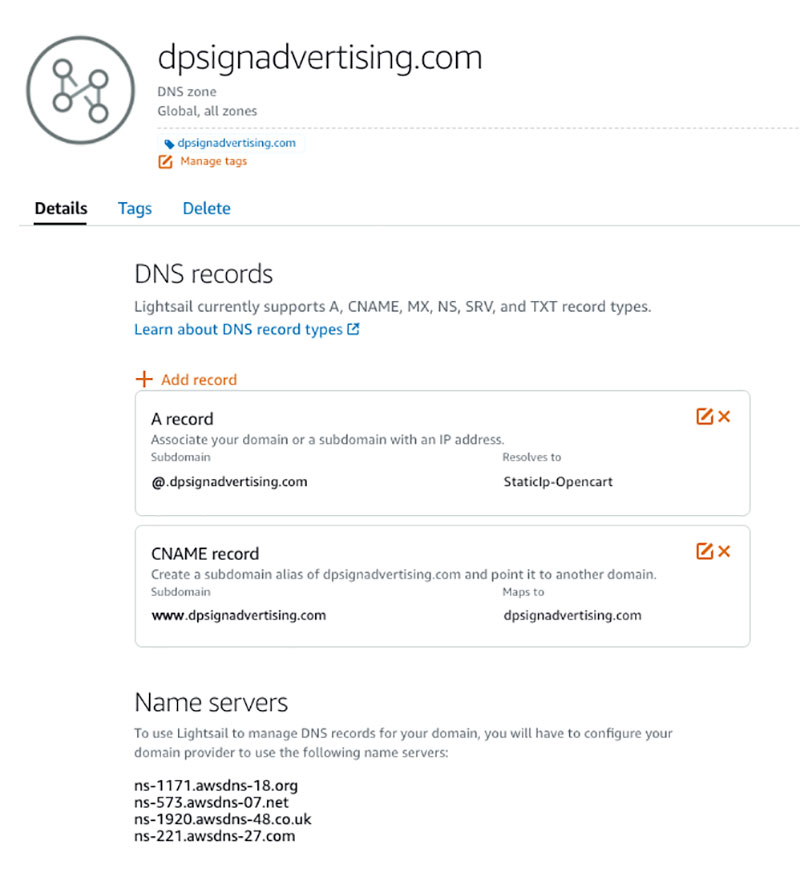
Click “Add record”, then select A record, and enter @ in the subdomain in “Resolves to” select Static IP, our is “StaticIp-Opencart”, then click the green tick box. Similarly, again, click “Add record”, then select CNAME record, and enter www in the subdomain and in “Maps to” enter the domain name. URL, then click the green tick box.
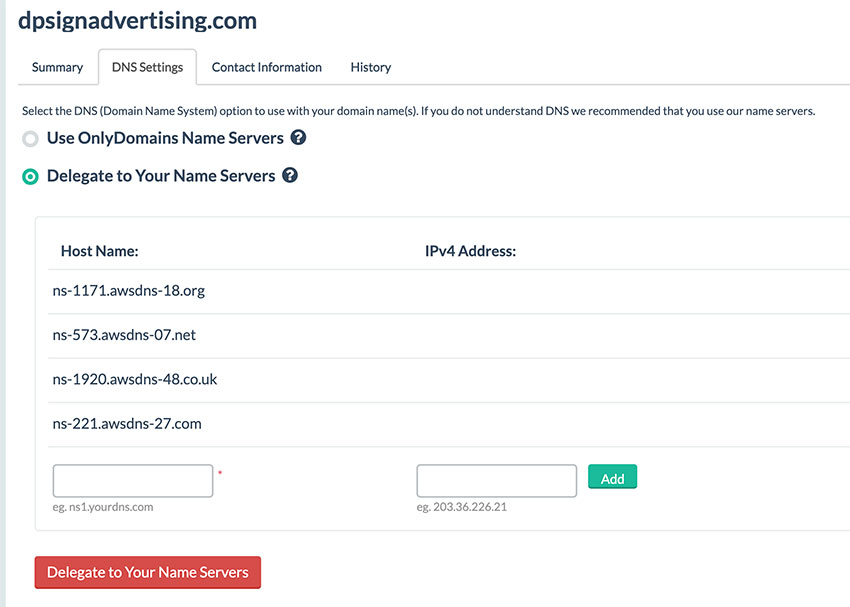
Add Name servers to your domain registrar
Now open your domain registrar, our is onlydomains.com, in your domain change the Name Servers details like below and delegate to your AWS nameservers.
After some time go to your domain, for us, it took around 5min for DNS propagation, as we use dpsignadvertising.com for the domain so when we visit the dpsignadvertising.com, visit your URL and you will see the first page of the Opencart installation of the License agreement, click the “Continue” button.
In step 2, pre-installation steps, we see all green except the config files:
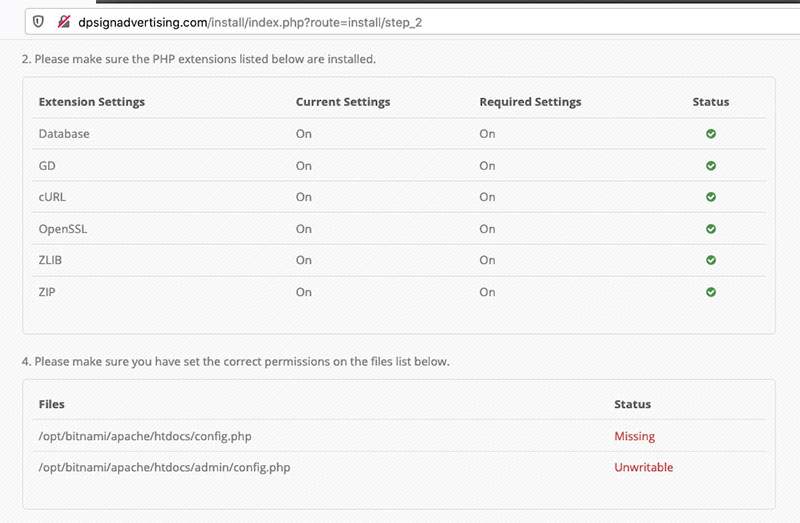
So, we need to create the config.php files. You can use the following commands to change the config-dist.php to config.php
sudo mv config-dist.php config.php
sudo mv admin/config-dist.php admin/config.php
Or, you can simply create the config.php files with the touch command:
sudo touch config.php admin/config.php
Now, change the ownership of config.php and admin/config.php
sudo chown daemon:daemon config.php admin/config.php
After the changes above, you can refresh the 2nd step of installation and click “Continue”. We reached the third step, where we need to enter the database and administration details.
Create a database, database user, and grant access
Let’s close your opened console command terminal and reconnect by clicking the “Connect using SSH” button so that you can open the new console command terminal. Then, run the command to get the root password.
cat bitnami_application_password
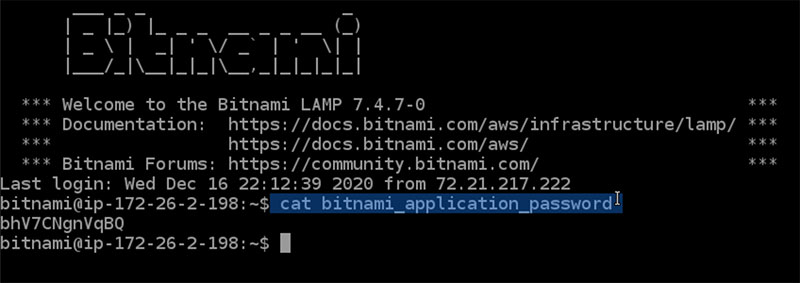
The root password for us is bhV7CNgnVqBQ
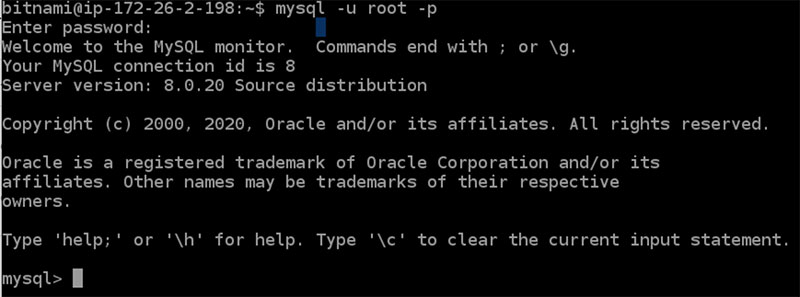
Now, let’s run the following command to create the new database
mysql -u root -p
Then enter the above password. Then you entered it into the MySQL console.
Let’s create a database, we are naming it “webocreationdb_2021”
CREATE DATABASE webocreationdb_2021;
Let’s create user “webocreationu12” with password ‘webocreation#123#dppass’ by running the command below:
CREATE USER 'webocreationu12'@'localhost' IDENTIFIED BY 'webocreation#123#dppass';
Let’s grant access to all for the user “webocreationu12” by running the command below:
GRANT ALL PRIVILEGES ON * . * TO 'webocreationu12'@'localhost';
Now, you can exit the database by typing the command exit;.
exit;
With all these, we are set for our database configuration.
- DB Driver: Select MySQLi
- Hostname: localhost
- Username: webocreationu12
- Password: webocreation#123#dppass
- Database: webocreationdb_2021
- Port: 3306
- Prefix: oc_ or any as you need.
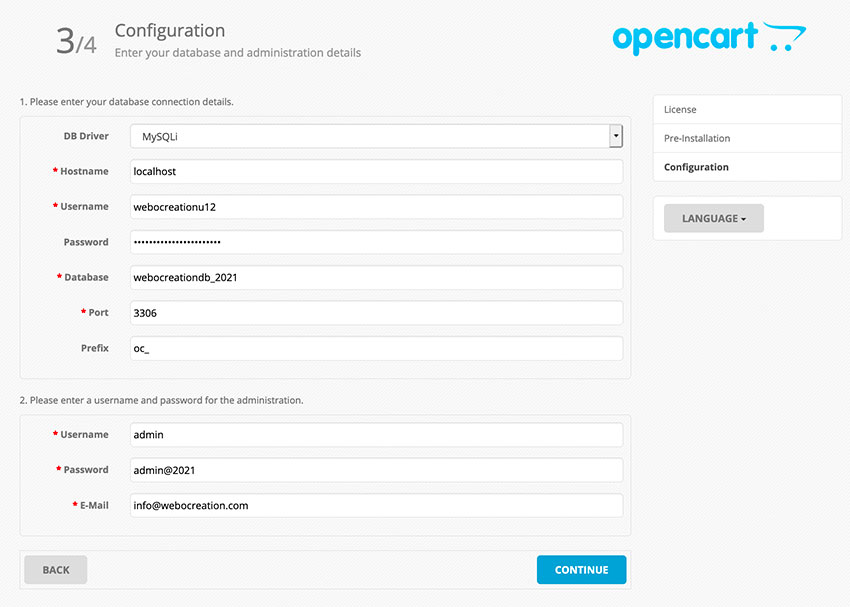
You can enter the username and password for the administration
- Username: admin (any)
- Password: admin@2021 (any)
- E-mail: info@webocreation.com (any)
Once, you entered all the details then click “Continue”.
In this 3rd step, you may see the blank page. So let’s debug the error. For that, let’s run the following command:
cd /opt/bitnami/apache2/htdocs/
sudo nano install/index.php
Then, in install/index.php, add the following lines of code.
ini_set('display_errors', 1);
ini_set('display_startup_errors', 1);
error_reporting(E_ALL);
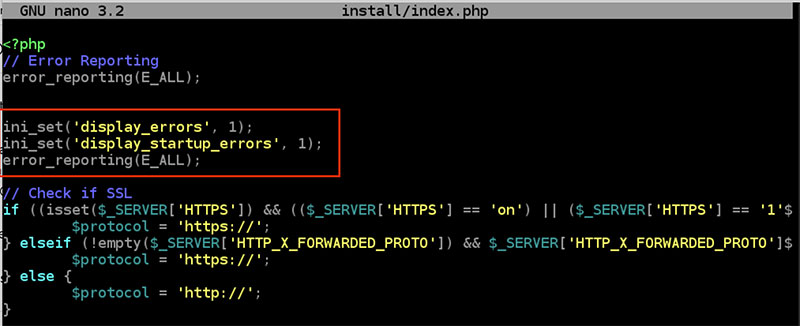
After adding the code, exit the nano by clicking Ctrl + O and then Ctrl + X. After this let’s refresh step 3 http://dpsignadvertising.com/install/index.php?route=install/step_3, then you will see error 2. Let’s fix error 2.
sudo nano install/cli_install.php
Then find the code $db->query(“SET @@session.sql_mode = ‘MYSQL40′”); and change to following:
$db->query("SET @@session.sql_mode = ''");
After the change, click Ctrl+O and Ctrl+X to exit the nano.
Similarly, do the same for install/model/install/install.php
sudo nano install/model/install/install.php
Then find the code $db->query(“SET @@session.sql_mode = ‘MYSQL40′”); and change to following:
$db->query("SET @@session.sql_mode = ''");
After the change, click Ctrl+O and Ctrl+X to exit the nano.
Now, go and refresh the URL http://dpsignadvertising.com/install/index.php?route=install/step_3 and your Opencart installation is completed.
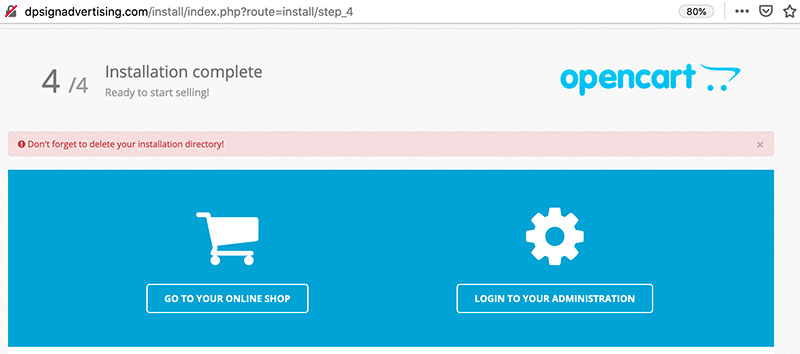
Now, let’s delete the install folder and other files and folders which are not needed.
sudo rm -rf install
sudo rm -rf backup
sudo rm opencart-3.0.3.6.zip
With this Opencart installed, now let’s install the SSL certificate and implement the SEO URL for Opencart.
Install the free Let’s Encrypt Certificate
Install Certbot on your Lightsail instance by running the following commands:
sudo apt-get install software-properties-common -y
sudo apt-add-repository ppa:certbot/certbot -y
sudo apt-get update -y
sudo apt-get install certbot -y
Request a Let’s Encrypt SSL wildcard certificate by running the following commands, don’t forget to replace your domain where we use dpsignadvertising.com
DOMAIN=dpsignadvertising.com
WILDCARD=*.$DOMAIN
sudo certbot -d $DOMAIN -d $WILDCARD --manual --preferred-challenges dns certonly
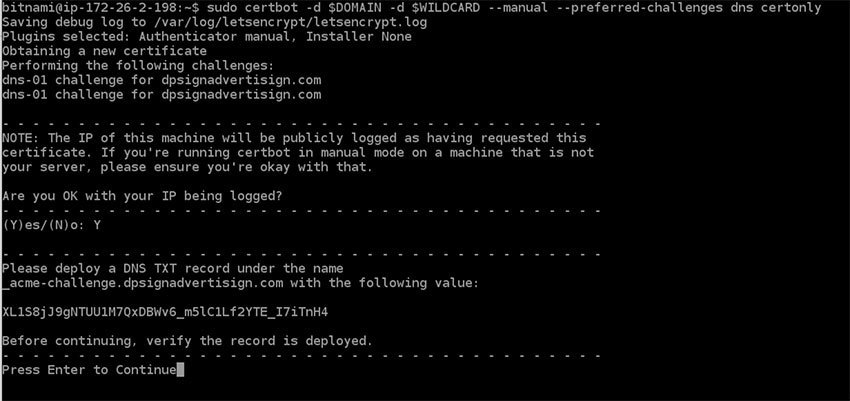
Before entering the Continue, you need to add the TXT record in the “Add record”. So, go to Lightsail dashboard >> Networking tab >> Click the DNS Zones for dpsignadvertising.com >> Click to Add record >> Select the TXT record >> in the Subdomain adds _acme-challenge >> in the “Responds with” add the value shown in console, ours is “XL1S8jJ9gNTUU1M7QxDBWv6_m5lC1Lf2YTE_I7iTnH4” and save it by clicking the green checkmark.

Please wait for some time so that it propagates, after around 10 mins we click Continue in the Console.
Sometimes, it asks to add multiple TXT records. This must be set up in addition to the previous challenges; do not remove, replace, or undo the previous challenge tasks yet. Note that you might be asked to create multiple distinct TXT records with the same name. This is permitted by DNS standards.
Create links to the Let’s Encrypt certificate files in the Apache server directory by running the following commands:
sudo /opt/bitnami/ctlscript.sh stop
sudo mv /opt/bitnami/apache/conf/bitnami/certs/server.crt /opt/bitnami/apache/conf/bitnami/certs/server.crt.old
sudo mv /opt/bitnami/apache/conf/bitnami/certs/server.key /opt/bitnami/apache/conf/bitnami/certs/server.key.old
sudo ln -s /etc/letsencrypt/live/$DOMAIN/privkey.pem /opt/bitnami/apache/conf/bitnami/certs/server.key
sudo ln -s /etc/letsencrypt/live/$DOMAIN/fullchain.pem /opt/bitnami/apache/conf/bitnami/certs/server.crt
sudo /opt/bitnami/ctlscript.sh start
Configure HTTP to HTTPS redirection for your web application by running the following commands:
sudo vim /opt/bitnami/apache2/conf/bitnami/bitnami.conf
Add the following lines of code:
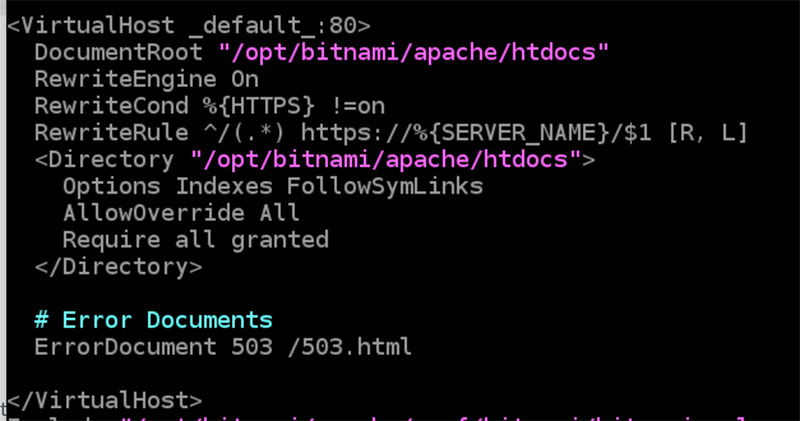
RewriteEngine On
RewriteCond %{HTTPS} !=on
RewriteRule ^/(.*) https://%{SERVER_NAME}/$1 [R,L]
After adding the code click the ESC key, and then enter:wq to save your changes, and quit Vim. Then restart the LAMP stack
sudo /opt/bitnami/ctlscript.sh restart
With these changes your SSL certificate is ready. Now you need to change a setting in Opencart admin and change the URL in the config.php and admin/config.php
cd /opt/bitnami/apache2/htdocs
sudo nano config.php
Change the define(‘HTTPS_SERVER’, ‘http://dpsignadvertising.com/’); to add https://
define('HTTPS_SERVER', 'https://dpsignadvertising.com/');
Exit it by pressing Ctrl + O to save and then enter, after that Ctrl + X to exit
Similarly, open admin/config.php and change the following to HTTPS://
// HTTPS
define('HTTPS_SERVER', 'https://dpsignadvertising.com/admin/');
define('HTTPS_CATALOG', 'https://dpsignadvertising.com/');
Exit it by pressing Ctrl + O to save and then enter, after that Ctrl + X to exit.
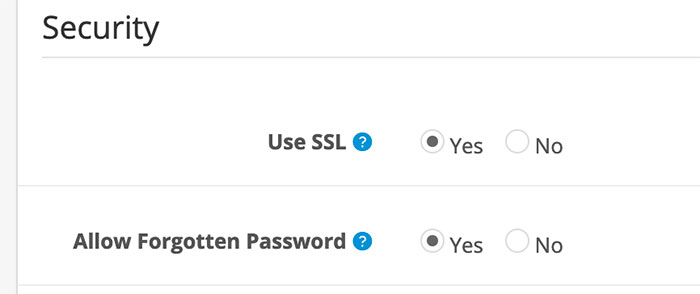
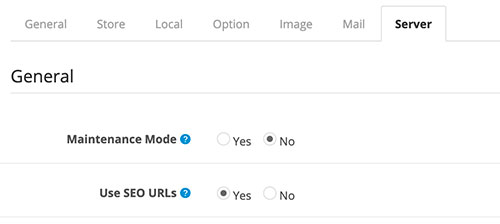
Now go to https://dpsignadvertising.com/admin and System >> Settings >> Edit the store >> go to the Server tab >> in the security section select Yes for “Use SSL”. Then click Save.
With these steps, your SSL is activated for your domain.
Rename .htaccess.txt to .htaccess
Pull the .htaccess.txt of the Opencart and rename it to .htaccess
sudo wget https://raw.githubusercontent.com/opencart/opencart/master/upload/.htaccess.txt
sudo mv .htaccess.txt .htaccess
Read more about SEO friendly URL of Opencart
Activate the SEO URL
Once the .htaccess.txt is renamed to .htaccess, then we can activate the SEO URL at the admin. Go to admin >> System >> Settings >> Edit the Store >> Server tab >> Select Yes for “Use SEO URL”.
Read more for some best practices of Opencart SEO.
How to set up FileZilla SFTP in AWS Lightsail to transfer files?
In the Protocol field, you need to select SFTP – SSH File Transfer Protocol. The Host is your public IP. In Logon Type, you need to select the Key file. In the User field, you need to type bitnami. Finally in the Key file field, add the public key (where can you find the public key).
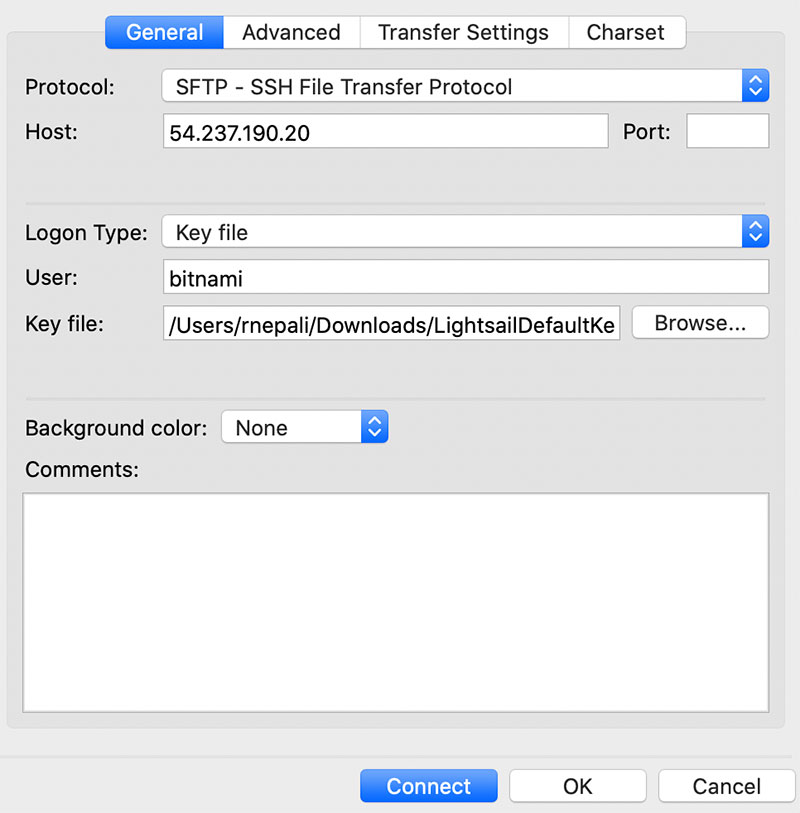
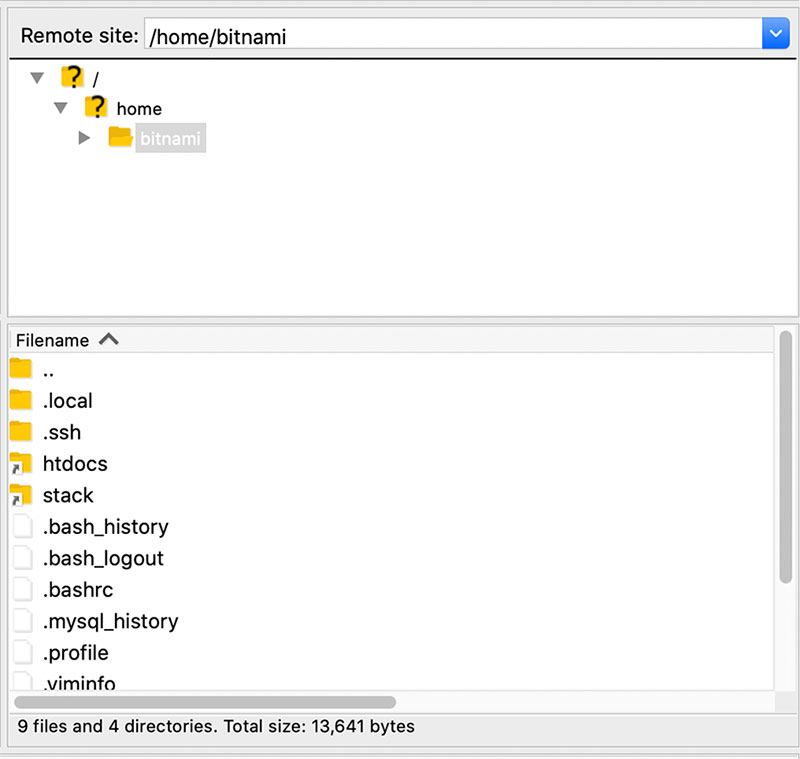
Then, click Connect button. You will get a list of folders, your code will be at htdocs.
PHPMyadmin access
Download the Lightsail SSH public key and change its permission to 0644 and make a tunnel to connect to PHPmyadmin. First, run the following command. Change the path of the key as per yours.
sudo chmod 0644 '/Applications/MAMP/htdocs/webocreation-bk/LightsailDefaultKey-us-east-1.pem'
sudo ssh -N -L 8888:127.0.0.1:80 -i /Applications/MAMP/htdocs/webocreation-bk/LightsailDefaultKey-us-east-1.pem bitnami@3.238.31.110
Then, go to http://127.0.0.1:8888/phpmyadmin/ and you will be able to log in to the PHPMyadmin. The username is the root and you can get the password by running the following command the first time you logged in:
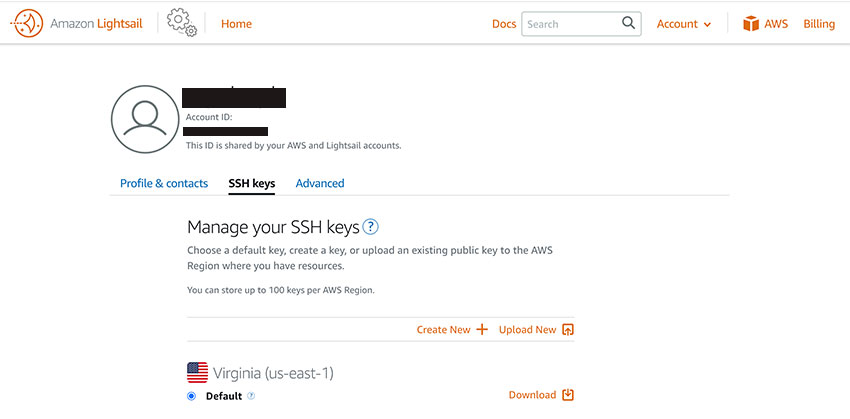
Where can you find the SSH public key in AWS Lightsail?
To get your SSH public key in AWS Lightsail, go to the top menu “Account“, then click on the SSH Keys tab, where you can see the lists of keys as per your region. Download the key as per your region. (How to find the region key pair of your EC2 instance?)
How to find the region key pair of your EC2 instance?
Click on the instance and go to Connect tab, then at the bottom, it shows which key pair is used for this instance.
You configured this instance to use default (us-east-1) key pair.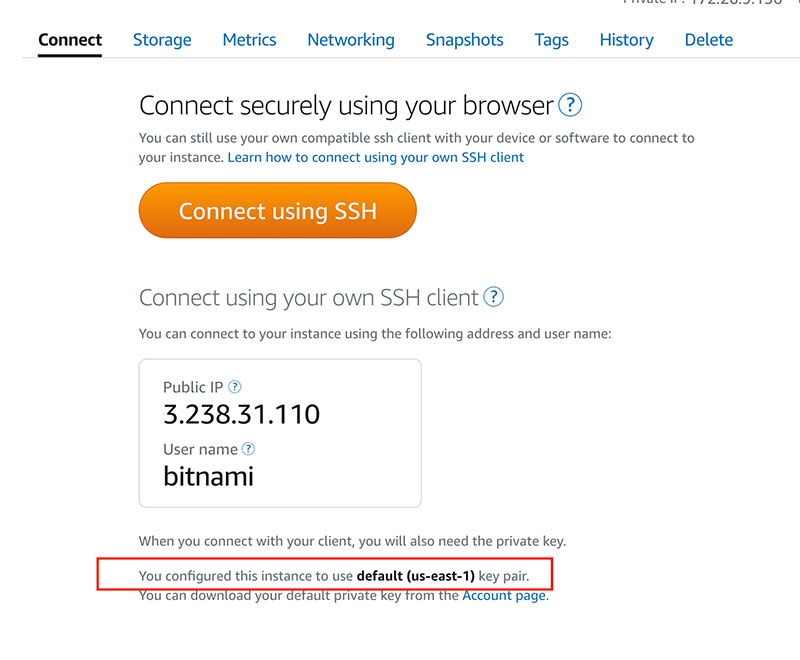
How to upgrade to a higher Lightsail package?
To upgrade your Lightsail plan to a larger instance, take a snapshot and then create a larger instance from the snapshot.

Setup CDN Content Distribution in AWS
Go to Lightsail dashboard >> Networking tab >> Click the “Create distribution” button >> Then, in Choose your origin, select your Instance
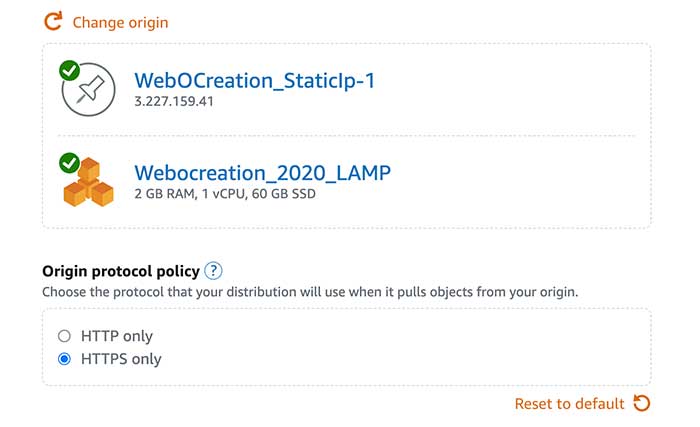
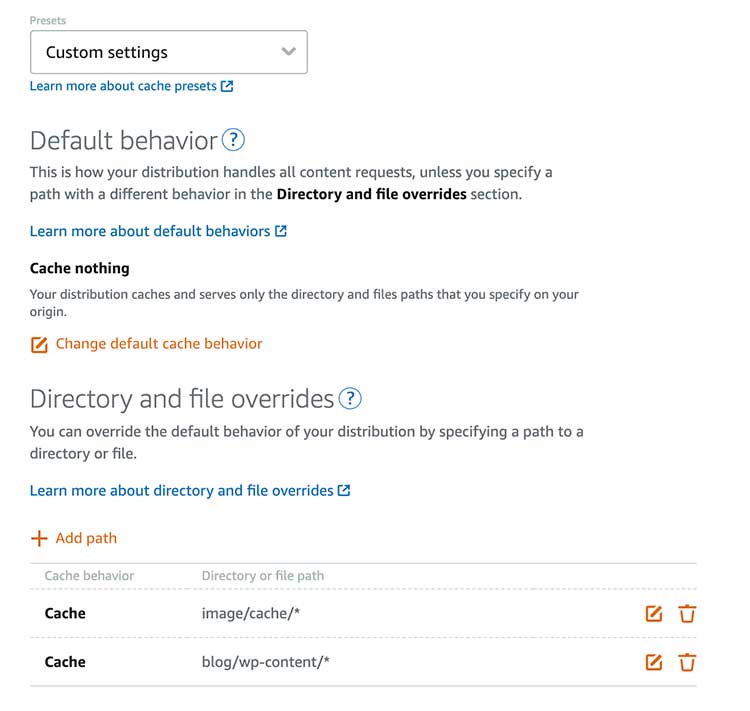
You can “Best for Dynamic Content” or Custom settings. Change the default cache behavior to cache nothing, then change the “Directory and file overrides” and give a path to the image cache.
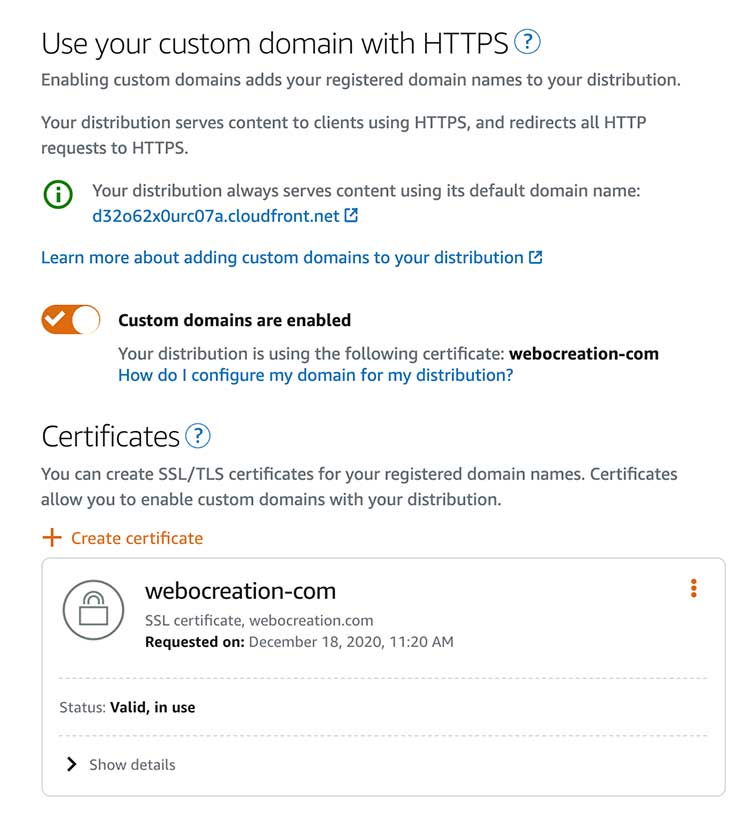
In the Custom domains, first, create the SSL certificates and then enable the custom domains.
You can leave the remaining setting as it is or change it as per your requirement and click the “Create Distribution” button and your CDN is set up.
Then, change A record with the AWS Cloudfront URL by removing the Static IP.
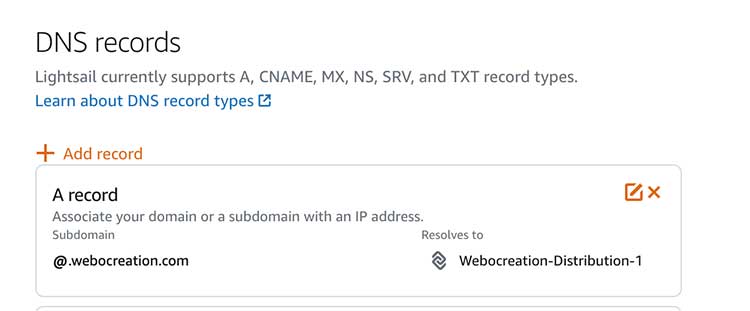
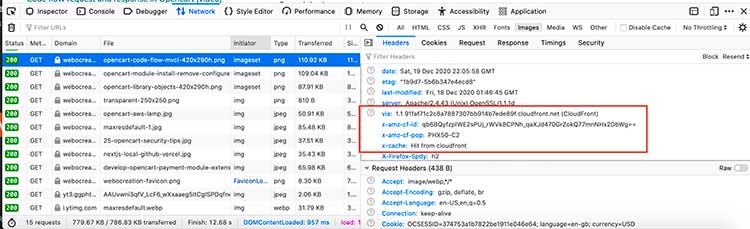
To check if the Cloudfront is working or not, just inspect the page and in the Network tab of the console, click the image and see the details. In the response, if it is serving via CloudFront URL and see the x-cache: “Hit from Cloudfront”, then CloudFront is serving the images.
Errors:
Error 1: Installation error because of ownership issues
Warning: fopen(/opt/bitnami/apache/htdocs/system/storage/session//sess_bb5cfd84f55cef397e6edd17cb): failed to open stream: Permission denied in /opt/bitnami/apache/htdocs/system/library/session/file.php on line 29Warning: flock() expects parameter 1 to be resource, bool given in /opt/bitnami/apache/htdocs/system/library/session/file.php on line 31Warning: fwrite() expects parameter 1 to be resource, bool given in /opt/bitnami/apache/htdocs/system/library/session/file.php on line 33Warning: fflush() expects parameter 1 to be resource, bool given in /opt/bitnami/apache/htdocs/system/library/session/file.php on line 35Warning: flock() expects parameter 1 to be resource, bool given in /opt/bitnami/apache/htdocs/system/library/session/file.php on line 37Warning: fclose() expects parameter 1 to be resource, bool given in /opt/bitnami/apache/htdocs/system/library/session/file.php on line 39Solution Error 1: run command ‘sudo chown daemon:daemon -R .’
Error 2: Fatal error: Uncaught Exception: Error: Variable ‘sql_mode’
Fatal error: Uncaught Exception: Error: Variable 'sql_mode' can't be set to the value of 'MYSQL40'<br />Error No: 1231<br />SET @@session.sql_mode = 'MYSQL40' in /opt/bitnami/apache/htdocs/system/library/db/mysqli.php:40 Stack trace: #0 /opt/bitnami/apache/htdocs/system/library/db.php(45): DB\MySQLi->query() #1 /opt/bitnami/apache/htdocs/install/model/install/install.php(35): DB->query() #2 /opt/bitnami/apache/htdocs/system/engine/loader.php(248): ModelInstallInstall->database() #3 /opt/bitnami/apache/htdocs/system/engine/proxy.php(47): Loader->{closure}() #4 /opt/bitnami/apache/htdocs/install/controller/install/step_3.php(11): Proxy->__call() #5 /opt/bitnami/apache/htdocs/system/engine/action.php(79): ControllerInstallStep3->index() #6 /opt/bitnami/apache/htdocs/system/engine/router.php(67): Action->execute() #7 /opt/bitnami/apache/htdocs/system/engine/router.php(56): Router->execute() #8 /opt/bitnami/apache/htdocs/system/framework.php(165): Router->dispatch() #9 /opt/bitnami/apache/htdocs/system/startup.php(104): requir in /opt/bitnami/apache/htdocs/system/library/db/mysqli.php on line 40Solution Error 2: Remove the MYSQL40. Find the code $db->query(“SET @@session.sql_mode = ‘MYSQL40′”); and remove the MYSQL40 so that the code looks like $db->query(“SET @@session.sql_mode = ””);
Error 3: AWS LightSail 500 Internal Server Error
Internal Server Error
The server encountered an internal error or misconfiguration and was unable to complete your request.
Please contact the server administrator at you@example.com to inform them of the time this error occurred, and the actions you performed just before this error.
More information about this error may be available in the server error log.
Solution Error 3: check if the .htaccess is there and rename it to a different till you fix the .htaccess file
Error 4: WARNING: UNPROTECTED PRIVATE KEY FILE!
@@@@@@@@@@@@@@@@@@@@@@@@@@@@@@@@@@@@@@@@@@@@@@@@@@@@@@@@@@@
@         WARNING: UNPROTECTED PRIVATE KEY FILE!          @
@@@@@@@@@@@@@@@@@@@@@@@@@@@@@@@@@@@@@@@@@@@@@@@@@@@@@@@@@@@
Permissions 0644 for '/Applications/MAMP/htdocs/webocreation-bk/LightsailDefaultKey-us-east-1.pem' are too open.
It is required that your private key files are NOT accessible by others.
This private key will be ignored.
Load key "/Applications/MAMP/htdocs/webocreation-bk/LightsailDefaultKey-us-east-1.pem": bad permissions
bitnami@3.238.31.110: Permission denied (publickey).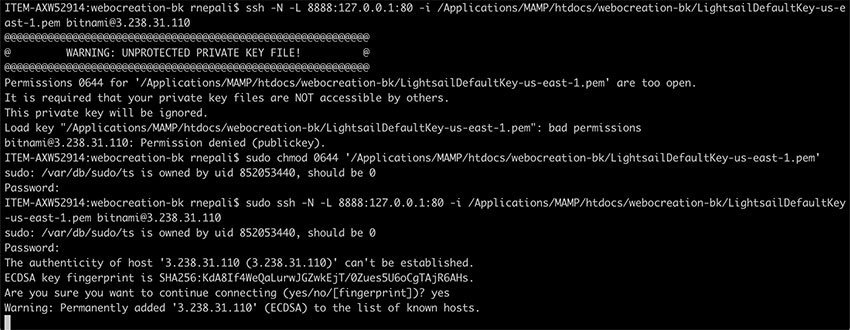
Solution Error 4: Give permission to the key file of 0644 by running “chmod 0644 pathofkeyfile“
Error 5: Error while generating the SSL certificate
Failed authorization procedure. dpsignadvertising.com (dns-01): urn:ietf:params:acme:error:unauthorized :: The client lacks sufficient authorization :: Incorrect TXT record "oujxGkfDXUloV5IUO3__gNQA47b1wePnF4rvUcQWclM" found at _acme-challenge.dpsignadvertising.comSolution Error 5: Check the TXT record and wait till it propagates.
Error 6: Class ‘Scssc’ not found
Fatal error: Uncaught Error: Class 'Scssc' not found in /opt/bitnami/apache/htdocs/admin/controller/startup/sass.php:9 Stack trace: #0 /opt/bitnami/apache/htdocs/system/engine/action.php(79): ControllerStartupSass->index() #1 /opt/bitnami/apache/htdocs/system/engine/router.php(67): Action->execute() #2 /opt/bitnami/apache/htdocs/system/engine/router.php(46): Router->execute() #3 /opt/bitnami/apache/htdocs/system/framework.php(165): Router->dispatch() #4 /opt/bitnami/apache/htdocs/system/startup.php(104): require_once('/opt/bitnami/ap...') #5 /opt/bitnami/apache/htdocs/admin/index.php(26): start() #6 {main} thrown in /opt/bitnami/apache/htdocs/admin/controller/startup/sass.php on line 9Solution Error 6: Check the vendor folder and upload the right Opencart version vendor folder.
Error 7: This site can’t be reached
This site can’t be reached
dpsignadvertising.com’s server IP address could not be found.
Try:
Checking the connection
Checking the proxy, firewall, and DNS configuration
ERR_NAME_NOT_RESOLVED
Solution Error 7: Either you just make DNS changes, so better to wait up to 1-2 hours. Or the IP address given is not correct.
Error 8: mysqli::__construct(): (HY000/2002): Connection refused
Warning: mysqli::__construct(): (HY000/2002): Connection refused in /opt/bitnami/apache/htdocs/system/library/db/mysqli.php on line 7Warning: DB\MySQLi::__construct(): Couldn't fetch mysqli in /opt/bitnami/apache/htdocs/system/library/db/mysqli.php on line 10Warning: DB\MySQLi::__construct(): Couldn't fetch mysqli in /opt/bitnami/apache/htdocs/system/library/db/mysqli.php on line 10
Fatal error: Uncaught Exception: Error: <br />Error No: in /opt/bitnami/apache/htdocs/system/library/db/mysqli.php:10 Stack trace: #0 /opt/bitnami/apache/htdocs/storage12/modification/system/library/db.php(35): DB\MySQLi->__construct() #1 /opt/bitnami/apache/htdocs/system/framework.php(80): DB->__construct() #2 /opt/bitnami/apache/htdocs/system/startup.php(104): require_once('/opt/bitnami/ap...') #3 /opt/bitnami/apache/htdocs/index.php(31): start() #4 {main} thrown in /opt/bitnami/apache/htdocs/system/library/db/mysqli.php on line 10
Solution Error 8: Make sure your database server is not down.
In this way, you can set up the Opencart in AWS Lightsail. You can see how to set up Opencart in google cloud. Hope you liked this opencart tutorial, please subscribe to our YouTube Channel for Opencart video tutorials. You can also find us on Twitter and Facebook.
I found out few errors on the post.
sudo chown -R bitnami:daemon /opt/bitnami/apache2/htdocs/ –this is wrong
sudo chown -R daemon:daemon /opt/bitnami/apache2/htdocs/ –replace with this
mv ./backup/upload/* . –this is wrong
sudo mv ./backup/upload/* . ./ –replace with this in this case you move the files to htdocs
this command got a syntex error : $db->query(“SET @@session.sql_mode = ””);
replace it with $db->query(“SET @@session.sql_mode = ””);
final step, manually move storage folder, dont let it move autometically, then edit config files to point to new location for Storage folder
Hi, I followed this tutorial roughly a dozen times! And I still can’t get the front end to work – I can view the dashboard, at domain.com/admin but the store will not show at domain.com
I’ve had some instructions adjust permissions of folders but I am completely lost. I feel like there is a step missing from this tutorial to get the front end to show on the domain.
were you able to figure this out? Maybe i can help.
Amazing tutorial. Every instruction needs to be followed precisely and consecutively to get this tutorial to work. I tried to be smart and download 3.0.3.17 [the latest & greatest] and flunked miserably.
Now that I was able to get this working end to end, if anyone needs some help or is stuck, feel free to reach out to me directly at makhani@berkeley.edu. I got you!
Likewise for those that receive headaches when programming & configuring the latest & greatest software, I am available for consulting. Email me at the address aforementioned.
Lastly, I just wanted to thank the author for writing a damn good tutorial. This stuff is super hard and I really respect those that go out of their way to put up content for education.
Sincerely
Samir
good