OpenCart 3 error Warning: You do not have permission to modify the default store theme!

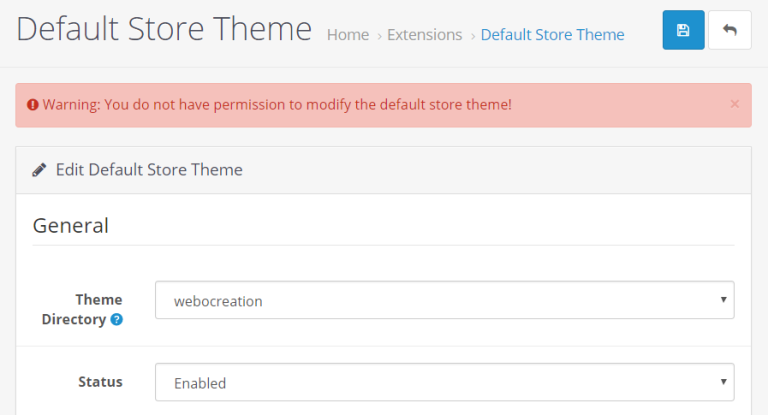
While playing around with OpenCart 3.0.0.0 we were trying to create a new OpenCart 3.0 theme and for that, we copy the default theme and named “Webocreation” and was doing the following setting but got an error: “Warning: You do not have permission to modify the default store theme!”

So make the following changes to solve the problem:

The above error says we don’t have permission to modify so we tried to give permission as follows:

  • Admin >> System >> Users >> User Groups >> Edit the Administrator >> clicked “Select All” for both access permission and modify permission, then clicked save.

With the above permission, we should be able to get access but still got the same errors so we checked the code and found some glitch.

We checked admin\controller\extension\theme\default.php in OpenCart 3.0 and found following permission check at validate() method.

if (!$this->user->hasPermission('modify', 'extension/theme/theme_default')) {
    $this->error['warning'] = $this->language->get('error_permission');
}

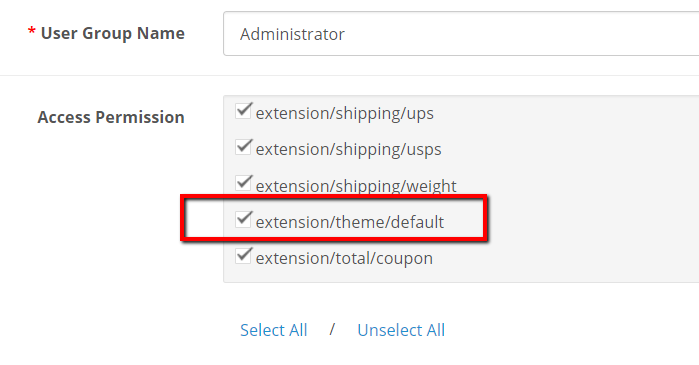
But when we check at the User group permission it is extension/theme/default

extension theme default

So above code need to change to the following:

if (!$this->user->hasPermission('modify', 'extension/theme/default')) {
    $this->error['warning'] = $this->language->get('error_permission');
}

With this change, we are able to save, but still, we are not able to retrieve the save theme setting so we checked the code again and found the following:

if (isset($this->request->get['store_id']) && ($this->request->server['REQUEST_METHOD'] != 'POST')) {
    $setting_info = $this->model_setting_setting->getSetting('default', $this->request->get['store_id']);
}

So we changed it to following

if (isset($this->request->get['store_id']) && ($this->request->server['REQUEST_METHOD'] != 'POST')) {
    $setting_info = $this->model_setting_setting->getSetting('theme_default', $this->request->get['store_id']);
}

Then, it all starts to work. If you are also getting such an error, we hope it will help you to solve the problem. Enjoy and let us know if you are getting any kind of errors.

Opencart 3 – display images of the sub-categories in the category page

In this Opencart tutorial, we show you how to display sub-categories image on the category page in Opencart 3 by making code changes, click for Opencart 2 show images for sub-categories.

Open catalog/controller/product/category.php and find the following code:

$data['categories'][] = array(
    'name' => $result['name'] . ($this->config->get('config_product_count') ? ' (' . $this- 
     >model_catalog_product->getTotalProducts($filter_data) . ')' : ''),
    'href' => $this->url->link('product/category', 'path=' . $this->request->get['path'] . '_' . 
     $result['category_id'] . $url)
);

Then replace with the following code:

$image = "";
if ($result['image']) {
    $image = $this->model_tool_image->resize($result['image'], 100, 100);
}
$data['categories'][] = array(
    'name' => $result['name'] . ($this->config->get('config_product_count') ? ' (' . $this- 
     >model_catalog_product->getTotalProducts($filter_data) . ')' : ''),
    'image' => $image,
    'href' => $this->url->link('product/category', 'path=' . $this->request->get['path'] . '_' . 
    $result['category_id'] . $url)
);

Open catalog/view/theme/default/template/product/category.twig and find the following code:

{% if categories|length <= 5 %}
    <div class="row">
        <div class="col-sm-3">
            <ul>
                {% for category in categories %}
                    <li>
                        <a href="{{ category.href }}">
                            {{ category.name }}
                        </a>
                    </li>
                {% endfor %}
            </ul>
        </div>
    </div>
{% else %}
    <div class="row">
        {% for category in categories|batch((categories|length / 4)|round(1, 'ceil')) %}
            <div class="col-sm-3">
                <ul>
                    {% for child in category %}
                        <li>
                            <a href="{{ child.href }}">
                                {{ child.name }}
                            </a>
                        </li>
                    {% endfor %}
                </ul>
            </div>
        {% endfor %}
    </div>
    <br/>
{% endif %}

Replace with the following code:

 {% if categories|length <= 5 %}
    <div class="row">
        <div class="col-sm-3">
            <ul>
                {% for category in categories %}
                    <li>
                        {% if category.image  %}
                            <div>
                                <img src="{{ category.image }}" alt="{{ category.name }}" title="{{ category.name }}" class="img-thumbnail"/>
                            </div>
                        {% endif %}

                        <a href="{{ category.href }}">
                            {{ category.name }}
                        </a>
                    </li>
                {% endfor %}
            </ul>
        </div>
    </div>
{% else %}
    <div class="row">
        {% for category in categories|batch((categories|length / 4)|round(1, 'ceil')) %}
            <div class="col-sm-3">
                <ul>
                    {% for child in category %}
                        <li>
                            <div>
                                {% if child.image  %}
                                    <img src="{{ child.image }}" alt="{{ child.name }}" title="{{ child.name }}" class="img-thumbnail"/>
                                {% endif %}
                            </div>

                            <a href="{{ child.href }}">
                                {{ child.name }}
                            </a>
                        </li>
                    {% endfor %}
                </ul>
            </div>
        {% endfor %}
    </div>
    <br/>
{% endif %}

In catalog/view/theme/default/template/product/category.twig there are two places where we added the following code:

 {% if category.image  %}
    <div>
        <img src="{{ category.image }}" alt="{{ category.name }}" title="{{ category.name }}" class="img- 
        thumbnail"/>
    </div>
{% endif %} 
{% if child.image  %}
    <div>
        <img src="{{ child.image }}" alt="{{ child.name }}" title="{{ child.name }}" class="img-thumbnail"/>
    </div>
{% endif %}

Once we added the above code then we can see the images of the sub-categories.

Sub-categories Images in category page

This way we can show the sub-categories image on the category page. Let us know if need any support. Hope you liked this post, please subscribe to our YouTube Channel for Opencart video tutorials. You can also find us on Twitter and Facebook.

Easy steps to setup local environment of Pantheon with Lando

This is an introduction of Lando and how to set up locally and set up the Pantheon environment in the local environment so that we can have the same environment as Pantheon and development, testing and deployment are so easy. Pantheon supports both WordPress and Drupal.

Install Lando

Mac

  • Ensure homebrew is installed and up-to-date.
  • Add the Lando cask: brew cask install lando

Windows:

  • Download the .exe file and install it from
    https://github.com/lando/lando/release

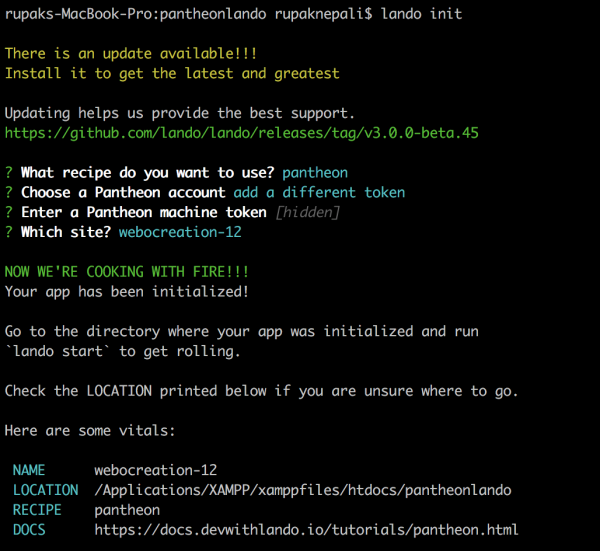
Now create a folder let’s say “pantheonlando” then go inside that folder and run lando init

lando init

After that it will ask the following questions:

  • What recipe do you want to use? pantheon
    Choose pantheon.
  • Choose a Pantheon account: add a different token
    Choose: add a different token
  • Enter a Pantheon machine token [hidden]
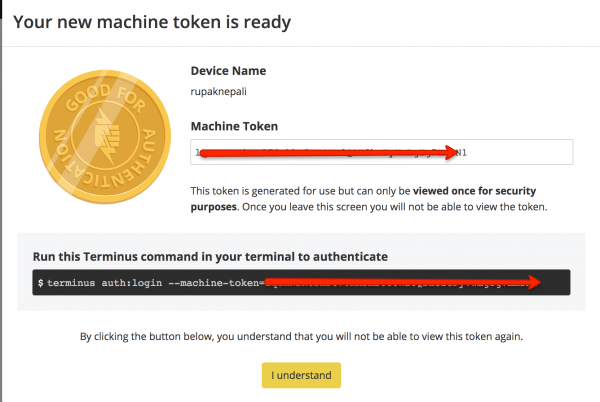
    Enter the token, if you don’t have one, create at Pantheon and enter that token here.
  • Which site? webocreation-12
    It will list out all the sites in your pantheon account, choose one
lando init

With this, Lando is initialized.

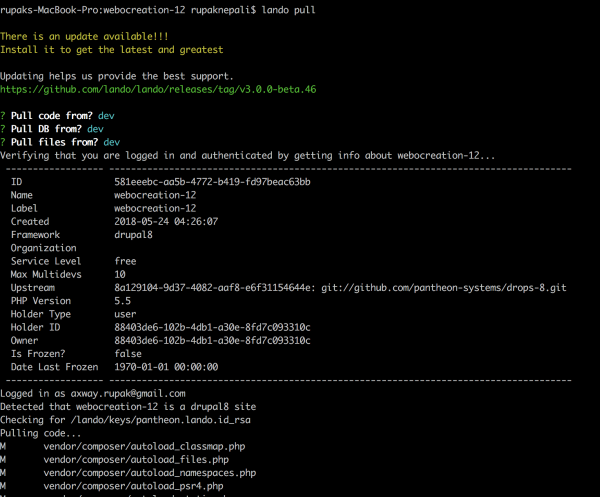
Import Pantheon Database, code, and files

lando pull
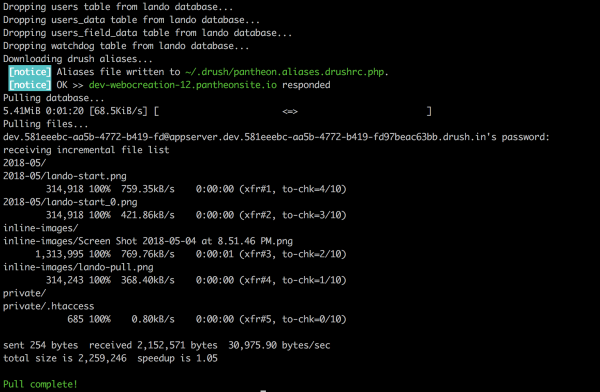
lando pull
lando pull

It drops all the database and pulls the recent one and all the files uploaded.

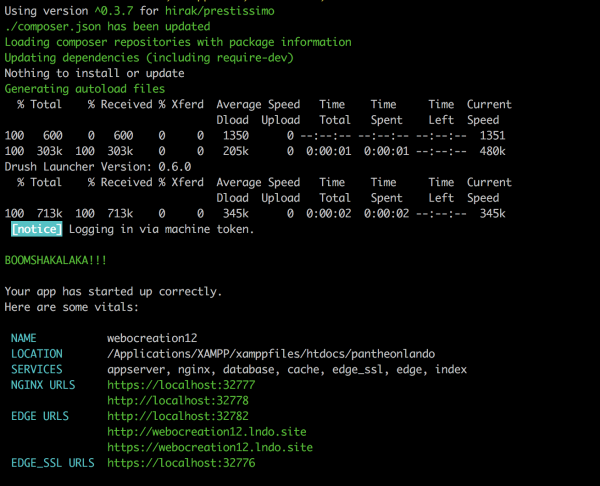
Start your site:

In the terminal run:

lando start

BOOMSHAKALAKA!!! Your site is ready.

lando start

Now go to NGINX URLs, here as in the example it is http://localhost:32778 but yours can be different.

With these steps, developers can quickly specify and painlessly spin up the services and tools needed to develop their projects of the pantheon and test it locally.

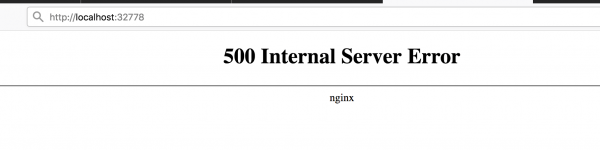
If you got 500 Internal Server Error, you may have forgotten to run composer install or perform lando pull or check the files and folder permission.

lando 500 internal server error

Let us know if you find any issues so that we can try to find the solution for you.

Enjoy Lando, for more details visit https://docs.devwithlando.io/tutorials/pantheon.html.

Pardot, Mailchimp, and website integrating Marketing system

With Digital Business Transformation approaches, business activities are more focused on automating Marketing system, as automation improves the lead nurturing process in a number of ways so being experienced in Pardot and Mailchimp, following can be one way to automate your subscription of the blog and pass data from Website to MailChimp to Pardot. With this you can use your website blog RSS feed and send daily, weekly or monthly email to your subscribers which will be handled by Mailchimp and data will be passed from Mailchimp activities to the website and then to Pardot where you can analyze your prospects more thoroughly and increase the reach.

Why this approach?

We did not find a way in Pardot to handle RSS feed and send published blogs to the subscribers on the predefined date so we have to use the MailChimp to automate it.

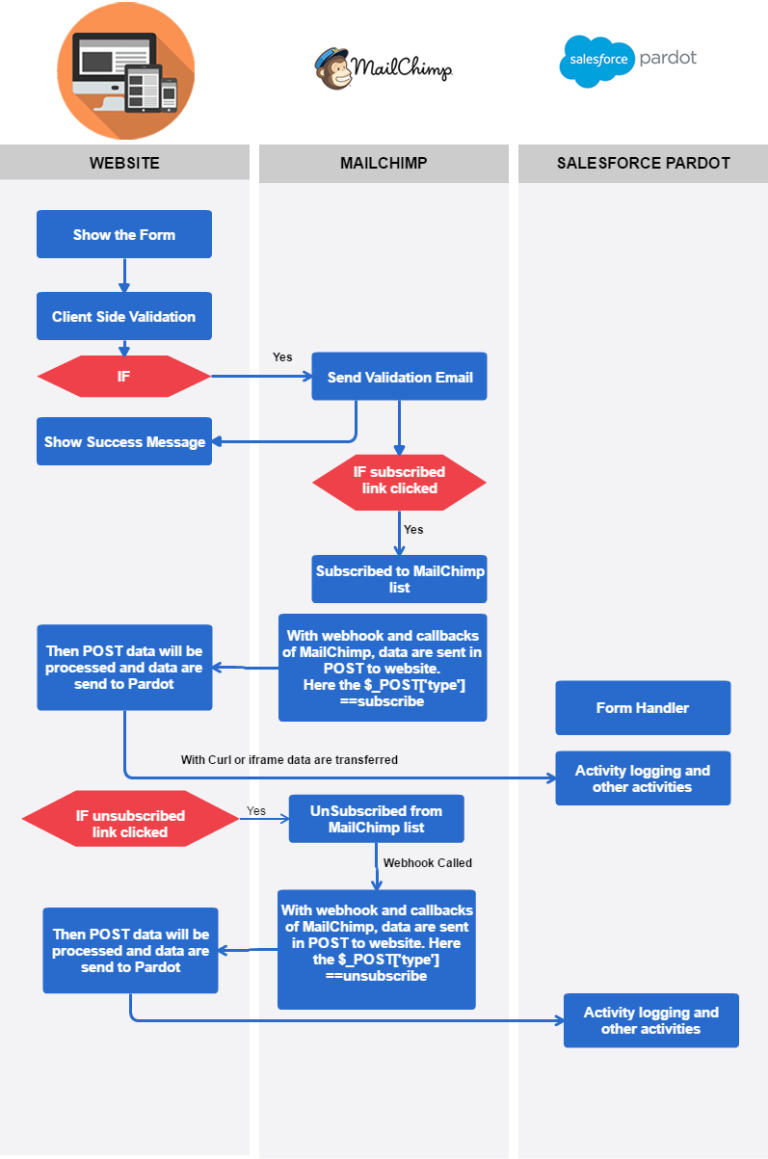
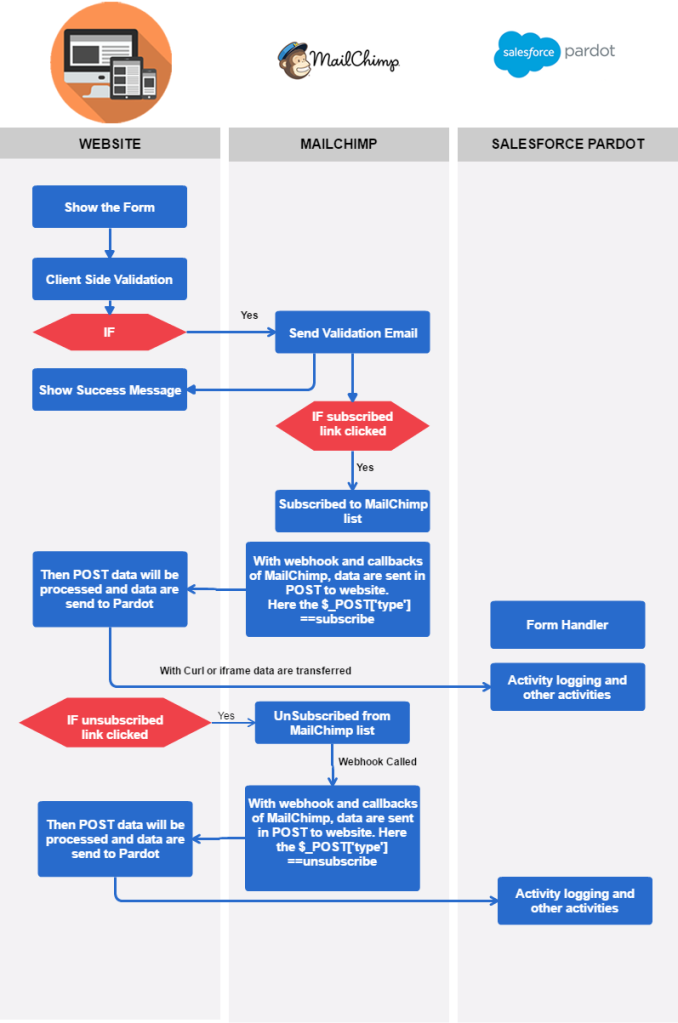
One of the workflows can be as below:

Mailchimp Pardot flow step

When visitors visit a website then they will see sign up form let’s say newsletter sign up form having two field email and first name. If they fill-up the form with the correct email format then they will get an email to confirm the email from the MailChimp and once they confirmed the subscription then they will be added to the subscriber’s list in the MailChimp.

Set Up WebHooks

  • Navigate to the Lists page.
  • Click the drop-down menu next to the list you want to work with, and choose Settings.
  • Select Settings
  • On the Settings page, click Webhooks.
  • Click Create New Webhook.
  • In the Callback URL field, type the URL from your integration or application where you want to send webhook requests. This URL will receive data about events going on in your MailChimp list.
  • If you don’t have a callback URL yet, contact your developer or hire an expert to set it up.
  • Check the boxes next to each update type to choose the events that will trigger your webhook.
    http://kb.mailchimp.com/integrations/api-integrations/how-to-set-up-webhooks
  • Click Save.
  • After the URL is saved, the webhook will notify your application of any events.

With webhook and callbacks of MailChimp, data are sent in POST to the website. For now, there is no connection between Mailchimp and Pardot. If anything is needed we need to handle from website and MailChimp webhooks and callbacks. When webhooks are called then this call URL will be called and code in that page runs.

Subscription mechanism with Pardot:

When someone subscribes from the website inserting name and email then these data also need to be passed to the Pardot.
As MailChimp does not transfer data directly to the Pardot so needs to create webhooks between website and MailChimp and transfer data from the website to Pardot. Similarly, we have to perform the same when someone unsubscribes in Mailchimp we have to trigger the webhook callback function and then use the form handler and submit for the prospects.

In this way, we can handle the data transfer from the website to MailChimp, MailChimp to the website and then website to Pardot.

Contact us if you want this to be implemented in your system.

Other posts about Pardot:

Show attributes of products in category page Opencart 2.0+ and 3.0+

This opencart tutorial shows how to show attributes of products in category page in Opencart 2.0 and Opencart 3.0.3.2 we will provide OCMOD and VqModafter some time:

Open catalog/controller/product/category.php and find following code:

$data['products'][] = array(
	'product_id'  => $result['product_id'],
	'thumb'       => $image,
	'name'        => $result['name'],
	'description' => utf8_substr(trim(strip_tags(html_entity_decode($result['description'], ENT_QUOTES, 'UTF-8'))), 0, $this->config->get('theme_' . $this->config->get('config_theme') . '_product_description_length')) . '..',
	'price'       => $price,
	'special'     => $special,
	'tax'         => $tax,
	'minimum'     => $result['minimum'] > 0 ? $result['minimum'] : 1,
	'rating'      => $result['rating'],
	'href'        => $this->url->link('product/product', 'path=' . $this->request->get['path'] . '&product_id=' . $result['product_id'] . $url)
);

Now add one line in it ‘attribute_groups’ => $this->model_catalog_product->getProductAttributes($result[‘product_id’]), then the products array will be like below:

$data['products'][] = array(
	'product_id'  => $result['product_id'],
	'thumb'       => $image,
	'attribute_groups'       => $this->model_catalog_product->getProductAttributes($result['product_id']),
	'name'        => $result['name'],
	'description' => utf8_substr(trim(strip_tags(html_entity_decode($result['description'], ENT_QUOTES, 'UTF-8'))), 0, $this->config->get('theme_' . $this->config->get('config_theme') . '_product_description_length')) . '..',
	'price'       => $price,
	'special'     => $special,
	'tax'         => $tax,
	'minimum'     => $result['minimum'] > 0 ? $result['minimum'] : 1,
	'rating'      => $result['rating'],
	'href'        => $this->url->link('product/product', 'path=' . $this->request->get['path'] . '&product_id=' . $result['product_id'] . $url)
);

For OpenCart 3.0+

Now open catalog/view/theme/YOUR_THEME_FOLDER/template/product/category.twig and add following codes just below <p>{{ product.description }}</p>

{% if product.attribute_groups %}
<div class="tab-pane" id="tab-specification">
  <table class="table table-bordered">
    {% for attribute_group in product.attribute_groups %}
    <thead>
      <tr>
        <td colspan="2"><strong>{{ attribute_group.name }}</strong></td>
      </tr>
    </thead>
    <tbody>
    {% for attribute in attribute_group.attribute %}
    <tr>
      <td>{{ attribute.name }}</td>
      <td>{{ attribute.text }}</td>
    </tr>
    {% endfor %}
      </tbody>
    {% endfor %}
  </table>
</div>
{% endif %}

For OpenCart 2.0+

Now open catalog/view/theme/YOUR_THEME_FOLDER/template/product/category.tpl and add following codes just below <p><?php echo $product[‘description’]; ?></p>

<p>
  <?php if ($product['attribute_groups']) { ?>
<div class="tab-pane" id="tab-specification">
  <table class="table table-bordered">
    <?php foreach ($product['attribute_groups'] as $attribute_group) { ?>
    <thead>
    <tr>
      <td colspan="2"><strong><?php echo $attribute_group['name']; ?></strong></td>
    </tr>
    </thead>
    <tbody>
    <?php foreach ($attribute_group['attribute'] as $attribute) { ?>
    <tr>
      <td><?php echo $attribute['name']; ?></td>
      <td><?php echo $attribute['text']; ?></td>
    </tr>
    <?php } ?>
    </tbody>
    <?php } ?>
  </table>
</div>
<?php } ?>
</p>

Save and reload and it will show attributes in category’s products

attributes-at-category-page

If you need to do for the featured products, bestseller products then follow similar code changes in their controller and view files.

Comment below or let us know if you have any questions or requirements for OpenCart. You can subscribe to our youtube channel for OpenCart tutorials.

“What People are Buying right now?” Opencart Module for free

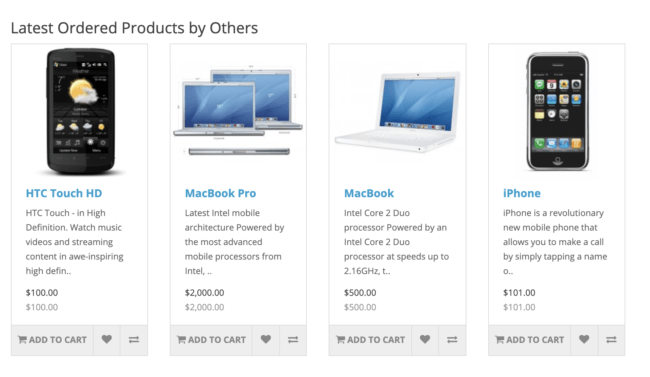
Another free Opencart module for my visitors and subscribers, this extension will show “What People are buying right now?”. It lists out the recently ordered products.

To download the module click below:

Installation

Upload the folders ‘admin’ and ‘catalog’ and their files from the extracted directory to your server OpenCart main directory. Check this installation video if have any issues

OpenCart core files are not changed.

After installation:

You can edit the module and setup following:

Then setup in your preferred layout and you will see like below:

Query implemented is below:

public function getLatestOrderedProducts($limit)
{
	$product_data = "";
	$product_data = $this->cache->get('product.latestordered.' . (int)$this->config->get('config_language_id') . '.' . (int)$this->config->get('config_store_id') . '.' . $this->config->get('config_customer_group_id') . '.' . (int)$limit);

	if (!$product_data) {
		$product_data = array();

		$query = $this->db->query("SELECT op.product_id FROM " . DB_PREFIX . "order_product op LEFT JOIN `" . DB_PREFIX . "order` o ON (op.order_id = o.order_id) LEFT JOIN `" . DB_PREFIX . "product` p ON (op.product_id = p.product_id) LEFT JOIN " . DB_PREFIX . "product_to_store p2s ON (p.product_id = p2s.product_id) WHERE o.order_status_id > '0' AND p.status = '1' AND p.date_available <= NOW() AND p2s.store_id = '" . (int)$this->config->get('config_store_id') . "' ORDER BY o.order_id DESC LIMIT " . (int)$limit);
		foreach ($query->rows as $result) {
			$product_data[$result['product_id']] = $this->getProduct($result['product_id']);
		}
		$this->cache->set('product.latestordered.' . (int)$this->config->get('config_language_id') . '.' . (int)$this->config->get('config_store_id') . '.' . $this->config->get('config_customer_group_id') . '.' . (int)$limit, $product_data);
	}

	return $product_data;
}

Further help and customized versions:

This module has been successfully tested for a standard OpenCart 3.0.3.2.

If you need a customized version of this module and any other Opencart help and support then let me know and I can create one for a charge.

If you get any problem with the module then let me know by commenting.

Youtube video to show with autoplay, Free Opencart module or extensions

Another Opencart module for free by webocreation.com which shows youtube video and autoplay it, download this extension upload and take the youtube video id and show it in module placed and autoplay it.

Download, extract and Upload the files and folder inside the upload/ folder to your respective admin/ and catalog/ folder. If you have a problem then watch this video which will show how to upload, install and configure opencart module

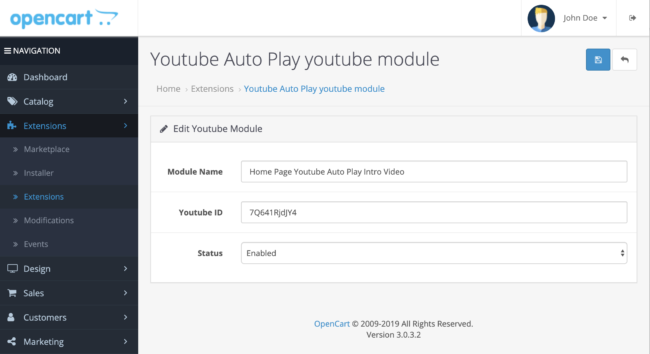
After uploading, go to Extensions >> Choose the Modules >> Then go to the “Youtube AutoPlay youtube module” and click + Install green button and then click the + blue button. After that, you will see the following screenshot where you have to enter the Module Name, Youtube Id and change the status to Enabled.

Youtube Auto Play Opencart module

Click Save.

Then go to Design >> Layouts >> Edit where you want to show the youtube video. For us we are showing it on the home page at the bottom so our setting is like below:

Layout and Position to show for the Youtube Autoplay module

With the above settings we can see the youtube video at the bottom of the home page, like in this demo:

Let us know if you need to improve anything in the module and we will make the adjustments as per your request. Thanks for using these modules and let us know if you have any requirements.

How to upgrade Opencart from version 2.3 to 3.0.3.1 and Journal theme 2 to 3?

Our webocreation.com is still in opencart v2.3 and today we are upgrading to opencart version 3.0.3.1 live. So that it will be pressure for us to complete it. We are able to upgrade in 1hrs and fix problems to go through the normal ordering. Previously we were using Journal version 2 and now we are using journal version 3.

Be prepared with the following:

  • Make a backup of every file and folder and the database.
  • Download the latest version of OpenCart, right now it is 3.0.3.2
  • Download the Journal theme version 3
  • Download the demo data of the Journal theme
  • Login to admin and disable the custom theme and set up the default theme of OpenCart so there are no conflicts.
  • Upload all the latest version Opencart files and folders to your server and go to your store URL, it mostly gives errors unless it is a minor version update.
  • Rename the Vqmod folder to something else as it may contain .xml files which give errors in major version upgrades.
  • Rename the journal-cache folder also if you have.
  • Remove all .xml files except modification.xml inside system/ folder
  • Go to system/storage/cache folder and delete all files and folder except index.html, similarly go to system/storage/modification and delete all files and folder except index.html, likewise, go to system/storage/upload and delete all files and folder except index.html. It means the need to remove all the cache and file modifications that are in the system/storage of Opencart 2.
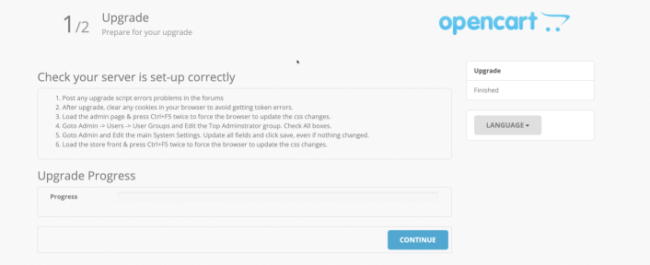
  • Then run YOURSTOREURL/install in your browser
  • You will see some notice, if you re-run then it will be resolved automatically.
  • Install the Opencart in the subfolder so that it will be easy to copy and paste in the config.php and get the files and folder as needed. This is extra steps but will be helpful to debug if something went wrong.
  • Update your config.php and admin/config.php as required as mostly, it missed the DIR_STORAGE constant.
  • Then go to the directory of DIR_STORAGE and upload files and folders to match the DIR_STORAGE folder of your demo sub-folder installation. Or you can download the following and extract and upload all files and folders to your store DIR_STORAGE path.
    • Download DIR_STORAGE files.
    • Some time upgrade code is not able to create the files and folders for the DIR_STORAGE so we have to upload it manually.
  • If you see errors then it is because of non-upgraded extensions, so find them out and disable them.
  • Then verify all of your extensions if they are enabled as mostly they got disabled when a major version upgrade is done.
  • Check for modules, shipping, payments, and Order totals likewise other Analytics, Captchas, etc
  • Don’t forget to delete Journal2 folders in admin and in catalog likewise in the system folder. Similarly, remove all .tpl files will be a good idea.
  • Happy Upgrading and hope it went smooth on your side.

Read: Learn Journal theme coding by example

Things to consider:

  • SEO URL alias is not transferred properly. So you have to transferred manually or write SQL code to transfer from the oc_url_alias to oc_seo_url, as now in OpenCart 3.0.3.1 the SEO URL is also stored specific and language-specific.
  • None of the Journal settings and configuration are transferred so if you have a unique design then you have entered them manually.
  • Most of the modules get disabled so need to enabled again.
  • Theme will show two default theme so need to disabled both and enable whichever works as this is because there are existing files of Opencart 2

Some of the error we fixed while we upgrade the OpenCart and Journal theme:

SyntaxError: Unexpected token < in JSON at position 0 parsererror Notice: Undefined variable: affiliatee in /public_html/install/model/upgrade/1009.php on line 23{“success”:”Patch 1009 has been applied (10 of 10)”,”next”:”index.php?route=upgrade\/upgrade\/next&step=11″}

-Re-run the install

Warning: fopen(DIR_STORAGElogs/openbay.log): failed to open stream: No such file or directory in /public_html/system/library/log.php on line 22Warning: fopen(DIR_STORAGElogs/error.txt): failed to open stream: No such file or directory in /public_html/system/library/log.php on line 22Warning: Use of undefined constant DIR_STORAGE – assumed ‘DIR_STORAGE’ (this will throw an Error in a future version of PHP) in /public_html/admin/controller/startup/sass.php on line 7Warning: include_once(DIR_STORAGEvendor/scss.inc.php): failed to open stream: No such file or directory in /public_html/admin/controller/startup/sass.phpon line 7Warning: include_once(): Failed opening ‘DIR_STORAGEvendor/scss.inc.php’ for inclusion (include_path=’.:/opt/alt/php72/usr/share/pear’) in /public_html/admin/controller/startup/sass.php on line 7

  • First, remove the cache which is in system/storage of OpenCart 2
  • Define the DIR_STORAGE constant at the config.php and provide the right path.
  • If you are confused which path to provide then install an Opencart in sub-folder and log in which will redirect you to define the storage folder. With this default setup, now you can see its config.php and admin/config.php and do the same for your store config.php and admin/config.php. This is one way.

Warning: fopen(/v3storage/cache/cache.catalog.language.1557105242): failed to open stream: No such file or directory in /public_html/system/library/cache/file.php on line 49Warning: flock() expects parameter 1 to be resource, boolean given in /public_html/system/library/cache/file.php on line 51Warning: fwrite() expects parameter 1 to be resource, boolean given in /public_html/system/library/cache/file.php on line 53Warning: fflush() expects parameter 1 to be resource, boolean given in /public_html/system/library/cache/file.php on line 55Warning: flock() expects parameter 1 to be resource, boolean given in /public_html/system/library/cache/file.php on line 57Warning: fclose() expects parameter 1 to be resource, boolean given in /public_html/system/library/cache/file.php on line 59Warning: fopen(/v3storage/cache/cache.currency.1557105242): failed to open stream

  • Upload the cache folder, download, logs, modification, session, upload, vendor files, and folder.
  • You can download here as well, which is the basic files and folder of the OpenCart installation

Error: A theme has not been assigned to this store!

You can fix the error by referring to this post as it contains some steps to solve it.

Notice: Undefined variable: _SESSION in /public_html/catalog/controller/extension/module/v2pagecache.php on line 13Error: A theme has not been assigned to this store!

In our case, most of the modules were disabled when we upgraded to OpenCart 3. Thus we re-installed modules, theme, Order Totals, payment and shipping also.

Journal Theme Installation Error
Make sure you have refreshed Opencart Modifications.

This is straight forward, go to admin>> Extensions >> Modifications and click the refresh button.

Let us know your upgrade process and issues if you got any.

Notice: Constant DATE_RFC7231 already defined in includes/bootstrap.inc on line 258

Notice: Constant DATE_RFC7231 already defined in includes/bootstrap.inc on line 258

Drupal 7:

  • Open /includes/bootstrap.inc
  • Go to line number 258
  • Comment out the following line
    //define(‘DATE_RFC7231’, ‘D, d M Y H:i:s \G\M\T’);
  • Then add following line
    if (!defined(‘DATE_RFC7231’)) {
    define(‘DATE_RFC7231’, ‘D, d M Y H:i:s \G\M\T’);
    }
  • Save and you are good to go 🙂

Solution: Failed to load the MailChimp PHP library or The MailChimp PHP library is missing the required GuzzleHttp library

0

Failed to load the MailChimp PHP library. Please refer to the installation requirements.
The MailChimp PHP library is missing the required GuzzleHttp library. Please check the installation notes in README.txt.

Solution:

  • To remove this issue please choose the correct version of the MailChimp module with corresponding to the Drupal version.
  • Download the library and paste it at sites/all/libraries
    Go to MailChimp PHP library
    Please verify your versions. Go to your module and sites\all\modules\**\mailchimp\mailchimp.module then see the code which library to download.
    hook_libraries_info() let you use an external library in your module, you need to make it known first and can be done by implementing this function as mailchimp_libraries_info()
  • The folder structure will look like below images (may differ in your case, mine drupal version is 7.34):
  • Clear the cache
    Home » Administration » Configuration » Development » Performance

We hope this will solve your problem. If not let us know and we will dig more

Overview of library creator:
============================================
A PHP 5.2+ API client for [v2 of the MailChimp API](http://apidocs.mailchimp.com/api/2.0/). Please note that we generate this client/wrapper, so while we’re happy to look at any pull requests, ultimately we can’t technically accept them. We will however comment on any additions or changes made due to them before closing them.
###Usage
This can be installed via [Composer](http://getcomposer.org/) and our [packagist package](https://packagist.org/packages/mailchimp/mailchimp).

A basic example app to help kickstart you which – will also automatically install this package – is over in a public [github](https://github.com/mailchimp/mcapi2-php-examples) repo.

===============================================

Thanks
Rupak