In the Opencart tutorial, we are showing you how to use VqMod with examples in Opencart, vqmod installation steps, configurations, example and discuss what kind of issues can occur and its solutions. With this installation, you can use the vqmod XML file to override the core file without changing core files.
Looking for OcMod click here.
Download:
Installation steps of VqMod for Opencart 4
Following the steps below will install Vqmod for Opencart 4:
- Before doing anything please back up your OpenCart installation so that you can revert if unexpected results happened.
- Download the VqMod from the above download button
- Extract the zip that you download, vQmod-oc4-master.zip
- You will get vqmod folder and readme file and copy the vqmod directory in your OpenCart root directory, alongside the admin, catalog, extension, system, etc. directories.
- If you’ve renamed your admin directory, you’ll have to do this bit manually for now:
- Open vqmod/install/index.php and change $admin = ‘admin’; on around line 33 to match your new admin directory name. We have used wpadmin, so that line is $admin=’wpadmin’
- Open vqmod/pathReplaces.php and change the line you’d add would be:
// START REPLACES //
$replaces[] = array('~^admin\b~', 'wpadmin');
// END REPLACES //
Configuration:
Now, open your website and add /vqmod/install/ at the end of the URL something like https://demo.webocreation.com/vqmod/install/. If everything is correct, you will get messages like:
VQMOD HAS BEEN INSTALLED ON YOUR SYSTEM!

Errors and Solutions:
1. Administrator index.php is not writeable

For this issue, first, check and please make sure you replace your admin folder correctly on the vqmod/install/index.php and vqmod/pathReplaces.php, and then you can check the file permission if your server can write on index.php file.
2. ERROR – COULD NOT DETERMINE OPENCART PATH CORRECTLY
For this issue also, we need to make sure you replace your admin folder correctly on the vqmod/install/index.php and vqmod/pathReplaces.php
Example use of Vqmod in Opencart 4
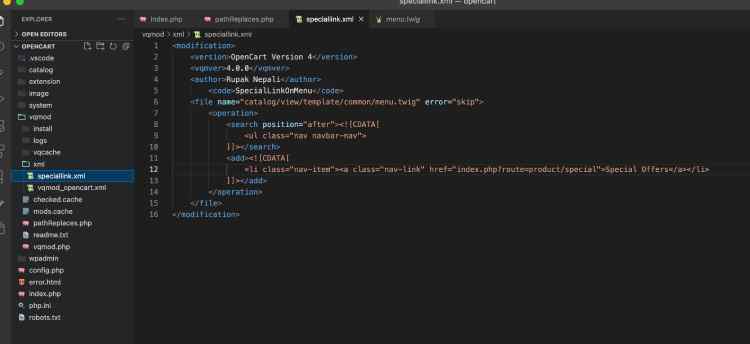
Here is one demo XML file in which you show the “Special Offers” links in the main menu. Open the project in your text editor and go to vqmod folder and then the XML folder create a file named speciallink.xml and add the following lines of code:
<modification>
	<version>OpenCart Version 4</version>
	<vqmver>4.0.0</vqmver>
	<author>Rupak Nepali</author>
	    <code>SpecialLinkOnMenu</code>
	<file name="catalog/view/template/common/menu.twig" error="skip">
		<operation>
			<search position="after"><![CDATA[
				<ul class="nav navbar-nav">
			]]></search>
			<add><![CDATA[
				<li class="nav-item"><a class="nav-link" href="index.php?route=product/special">Special Offers</a></li>
			]]></add>
		</operation>
	</file>
</modification>
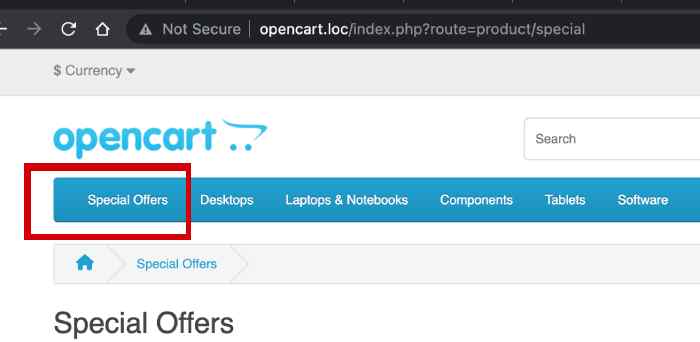
Once, you add the above code and then refresh the frontend URL, then you will see a menu item added at the beginning of the Opencart top menu.

In this way, you can use VqMod, know how to install vqmod, and its configurations, for example, and learn how to fix issues that may occur. Hope you liked this article, please subscribe to our YouTube Channel for Opencart video tutorials. You can also find us on Webocreation Twitter and Webocreation Facebook. Please let us know if you have any questions or concerns.


