
In this Opencart tutorial, we are setting up the OpenCart theme development environment with a gulp, package.json, yarn or NPM, create files and folder structure for development with the use of SCSS and custom JS and with gulp watch we output them in normal OpenCart theme.
We are already known about AMP(Apache, MySQL, PHP) stack with MAMP, install Opencart 3.0.3.2 and get used to the admin interface and files and folder structure of OpenCart. We are using Microsoft Visual Studio code as an Integrated development environment. Before you start this please have a look at this post where we show you how to make the custom theme in OpenCart with the base theme.
Opencart 3 Theme Gulp, SCSS, ES6 set up
We set up the automation tools for custom themes development, it may not be required for simple development but better to have them for continuous development. Steps for setting up the Opencart theme development environment and its automation can be below:
- Download https://github.com/rupaknepali/opencart-theme-developement-gulp-setup/archive/master.zip or clone this repo https://github.com/rupaknepali/opencart-theme-developement-gulp-setup
- Go to catalog/view/theme, paste this folder, unzip and rename the folder opencart-theme-development-gulp-setup to your theme name.
- Then in terminal go to catalog/view/theme/YOURTHEME/dev and run ‘npm install‘
- After all npm packages installed, open dev/gulpfile.js and change the proxy URL “opencart.loc” to your localhost URL
- Then in terminal go to catalog/view/theme/YOURTHEME/dev and run “gulp” and then “gulp watch”
- Now make changes in the YOURTHEME/dev/scss files or YOURTHEME/dev/js files or YOURTHEME/dev/image or YOURTHEME/dev/fonts, now you will see the changes.
- Now you can start the customization
- The following are the files and folders structure.
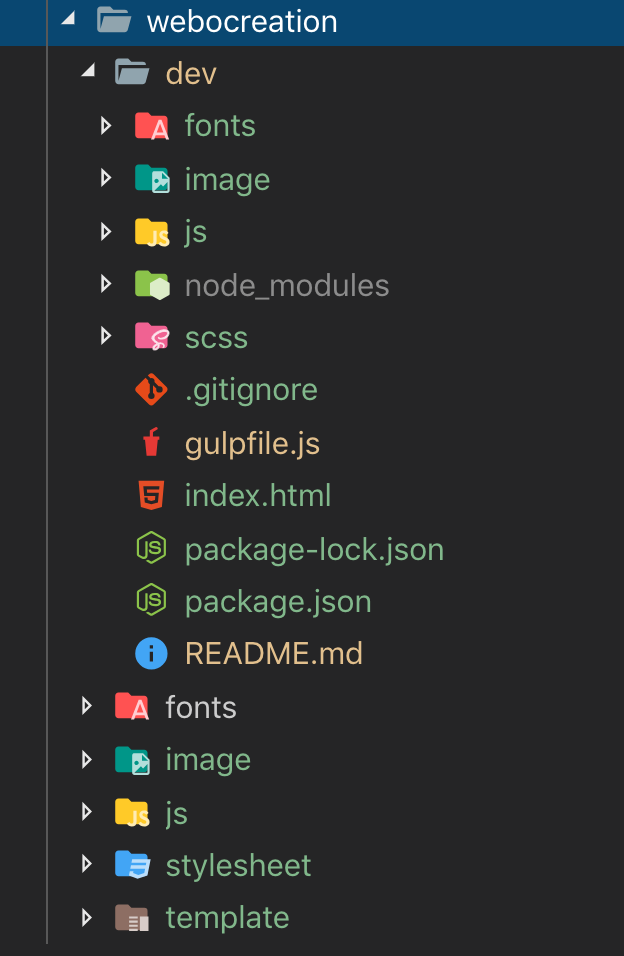
If someone needs more details about the setup then the following steps can help you to set up from the beginning of the Opencart theme development, here we will install node, npm, gulp packages, npm packages as needed and run the gulp to minify CSS and JS and convert the ES6 JS with babel
- Download and Install the Node.js
Go to https://nodejs.org and download the latest version and install it
- Install Gulp with npm
npm install gulp-cli -g
- Set up gulpfile.js
Navigate to your custom theme directory and create dev/ folder then inside it create a JavaScript file named gulpfile.js and paste the following code in it
https://raw.githubusercontent.com/rupaknepali/opencart-theme-developement-gulp-setup/master/dev/gulpfile.js - Create folders SCSS, Image, JS, Fonts
These folders hold files where we make changes the changes and the gulp will compile and create files and folders outside of dev/ folder
- Set up the package manager
Type ‘npm init‘ in your terminal from the dev folder as created in step 3. Enter the details that init asked.
- Install Dependencies that are needed for gulp.js
Type ‘npm install –save-dev <packagename> in your terminal, which will download gulp files and its associated dependencies and will create a folder ‘node_modules’. For ours we need:
npm -i babel/core babel/preset-env babelify browser-sync browserify browserify-shim gulp gulp-autoprefixer gulp-concat gulp-if gulp-notify gulp-options gulp-plumber gulp-rename gulp-sass gulp-sourcemaps gulp-strip-debug gulp-uglify gulp-uglifycss vinyl-buffer vinyl-source-stream
You can see in package.json following are the dev dependencies:
“devDependencies”: {
“@babel/core”: “^7.5.5”,
“@babel/preset-env”: “^7.5.5”,
“babelify”: “^10.0.0”,
“browser-sync”: “^2.26.7”,
“browserify”: “^16.3.0”,
“browserify-shim”: “^3.8.14”,
“gulp”: “^4.0.2”,
“gulp-autoprefixer”: “^6.1.0”,
“gulp-concat”: “^2.5.2”,
“gulp-if”: “^3.0.0”,
“gulp-notify”: “^3.0.0”,
“gulp-options”: “^1.1.1”,
“gulp-plumber”: “^1.2.1”,
“gulp-rename”: “^1.2.0”,
“gulp-sass”: “^4.0.2”,
“gulp-sourcemaps”: “^2.6.5”,
“gulp-strip-debug”: “^3.0.0”,
“gulp-uglify”: “^3.0.2”,
“gulp-uglifycss”: “^1.0.9”,
“vinyl-buffer”: “^1.0.0”,
“vinyl-source-stream”: “^2.0.0”
} - Add some other setting in package.json
“babel”: {
“presets”: [
“@babel/preset-env”
]
},
“browserify”: {
“transform”: [
“browserify-shim”
]
},
“browser”: {
“jquery”: “./node_modules/jquery/dist/jquery.js”
},
“browserify-shim”: {
“jquery”: “$”
},
“browserslist”: [
“last 2 version”,
“> 2%”
], - Our full package.json looks like:
{
“name”: “opencart-gulp-4-es6”,
“version”: “1.1.0”,
“description”: “Opencart theme development with Gulp 4 file setup for Javascript ES6 compiling, plus SCSS, images, and fonts”,
“author”: “Rupak Nepali <webocreation.com@gmail.com> (https://webocreation.com)”,
“repository”: {
“type”: “git”,
“url”: “https://github.com/rupaknepali/opencart-theme-developement-gulp-setup”
},
“keywords”: [
“opencart”,
“gulp”,
“es6”,
“scss”
],
“devDependencies”: {
“@babel/core”: “^7.5.5”,
“@babel/preset-env”: “^7.5.5”,
“babelify”: “^10.0.0”,
“browser-sync”: “^2.26.7”,
“browserify”: “^16.3.0”,
“browserify-shim”: “^3.8.14”,
“gulp”: “^4.0.2”,
“gulp-autoprefixer”: “^6.1.0”,
“gulp-concat”: “^2.5.2”,
“gulp-if”: “^3.0.0”,
“gulp-notify”: “^3.0.0”,
“gulp-options”: “^1.1.1”,
“gulp-plumber”: “^1.2.1”,
“gulp-rename”: “^1.2.0”,
“gulp-sass”: “^4.0.2”,
“gulp-sourcemaps”: “^2.6.5”,
“gulp-strip-debug”: “^3.0.0”,
“gulp-uglify”: “^3.0.2”,
“gulp-uglifycss”: “^1.0.9”,
“vinyl-buffer”: “^1.0.0”,
“vinyl-source-stream”: “^2.0.0”
},
“babel”: {
“presets”: [
“@babel/preset-env”
]
},
“browserify”: {
“transform”: [
“browserify-shim”
]
},
“browser”: {
“jquery”: “./node_modules/jquery/dist/jquery.js”
},
“browserify-shim”: {
“jquery”: “$”
},
“browserslist”: [
“last 2 version”,
“> 2%”
],
“license”: “GPL-3.0”,
“dependencies”: {
“gulp-clean-css”: “^4.2.0”,
“gulp-concat-css”: “^3.1.0”
}
} - Running automation tool from cmd/terminal.
Now type ‘gulp ‘ and then ‘gulp watch’
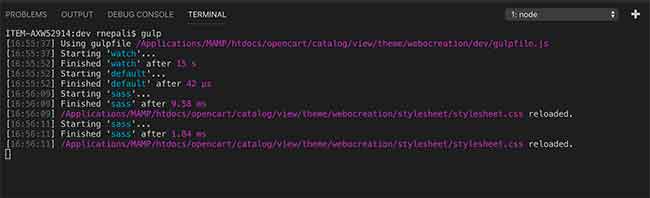
- You will see the browser opened at localhost:3000
Make the changes in SCSS files, JS files, twig files, add images and fonts and the browser reload will happen and you will see the changes.

")


