
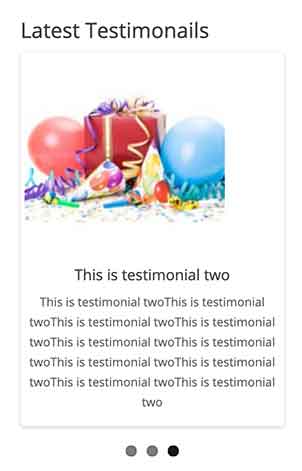
In this Opencart 3 module development tutorial, we are showing you how to create a multi-instance opencart 3 module frontend section and make an autoplay slider of testimonials. In our last two posts, we show how to perform Opencart CRUD functionalities of testimonials, create an admin custom listing page, form, validate it and save in the database, then create the admin section of the multi-instance opencart module now we will use those settings and show the testimonials at the frontend. The testimonial module at the frontend will look like in the image below. It will have a title, image, testimonial title, testimonial description, and sliders with autoplay and pagination.
Let’s start by creating the files and folders in the catalog folders for testimonials module, here are the lists of files and its path:
- catalog/language/en-gb/extension/module/testimonial.php
- catalog/controller/extension/module/testimonial.php
- catalog/model/extension/module/testimonial.php
- catalog/view/theme/default/template/extension/module/testimonial.twig
Language file code description
We start by creating the language file go to catalog/language/en-gb/extension/module/ and create testimonial.php and paste the following code. We don’t have lots of text needed in the frontend so just adding heading_title.
<?php
// Heading
$_['heading_title'] = 'Latest Testimonails';
Controller file code description
After that, we create the controller file at catalog/controller/extension/module/ and name it testimonial.php, following is the code and the code is described in the comment. You can see one difference for multi-instance and single instance index method, in multi-instance we pass the $setting argument.
<?php

/*** As our file is testimonial.php so Class name is ControllerExtensionModuleTestimonial which extends the Controller base class ***/
class ControllerExtensionModuleTestimonial extends Controller
{
	/*** Index method is called automatically or by default, if no parameters are passed, check this video tutorial for details https://www.youtube.com/watch?v=X6bsMmReT-4 .
	$setting is the argument of index which contain all details of the module ***/
	public function index($setting)
	{
		/*** Loads the language file catalog/language/en-gb/extension/module/testimonial.php by which the varaibles of the language file are accessible in twig file. ***/
		$this->load->language('extension/module/testimonial');
		/*** This is to load the model file catalog/model/extension/module/testimonial.php by which we can access all the method in ModelExtensionModuleTestimonial. ***/
		$this->load->model('extension/module/testimonial');
		/*** We can add custom CSS and JS as per needed for the controller. These two lines is to add the custom CSS that is needed only for this controller. Good for performance as it loads only when needed. We add these to show the slider effects for the testimonials ***/
		$this->document->addStyle('catalog/view/javascript/jquery/swiper/css/swiper.min.css');
		$this->document->addStyle('catalog/view/javascript/jquery/swiper/css/opencart.css');
		/*** We add this to add custom JS for the slider effects of testimonials ***/
		$this->document->addScript('catalog/view/javascript/jquery/swiper/js/swiper.jquery.js');
		$data['testimonials'] = array();
		/*** Setting array to pass for getTestimonials for filtering the testimonials
		 * $setting['limit'] is the value we get from the database which we added in the testimonial module setting section. Opencart find out for us to use the $setting. ***/
		$filter_data = array(
			'sort'  => 'p.date_added',
			'order' => 'DESC',
			'start' => 0,
			'limit' => $setting['limit']
		);
		/*** This is to call getTestimonials method of class ModelExtensionModuleTestimonial and retrieve the filtered out testimonials ***/
		$results = $this->model_extension_module_testimonial->getTestimonials($filter_data);
		if ($results) {
			/*** This is to load the model file catalog/model/tool/image.php by which we can access all the method and especially we use resize method for resizing the image. ***/
			$this->load->model('tool/image');
			/*** We loop through the $results and sets testimonials array which is used in the twig or view file ***/
			foreach ($results as $result) {
				if ($result['image']) {
					$image = $this->model_tool_image->resize($result['image'], $setting['width'], $setting['height']);
				} else {
					$image = $this->model_tool_image->resize('placeholder.png', $setting['width'], $setting['height']);
				}

				$data['testimonials'][] = array(
					'testimonial_id'  => $result['testimonial_id'],
					'thumb'       => $image,
					'name'        => $result['name'],
					'description' => html_entity_decode($result['description'], ENT_QUOTES, 'UTF-8')
				);
			}
			/*** This is to load the view catalog/view/theme/default/template/extension/module/testimonial.twig. ***/
			return $this->load->view('extension/module/testimonial', $data);
		}
	}
}
Model file code description
Testimonials are custom data, so we need to create a model file also to retrieve the testimonials from the database. So let go to catalog/model/extension/module/ and create a testimonial.php and paste the following code. The following code is SQL to retrieve the testimonials.
<?php
class ModelExtensionModuleTestimonial extends Model
{
    /** getTestimonials method is to retrieve the testimonials which is called from controller like $results = $this->model_extension_module_testimonial->getTestimonials($filter_data);. $data is the filtering parameter. Multiple testimonials are returned  ***/
    public function getTestimonials($data = array())
    {
        $sql = "SELECT * FROM " . DB_PREFIX . "testimonial c1 LEFT JOIN " . DB_PREFIX . "testimonial_description cd2 ON (c1.testimonial_id = cd2.testimonial_id) WHERE cd2.language_id ='" . (int) $this->config->get('config_language_id') . "'";
        $sort_data = array(
            'name',
            'sort_order'
        );
        if (isset($data['sort']) && in_array($data['sort'], $sort_data)) {
            $sql .= " ORDER BY " . $data['sort'];
        } else {
            $sql .= " ORDER BY sort_order";
        }
        if (isset($data['order']) && ($data['order'] == 'DESC')) {
            $sql .= " DESC";
        } else {
            $sql .= " ASC";
        }
        if (isset($data['start']) || isset($data['limit'])) {
            if ($data['start'] < 0) {
                $data['start'] = 0;
            }
            if ($data['limit'] < 1) {
                $data['limit'] = 20;
            }
            $sql .= " LIMIT " . (int) $data['start'] . "," . (int) $data['limit'];
        }
        $query = $this->db->query($sql);
        return $query->rows;
    }
}
View file or template file code description
At last, the view file or template file, which we create at catalog/view/theme/default/template/extension/module/, we named it testimonial.twig and paste the following code. We are showing the testimonial as a slider so we are using the Opencart default Swiper slider.
<h3>{{ heading_title }}</h3>
<div class="swiper-viewport">
    <div id="carousel{{ module }}" class="swiper-container">
        <div class="swiper-wrapper">
            {% for testimonial in testimonials %}
                <div class="swiper-slide text-center">
                  <div>
                      <div class="image">
                          <img src="{{ testimonial.thumb }}" alt="{{ testimonial.name }}" title="{{ testimonial.name }}" class="img-responsive"/>
                      </div>
                      <div class="caption">
                          <h4>
                              {{ testimonial.name }}
                          </h4>
                          <p>{{ testimonial.description }}</p>
                      </div>
                  </div>
                </div>
            {% endfor %}
        </div>
    </div>
    <div class="swiper-pagination carousel{{ module }}"></div>
    <div class="swiper-pager">
        <div class="swiper-button-next"></div>
        <div class="swiper-button-prev"></div>
    </div>
</div>
<script
    type="text/javascript">
    <!--
    $( '#carousel{{ module }}' ).swiper( {
        mode: 'horizontal',
        slidesPerView: 1,
        pagination: '.carousel{{ module }}',
        paginationClickable: true,
        nextButton: '.swiper-button-next',
        prevButton: '.swiper-button-prev',
        autoplay: 2500,
        loop: true
    } );
    -->
</script>
In this way, we create an Opencart 3 testimonial module’s frontend and show the setting that we entered in the multi-instance module admin section. Similarly, we make a slider of the testimonial module. Hope you liked this post, let us know if you have any questions or suggestions, please subscribe to our YouTube Channel for Opencart video tutorials. You can also find us on Twitter and Facebook. Enjoy!


 for Your Business")


Thank you very much for your articles, they are helping me a lot.
I downloaded the testimonial module and when I installed and went to edit the CRUD settings, the following error appears:
Exception: Error: Table ‘site.oc_testimonial’ doesn’t exist
Code: 1146
SELECT COUNT (*) AS total FROM oc_testimonial
Does this mean that the module does not create the table automatically and that I need to create it manually, before installing the module?