
In this Opencart tutorial, we are going through Opencart eCommerce conversion tracking with Google Analytics 4 (GA4) and google tag manager. First, we will install the google tag manager(GTM) in Opencart, then set up the DataLayer code on the checkout success page, then finalize with showing data in Google Analytics 4 dashboard.
Install the Google Tag Manager (GTM) in Opencart
We hope you already have the gmail account. Following are the steps to install the google tag manager in the Opencart:
- Log in to the http://tagmanager.google.com (you need a Gmail account for this).
- Click “Create Account”
- Enter the details, in the Container name you can add the website URL, and in the “Target platform” select the “Web”, then click the “Create” button.
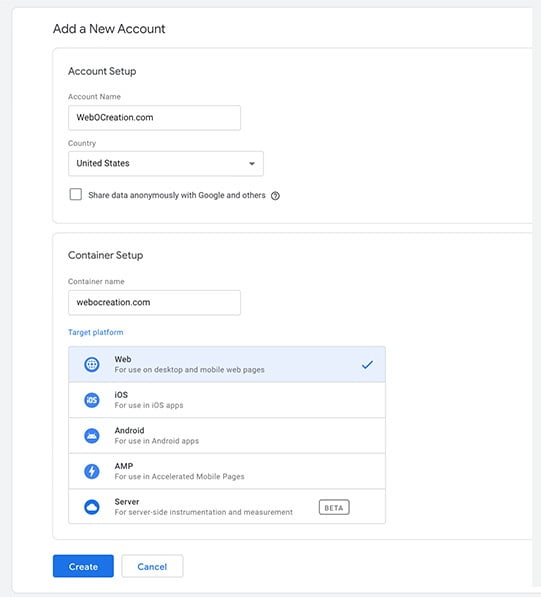
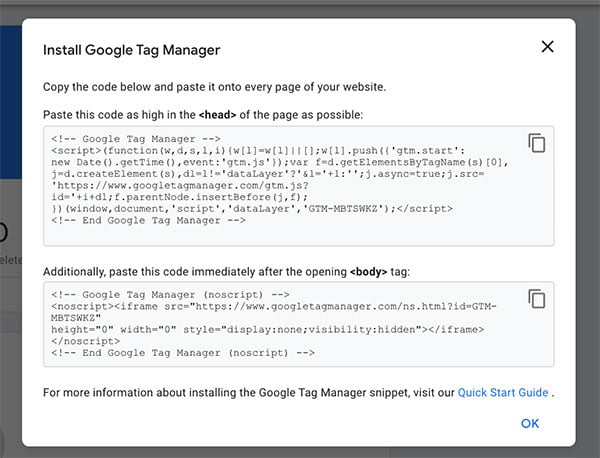
- It will show you the code like below to add to the opencart website, copy this code.
View Video: Add HTML, google analytics, tag manager, third party JS code in Opencart
Add GTM to Opencart
- Login to your Opencart admin
- Click Extensions in left menu >> Extensions >> in “Choose the extension type” select “Analytics”
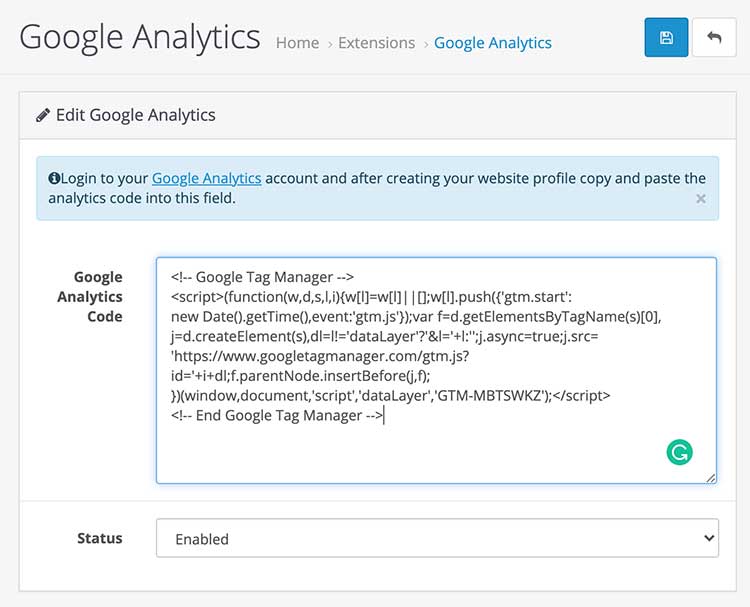
- Click Install if the “Google Analytics” module is not installed and then edit it, if it is already installed then edit it.
- Then, paste the Google Tag Manager code in the “Google Analytics Code” field.
- Finally, click Save blue button
Connect Google Analytics with GTM
- Login to https://analytics.google.com/analytics/web/
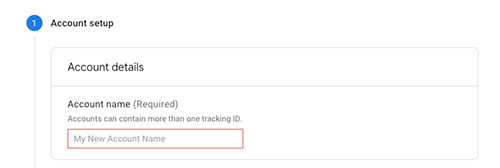
- Account setup: If you already have others GA account click “Admin” in the left menu and click “Create Account”, else you will see the Create Account page, where you can enter the Account Name.
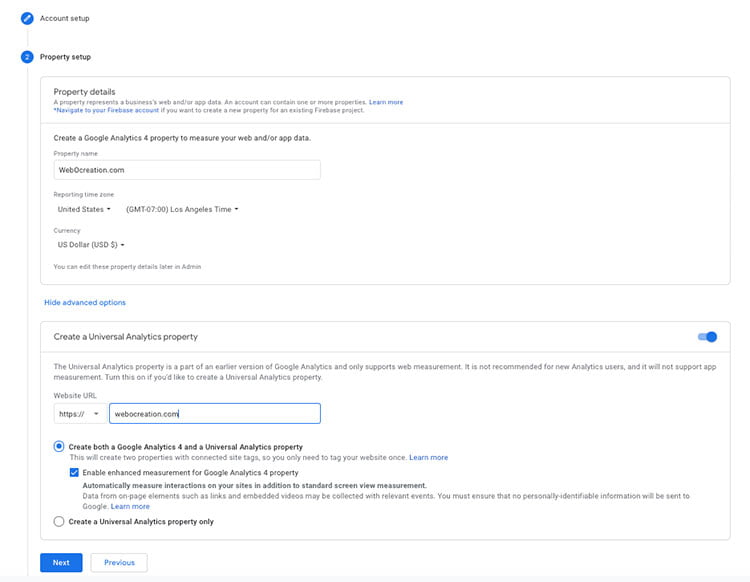
- Property setup: An account can contain one or more properties. For eg: webocreation is an Account and under that, we can have webocreation.com and rupaknepali.com.np as properties. So, enter the Property name. Then, click “Show advanced options“. Activate the Universal Analytics property and enter the website URL. Select “Create both a Google Analytics 4 and a Universal Analytics property“. Then click Next.
- About your business: enter the details of your business.
- Click Create and in the popup choose your country and click accept checkbox and click the “I Accept” button
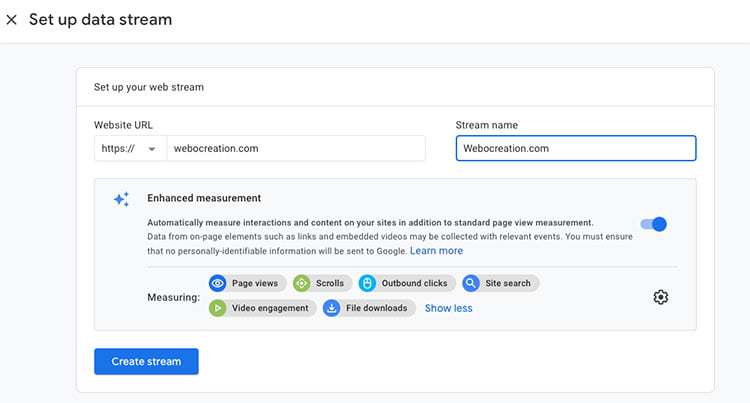
- Then, select the data stream to start collecting data, as we are collecting data of website so we select “Web”

- Then enter details to set up data stream, enter the website URL and stream name, then click create stream button.
- Now, see the “Tagging instructions” section and click the “Use existing on-page tag”, then click the Google Tag Manager, where you will see the steps for you.
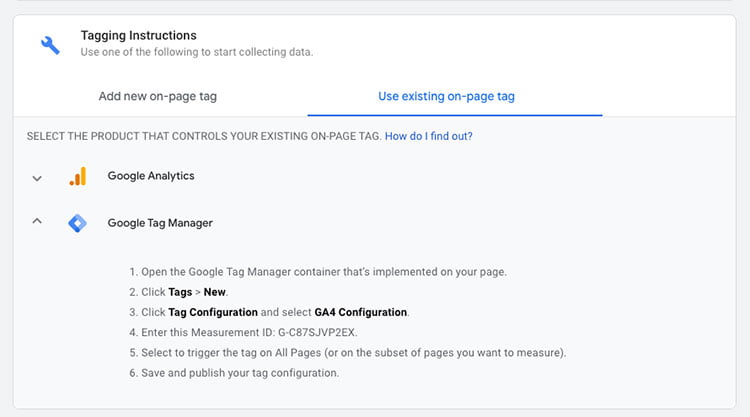
- Now, let’s go to https://tagmanager.google.com and select the container that you created earlier and do the steps as below
- Open the Google Tag Manager container that’s implemented on your page.
- Click Tags > New.
- Click Tag Configuration and select GA4 Configuration.
- Enter this Measurement ID: G-C87SJVP2EX. (Your Id will be different)
- Select to trigger the tag on All Pages (or on the subset of pages you want to measure).
- Save and publish your tag configuration.
Test whether GA4 is firing from GTM
- Click the Preview button

- Enter your website URL in the popup and click “Connect”
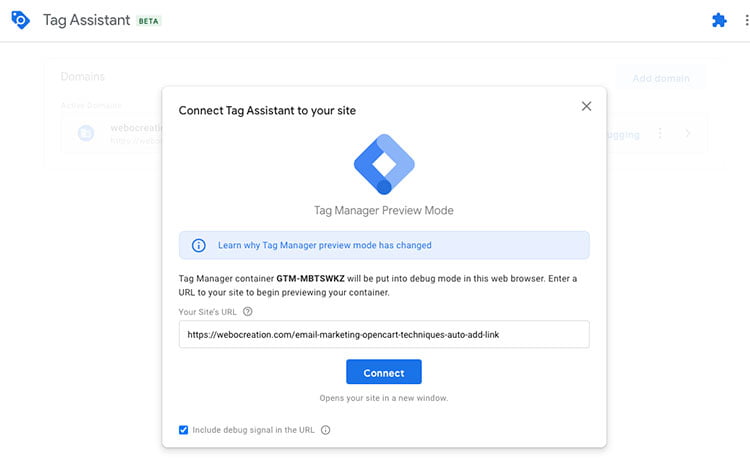
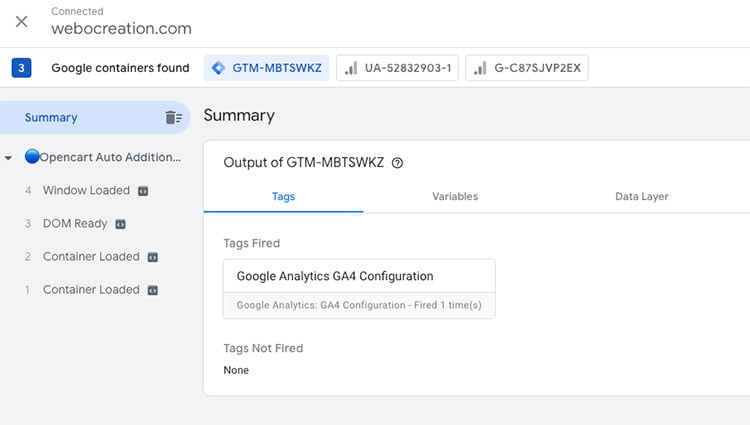
- If you see “Google Analytics GA4 configuration” in the tag fired list then it means your tags are firing from the website.
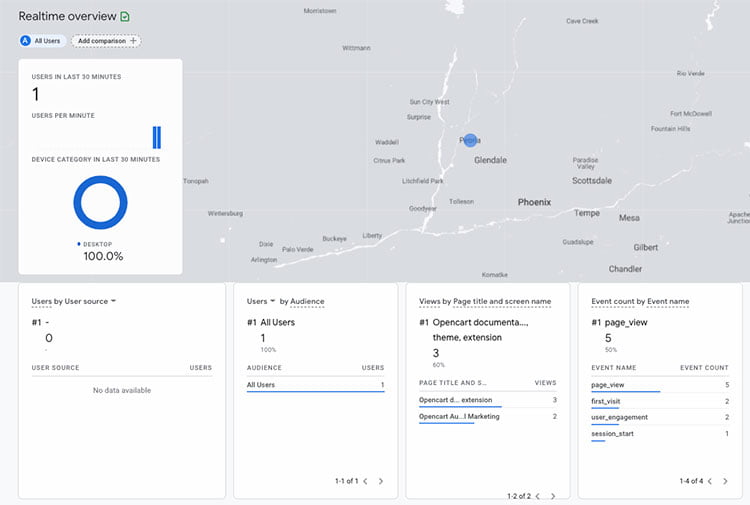
- Go to google analytics dashboard, then click the Realtime in the left menu, if you see some reports then it means. everything is connected properly with Google Analytics 4 and Google Tag manager.
Set up a custom tag, triggers, and events in GTM for success page for Opencart
Setup tags for Purchase Event
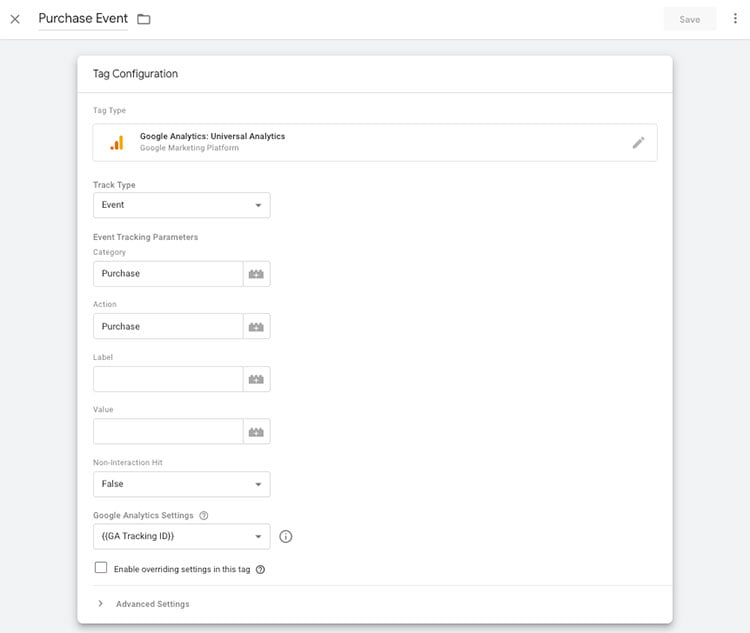
Go to tag manager, click the Tags, click New, enter the tag name as “Purchase Event”, click the “Tag Configuration”, select the “Google Analytics: Universal Analytics”. In the Track type, select the Event. In the Event tracking parameters, enter purchase in the category, and purchase in action. In the Google Analytics Settings, select the GA tracking ID.
Triggers for the purchase events
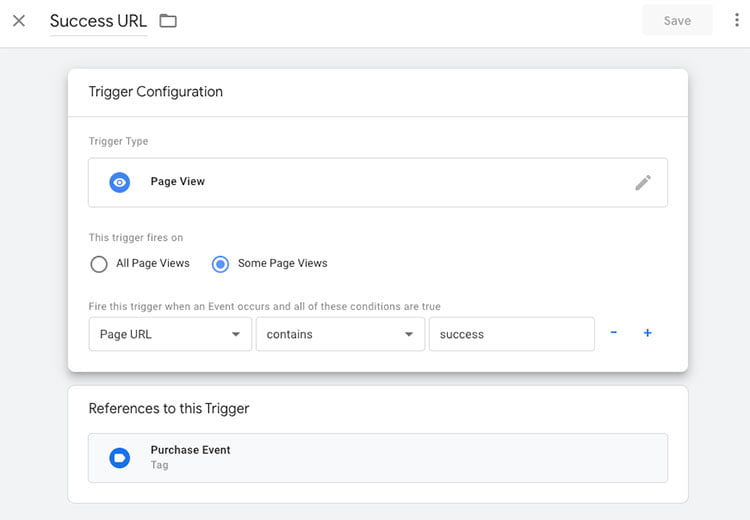
Go to tag manager, click the Triggers, click New, enter the name like “Success URL”, click in the “Trigger Configuration”, choose “Page View” on the trigger type. Choose “Some Page Views”, then select “Page Path”, then select “contains” and enter “success”. Finally, click Save
With these steps, we are doing a good start, in our next blog posts we will show you how to create custom datalayer code for the checkout success page in Opencart, probably we will provide you the Opencart module and similarly add other custom events for purchase and pass multiple variables like price, product id/name, etc to the google analytics. Then, we finalize by checking GA4 eCommerce tracking. Please let us know if you have issues or concerns and ideas for GA4 and Opencart, we will share our experiences. You can follow my Twitter account @rupaknpl and subscribe to our youtube channel Opencart tutorials. Similarly, keep on visiting my personal blog https://webocreation.com where you will find lots of free modules.
https://developers.google.com/tag-manager/ecommerce-ga4
https://developers.google.com/analytics/devguides/collection/ga4/ecommerce?client_type=gtag
https://support.google.com/analytics/answer/9268036

 for Your Business")


Thanks for the tutorial.. I want to pass the purchase conversion using Datalayer, but couldn’t find any tutorials for OpenCart 3 websites. I’m able to find the scripts for OpenCart 2 xx websites but it won’t work on OpenCart 3, as latest version has .twig extension.. So any guide for passing custom conversions of OpenCart v3 without the use of modules..
Hello, thanks for the tutorial, do you have a script for the datalayer? or way to get it, that’s a need we have!
I am totally lost. Is this different in GA4? Is there somewhere I can find a version for dummies? I cannot figure out any of this.